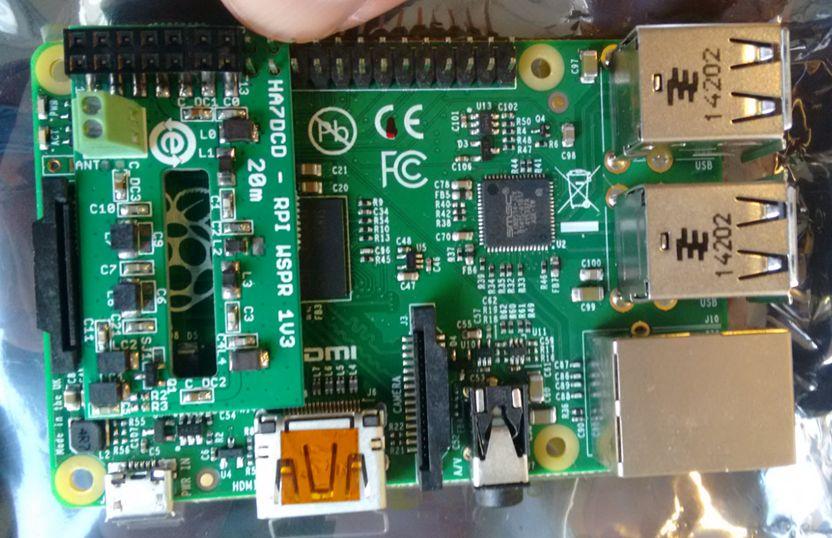
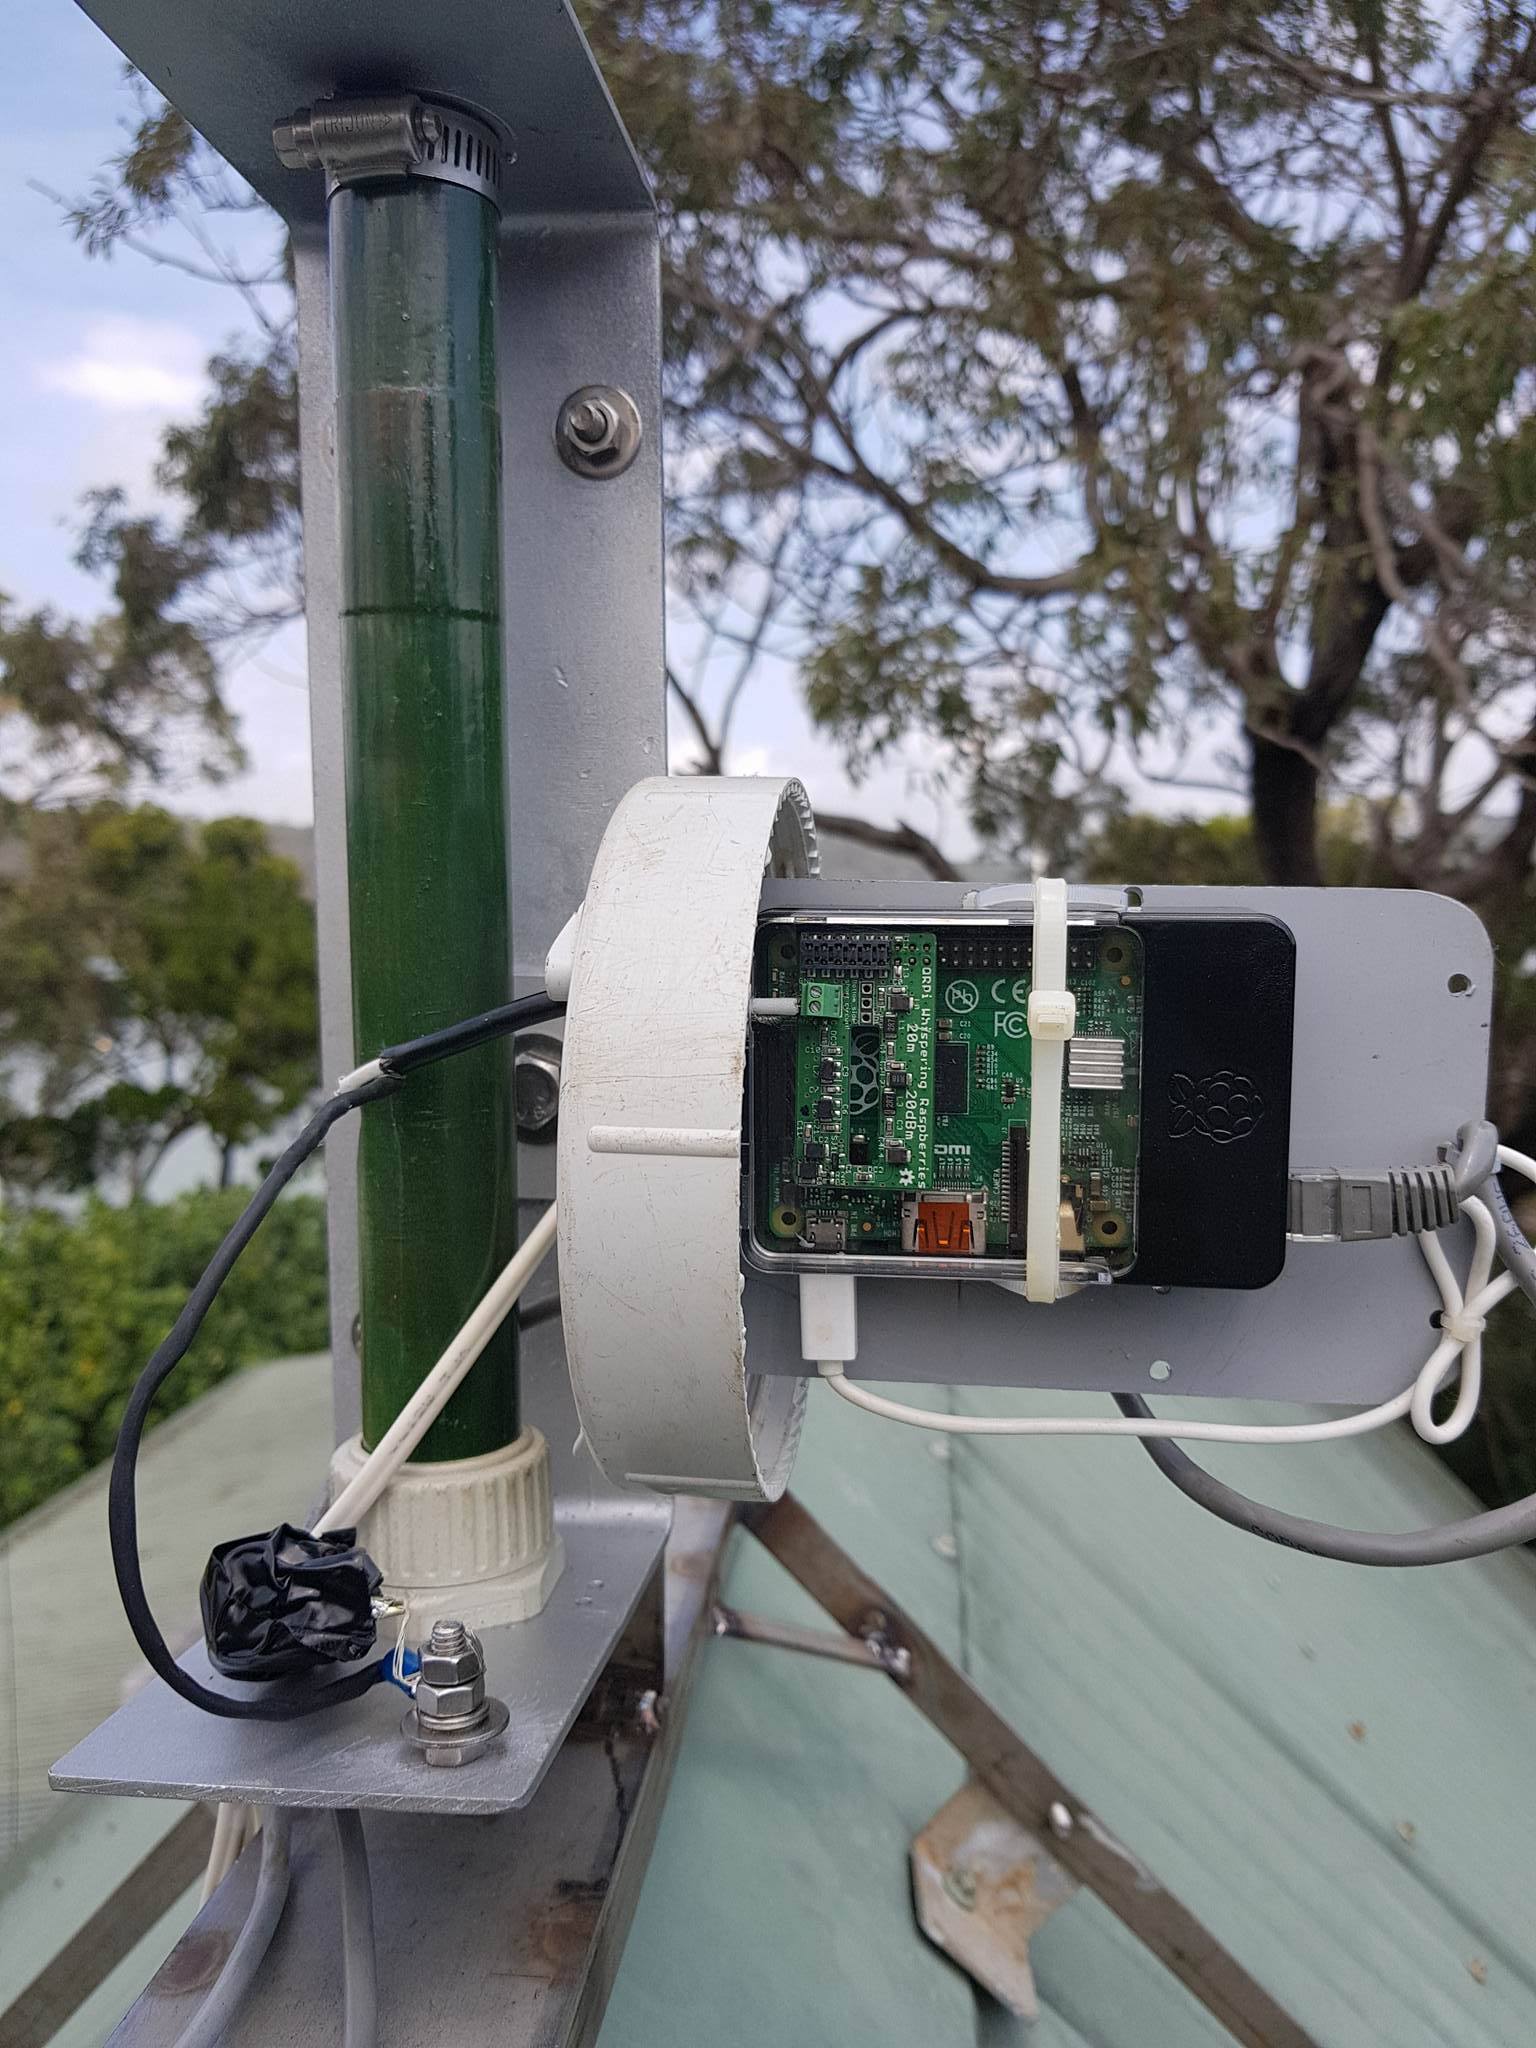
The HA7DCD add on board to Raspberry Pi is sold by Tucson Amateur Packet Radio Corp.
It cost me $29.00 USD and $17.00 postage and took two weeks to arrive.
The TAPR Website for purchasing the Raspberry Pi QRP TX Shield for WSPR on 20 Meters is:
https://www.tapr.org/kits_20M-wspr-pi.html
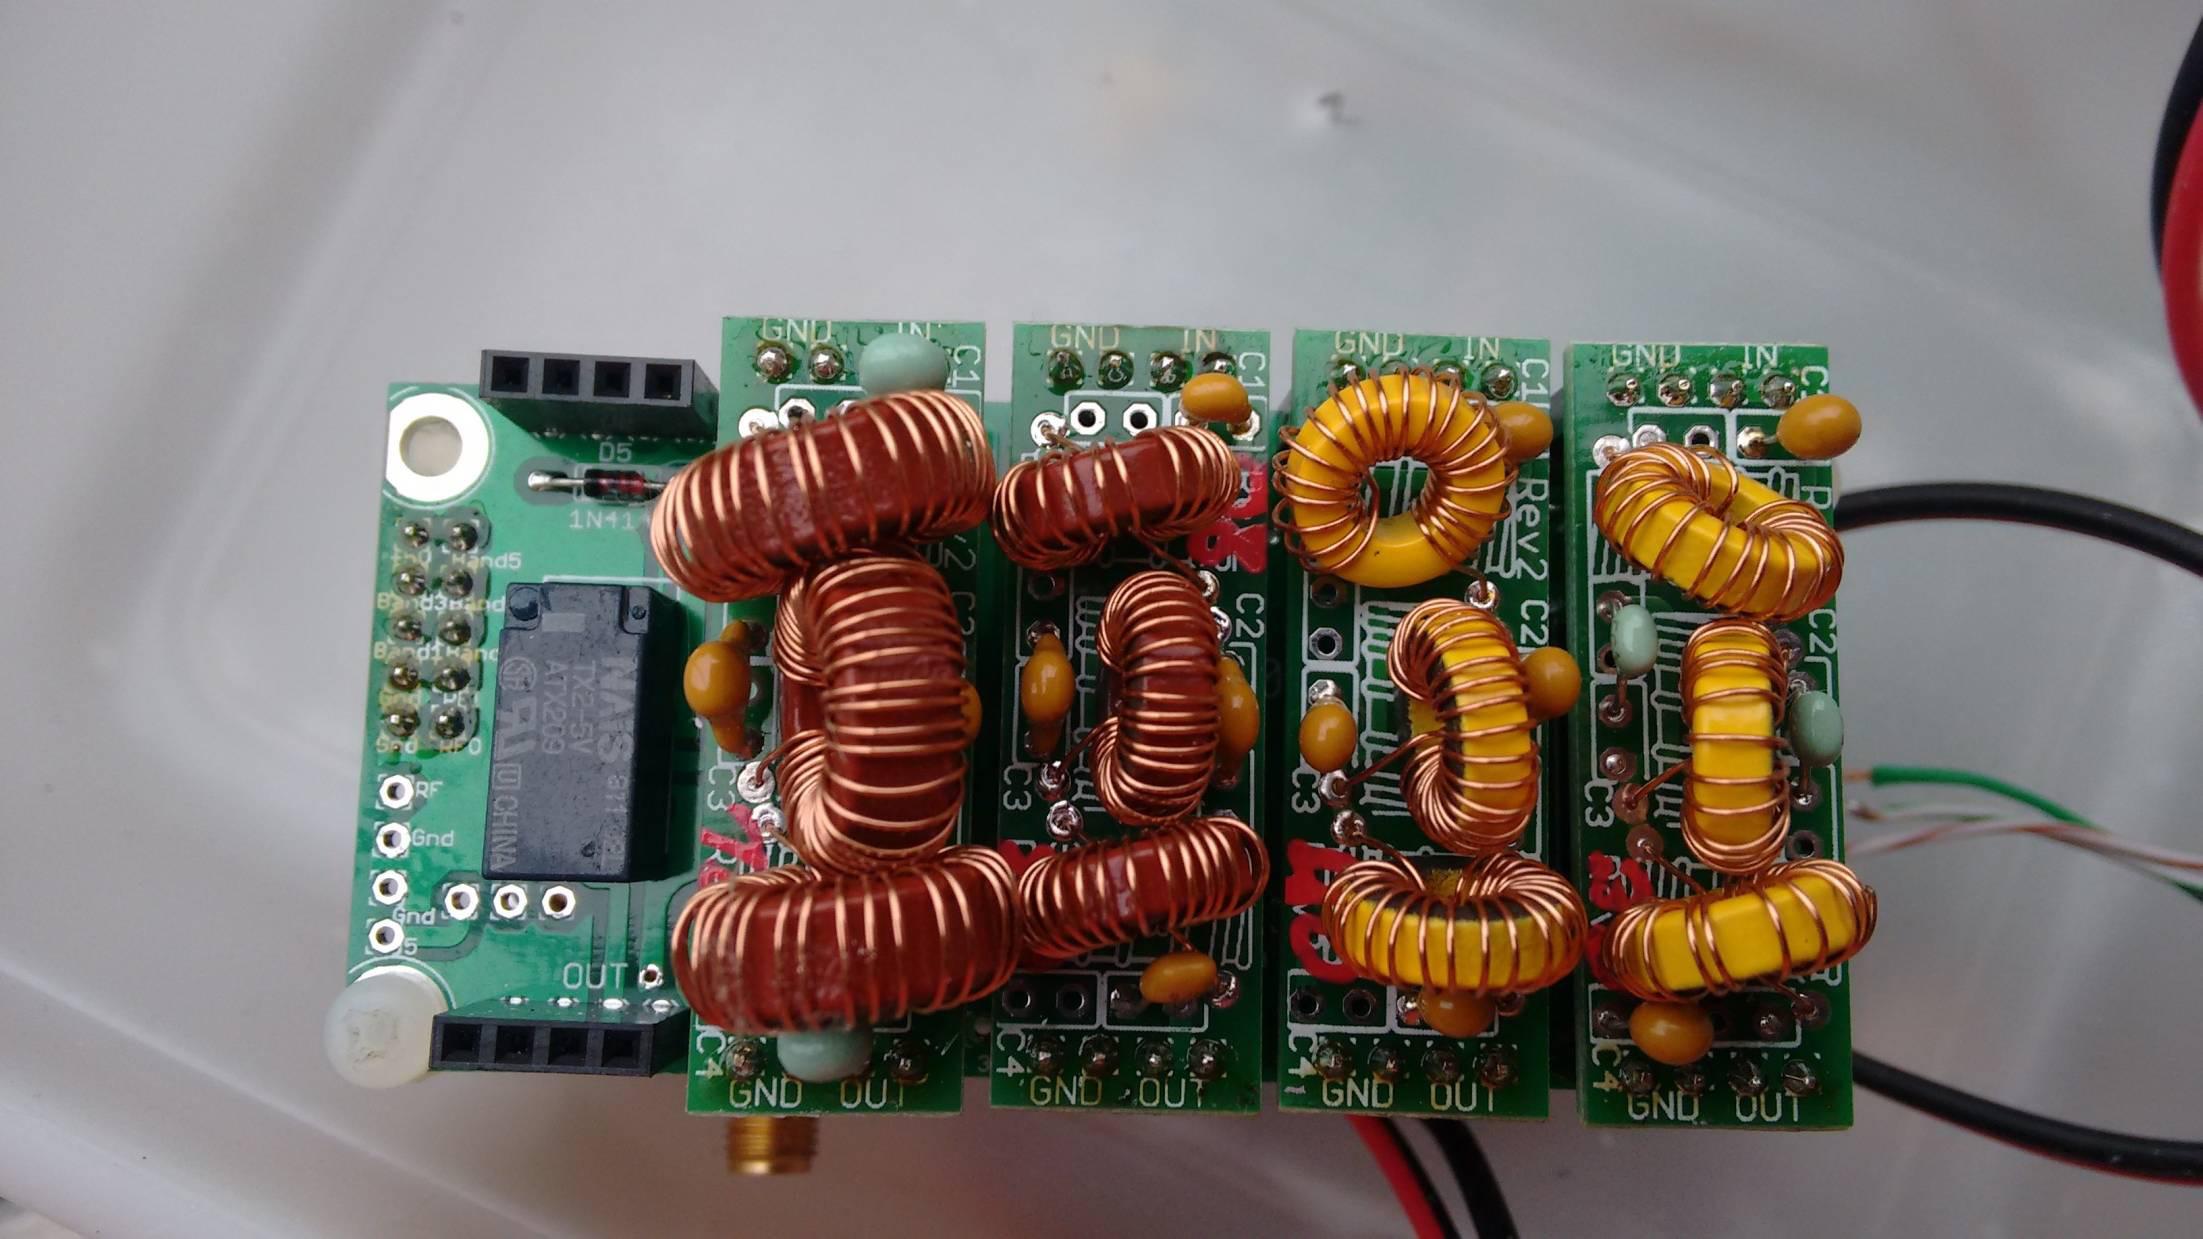
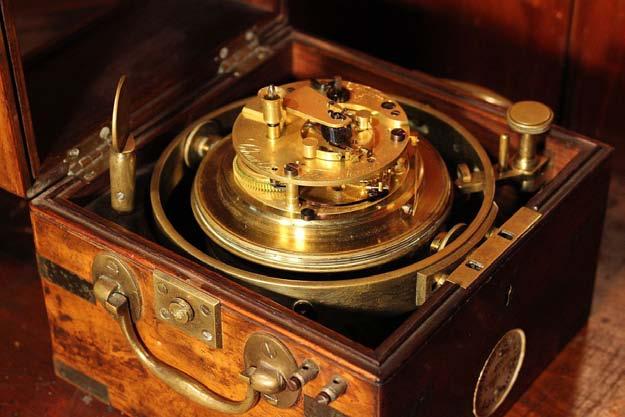
QRPi shield was inspired by Joe Taylor's WsprryPi open source program. There
were several predecessors. Earlier versions were a little crude.
Early iterations of the WSPR Hardware
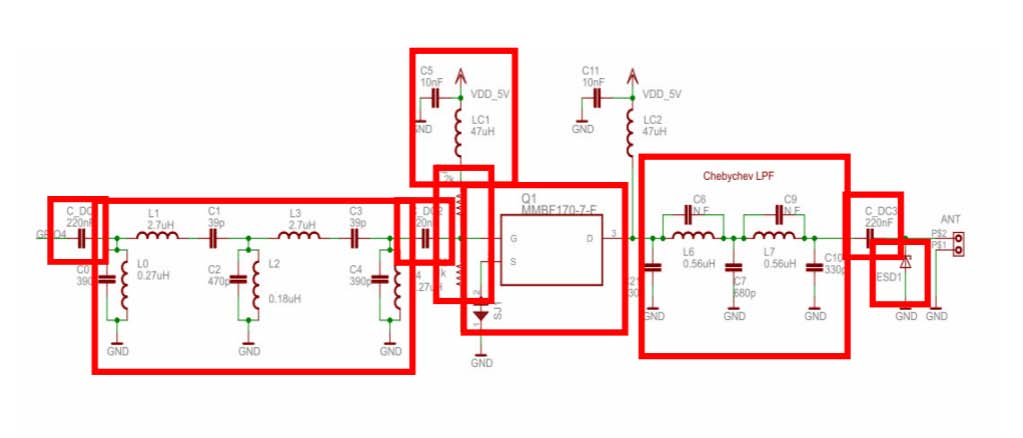
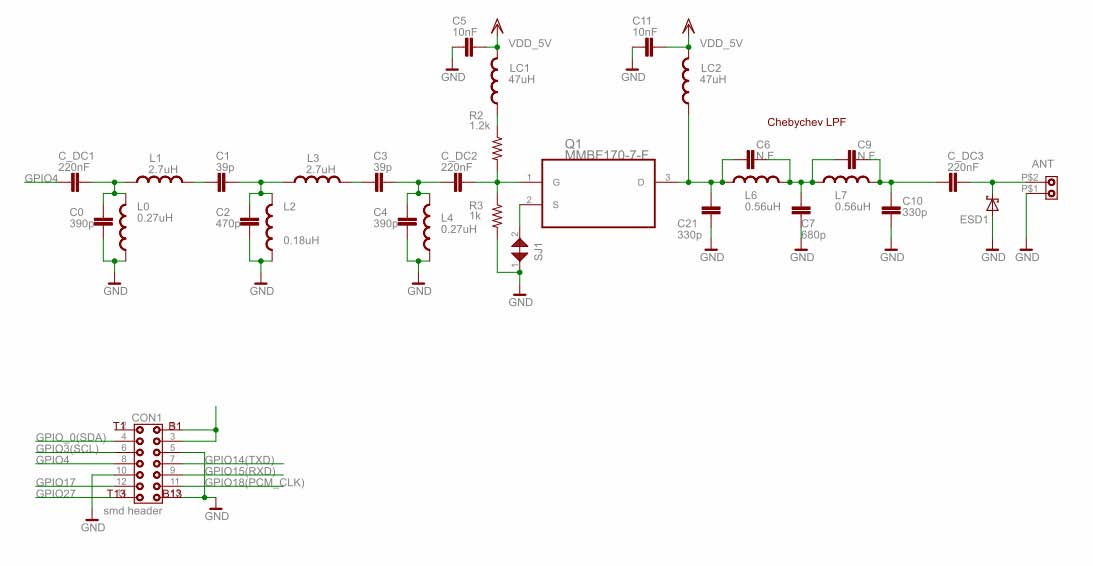
1.4 QRPi 20M Raspberry Pi QRP TX Shield Design [Top]
The design consists of a Buffer and Band Pass Filter BPF to the RF output from pin (GPIO 4) of the RPi
to filter harmonics, an FET amplifier stage and following that, the Low Pass Filter (LPF), and
finally an ESD suppressor. Circuit Schematic with and without functional groups
Stage 1 - Buffer stage to protect the BCM2835 SOC's clock generator output
The MMBF170 N-Channel Enhanced Mode MOSFET achieves a 10 dB gain which delivers +20 dBm output power
at the end of the Low Pass Filter.
BF170 N Channel FET Amplifier
Stage 4 - Chebyshev Filter Low Pass Filter
A brief description of the filter design. The Chebyshev response is a mathematical strategy
for achieving a faster roll off by allowing ripple in the frequency response. The mathematical
characteristics are derived from Chebyshev polynomials. Chebyshev Filter in a Cauer topology or an unbalanced ladder topology
Stage 5 - The Final Stage is an ESD suppressor diode added to the antenna terminal.
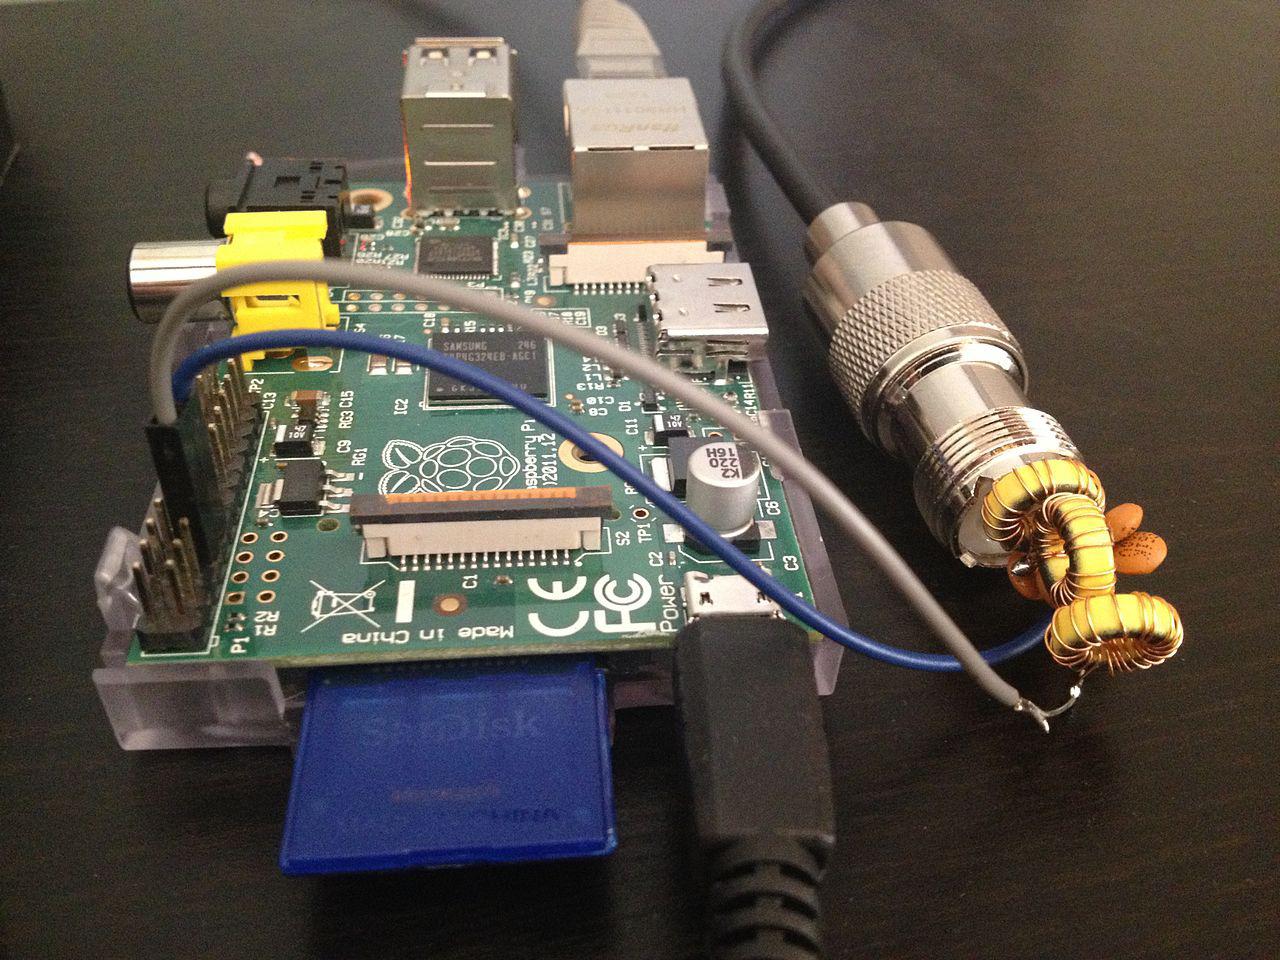
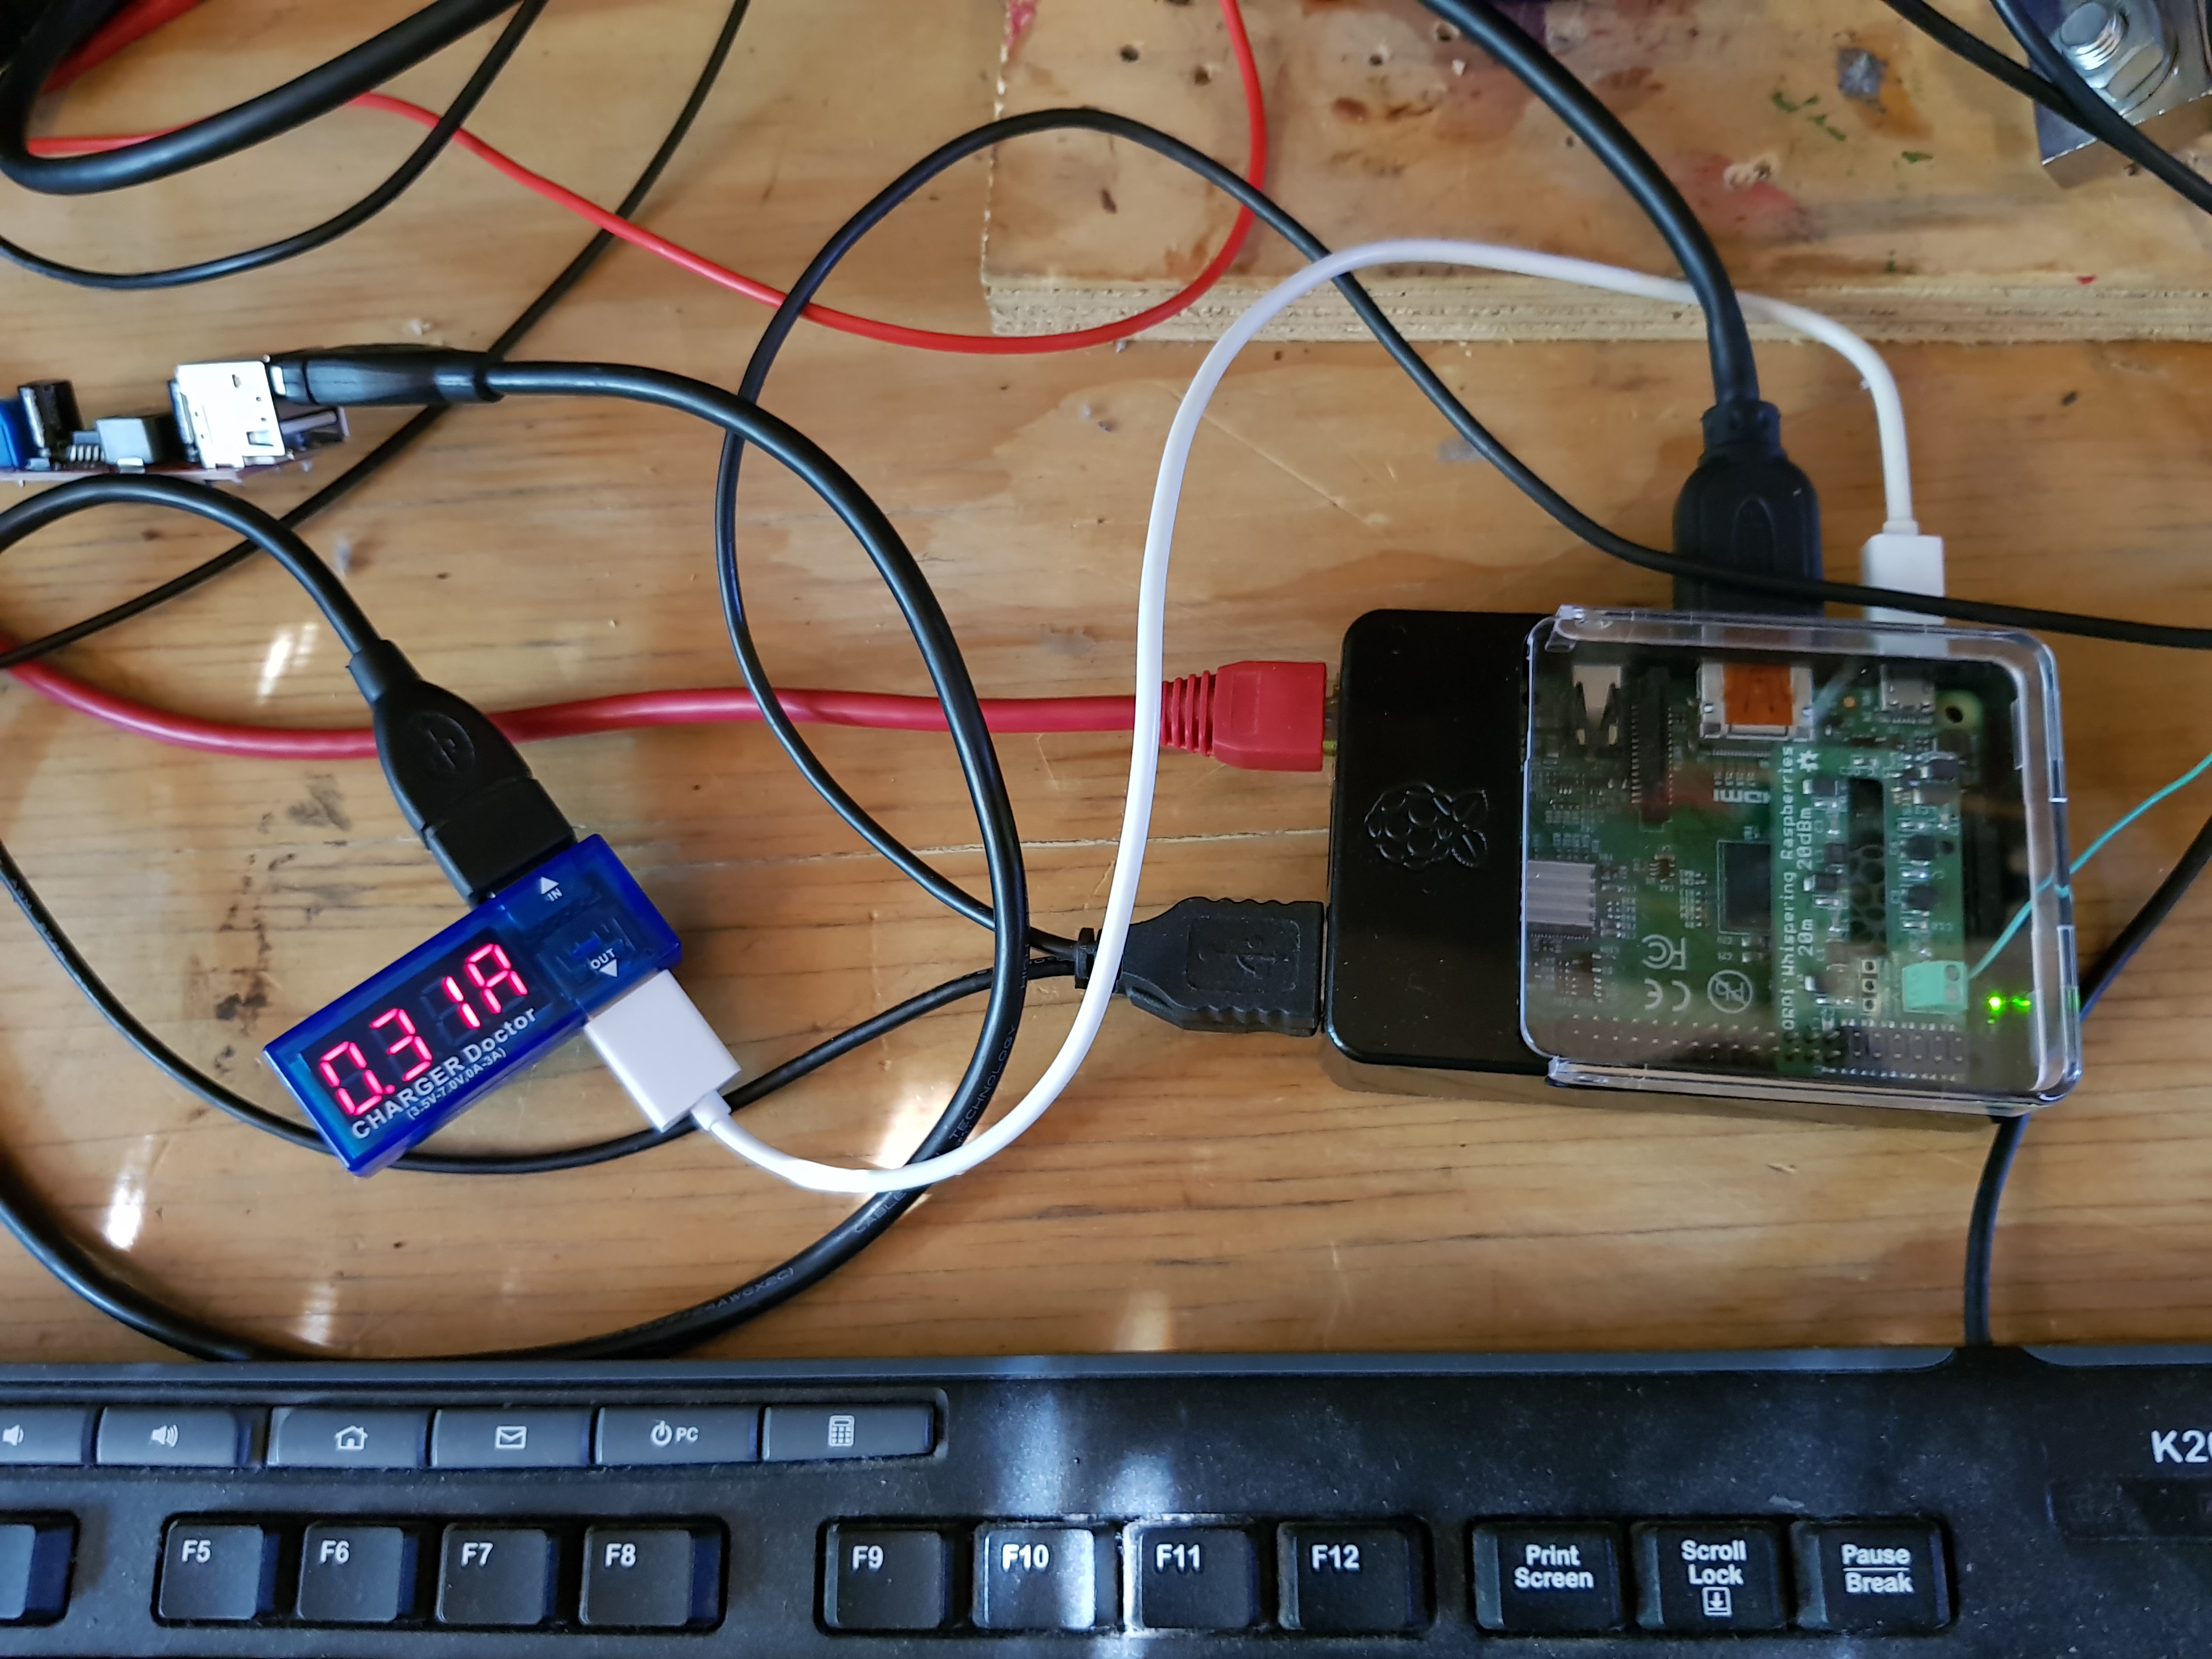
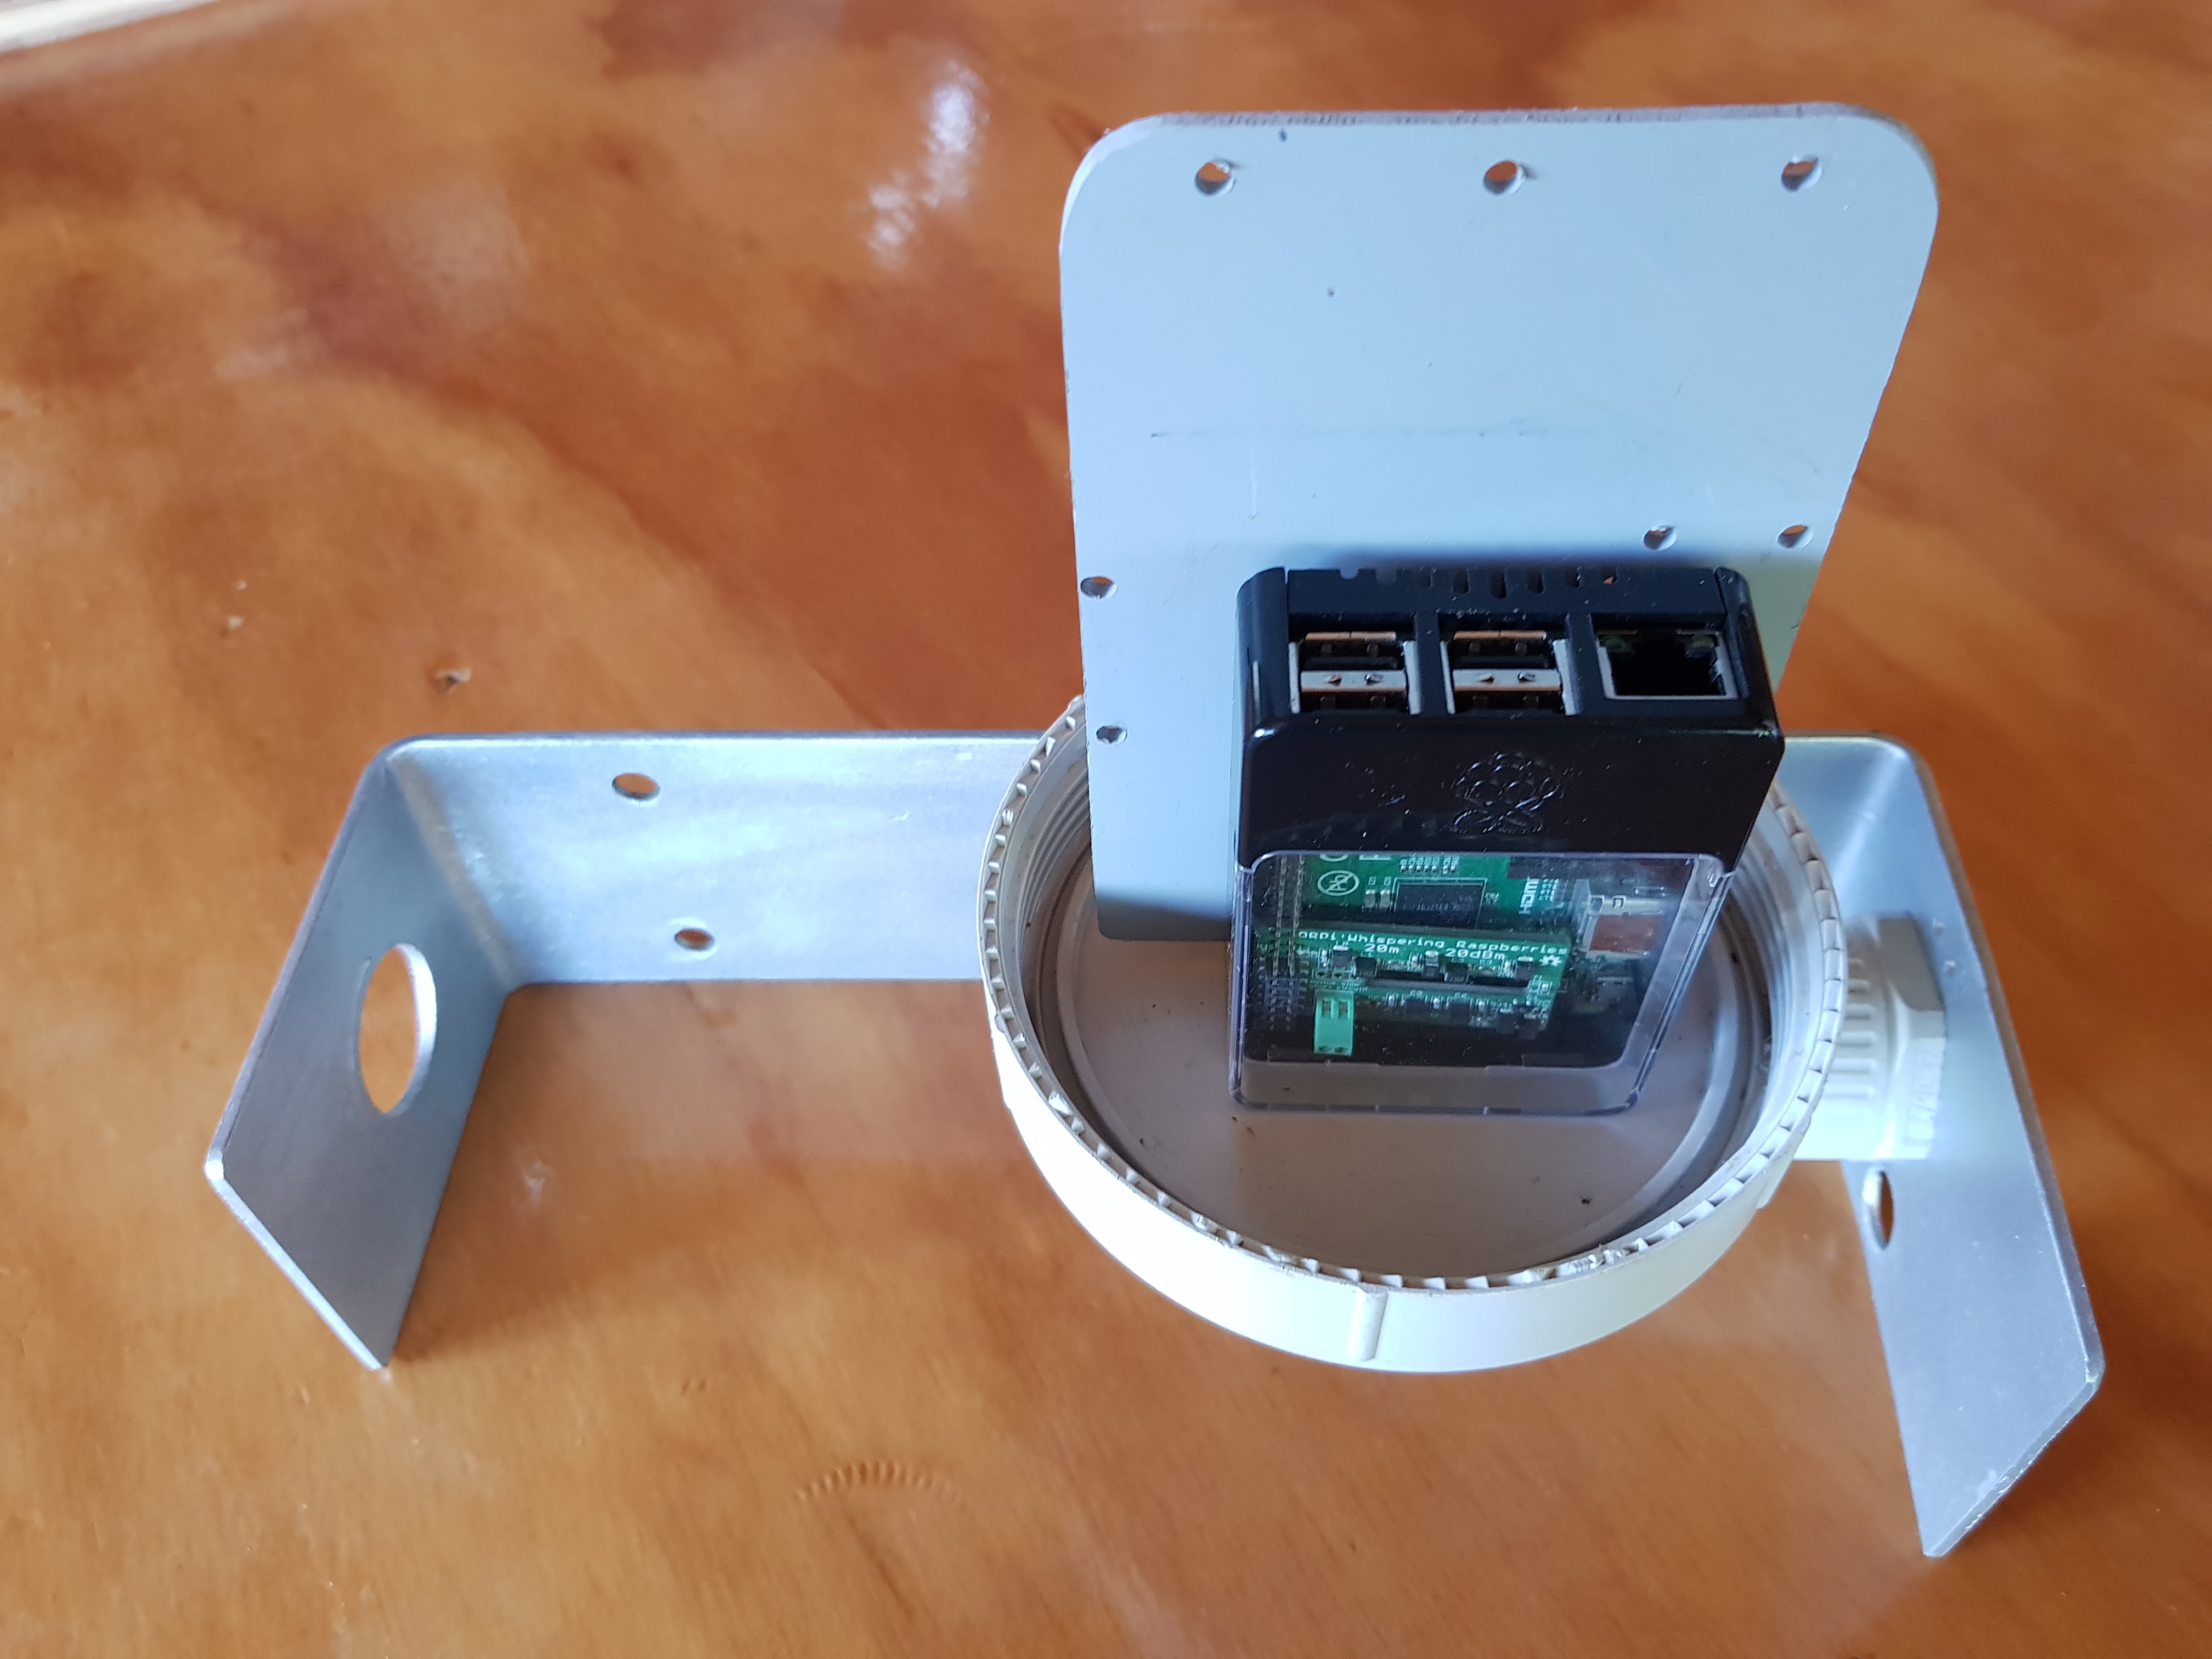
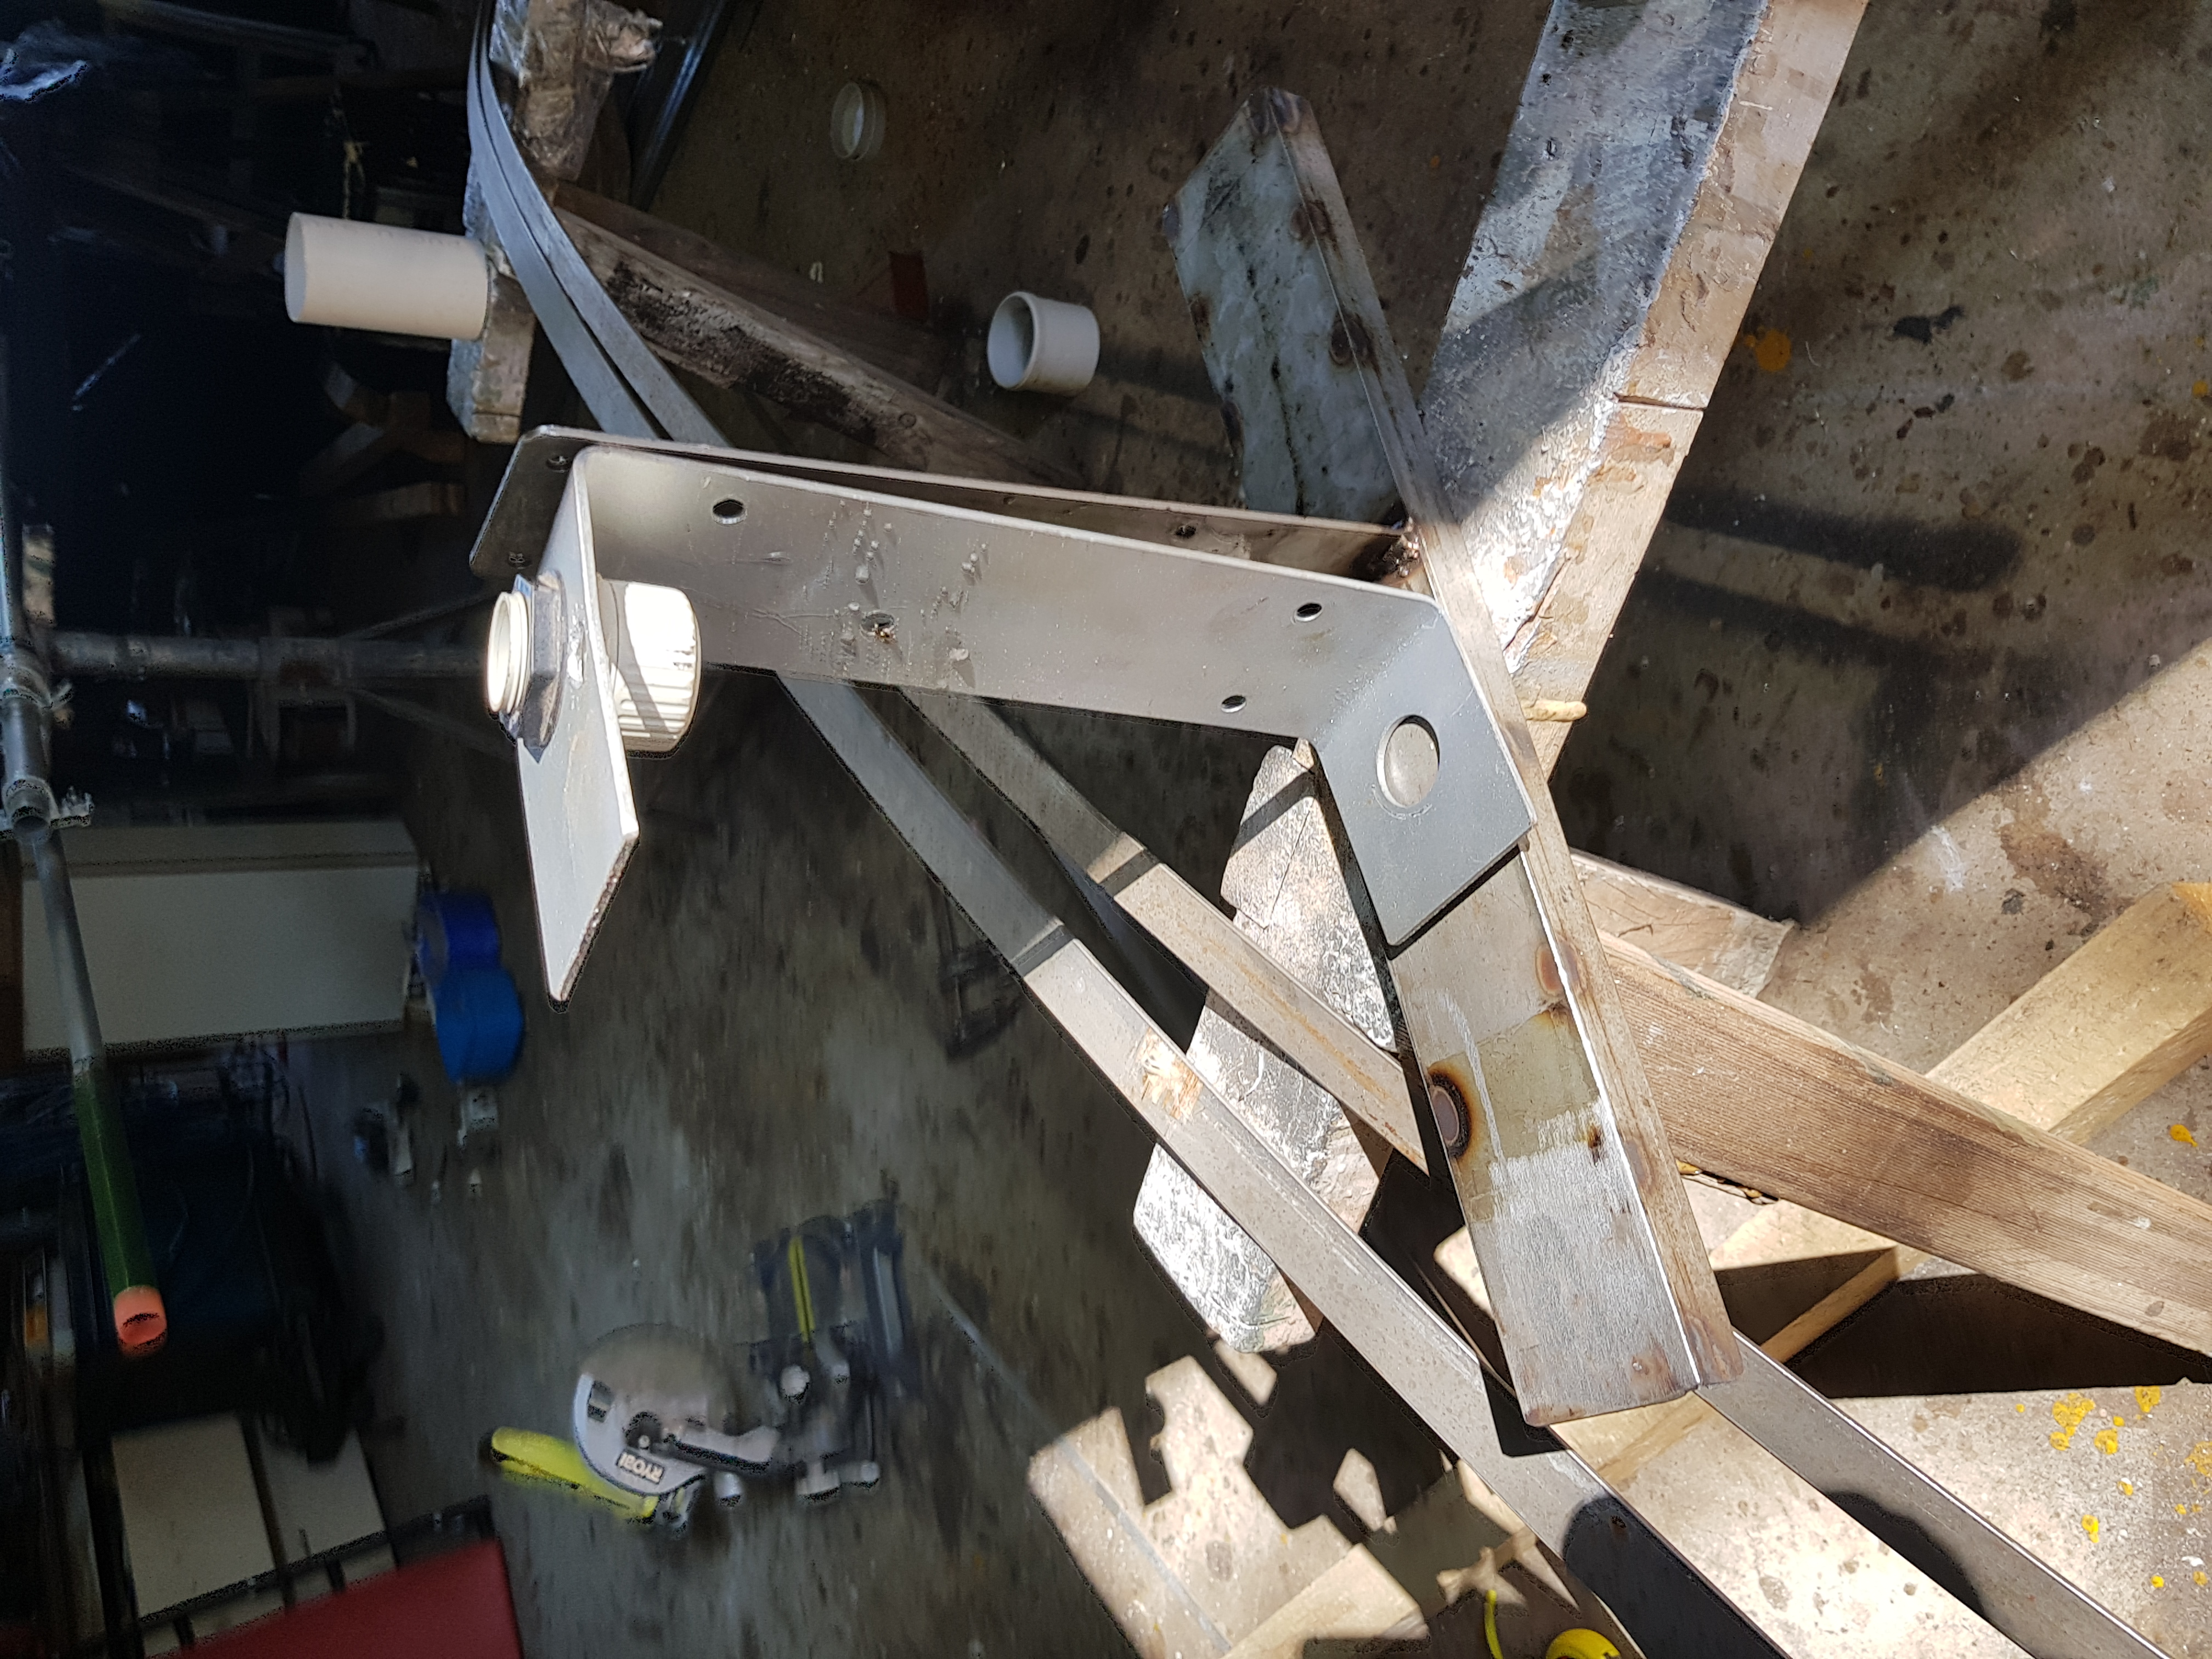
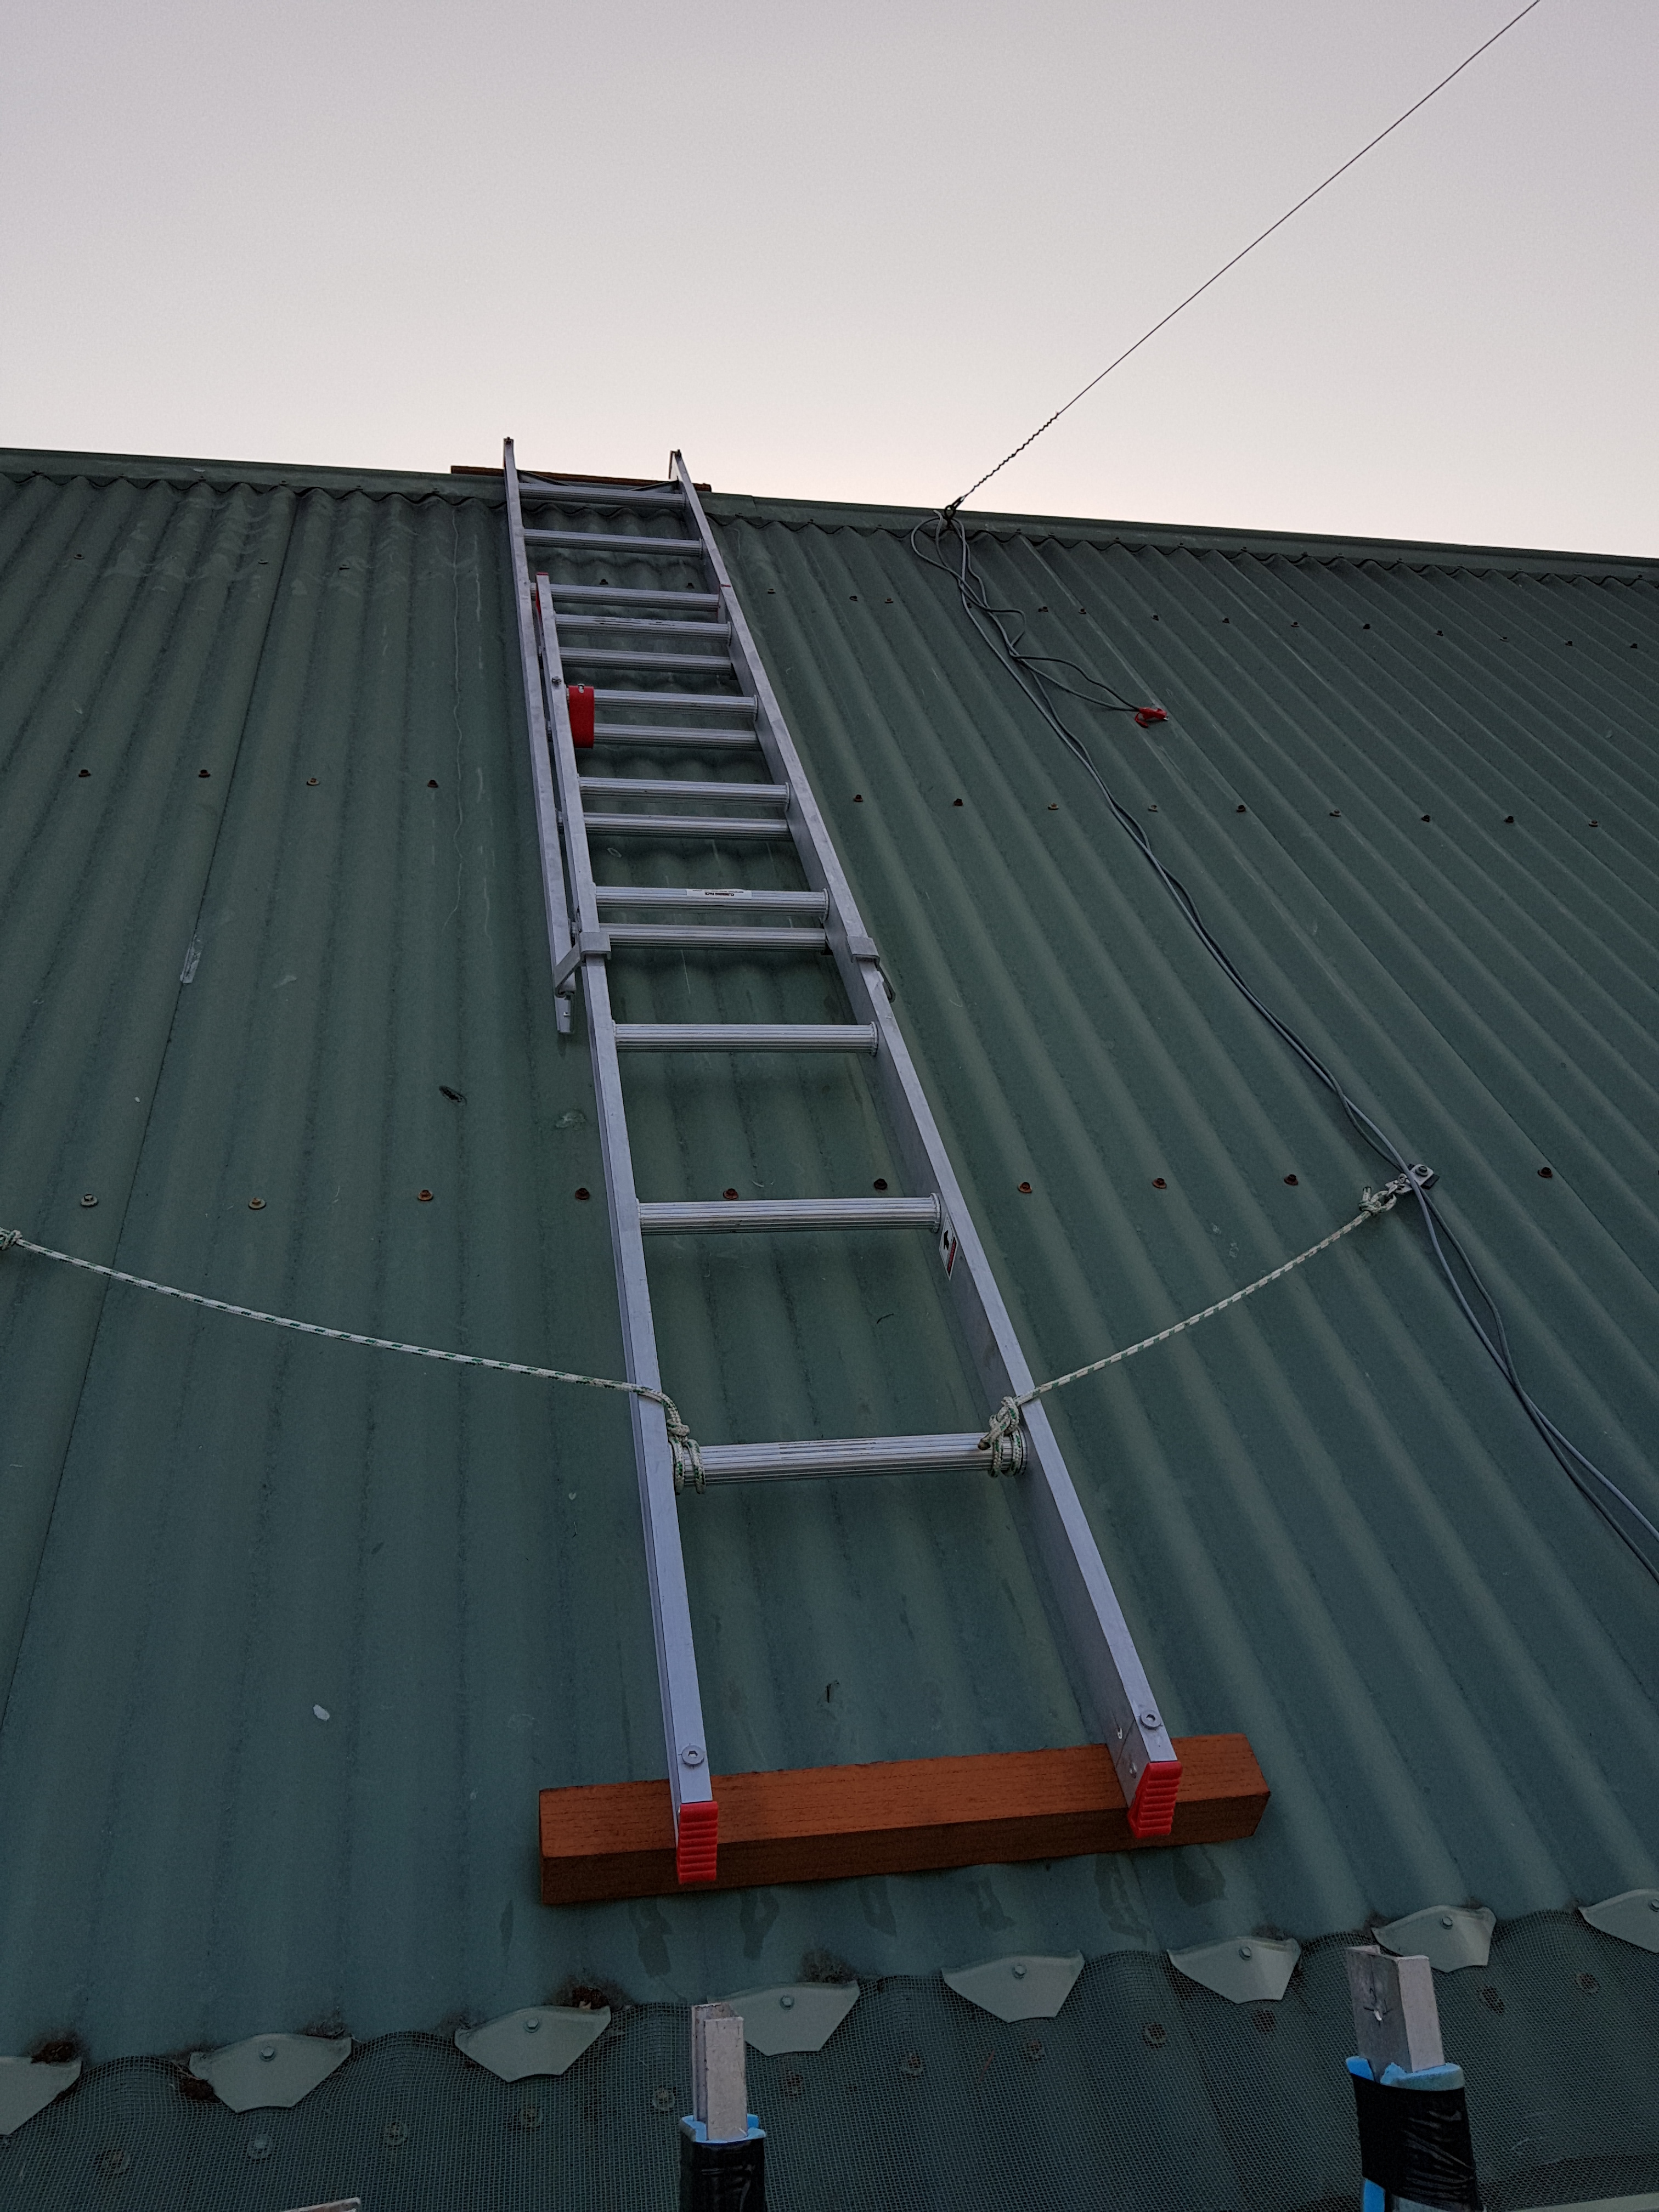
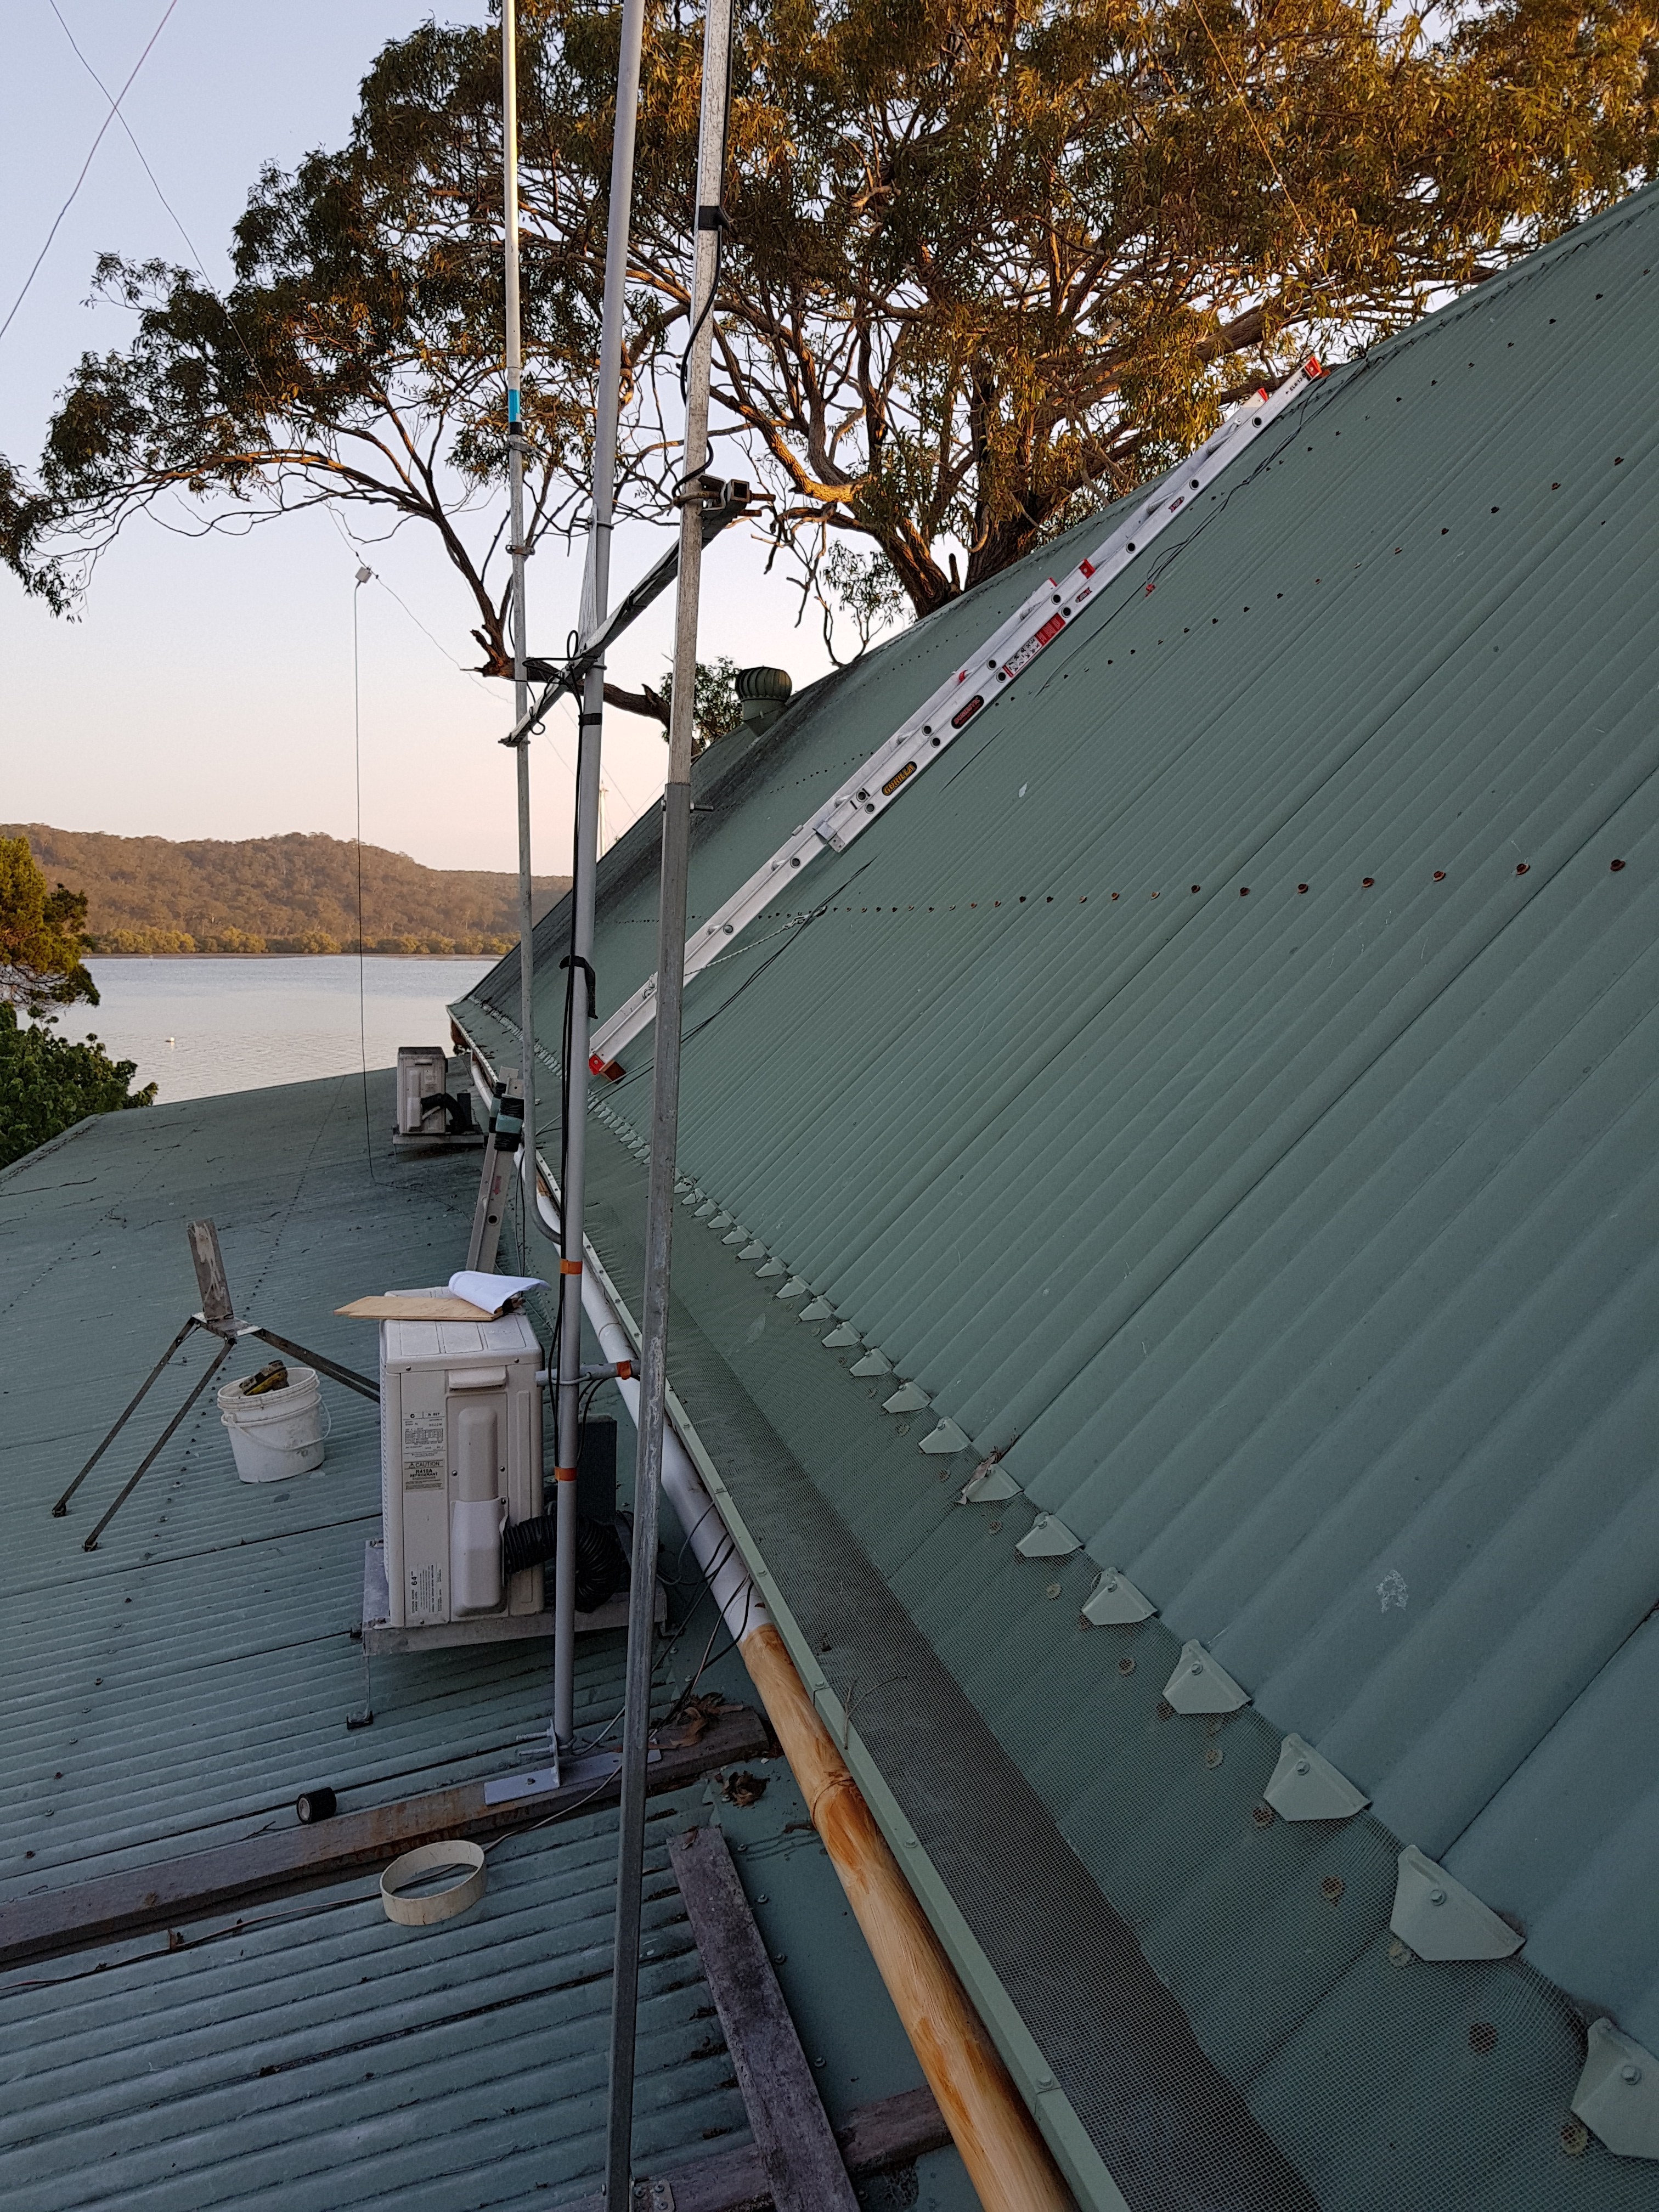
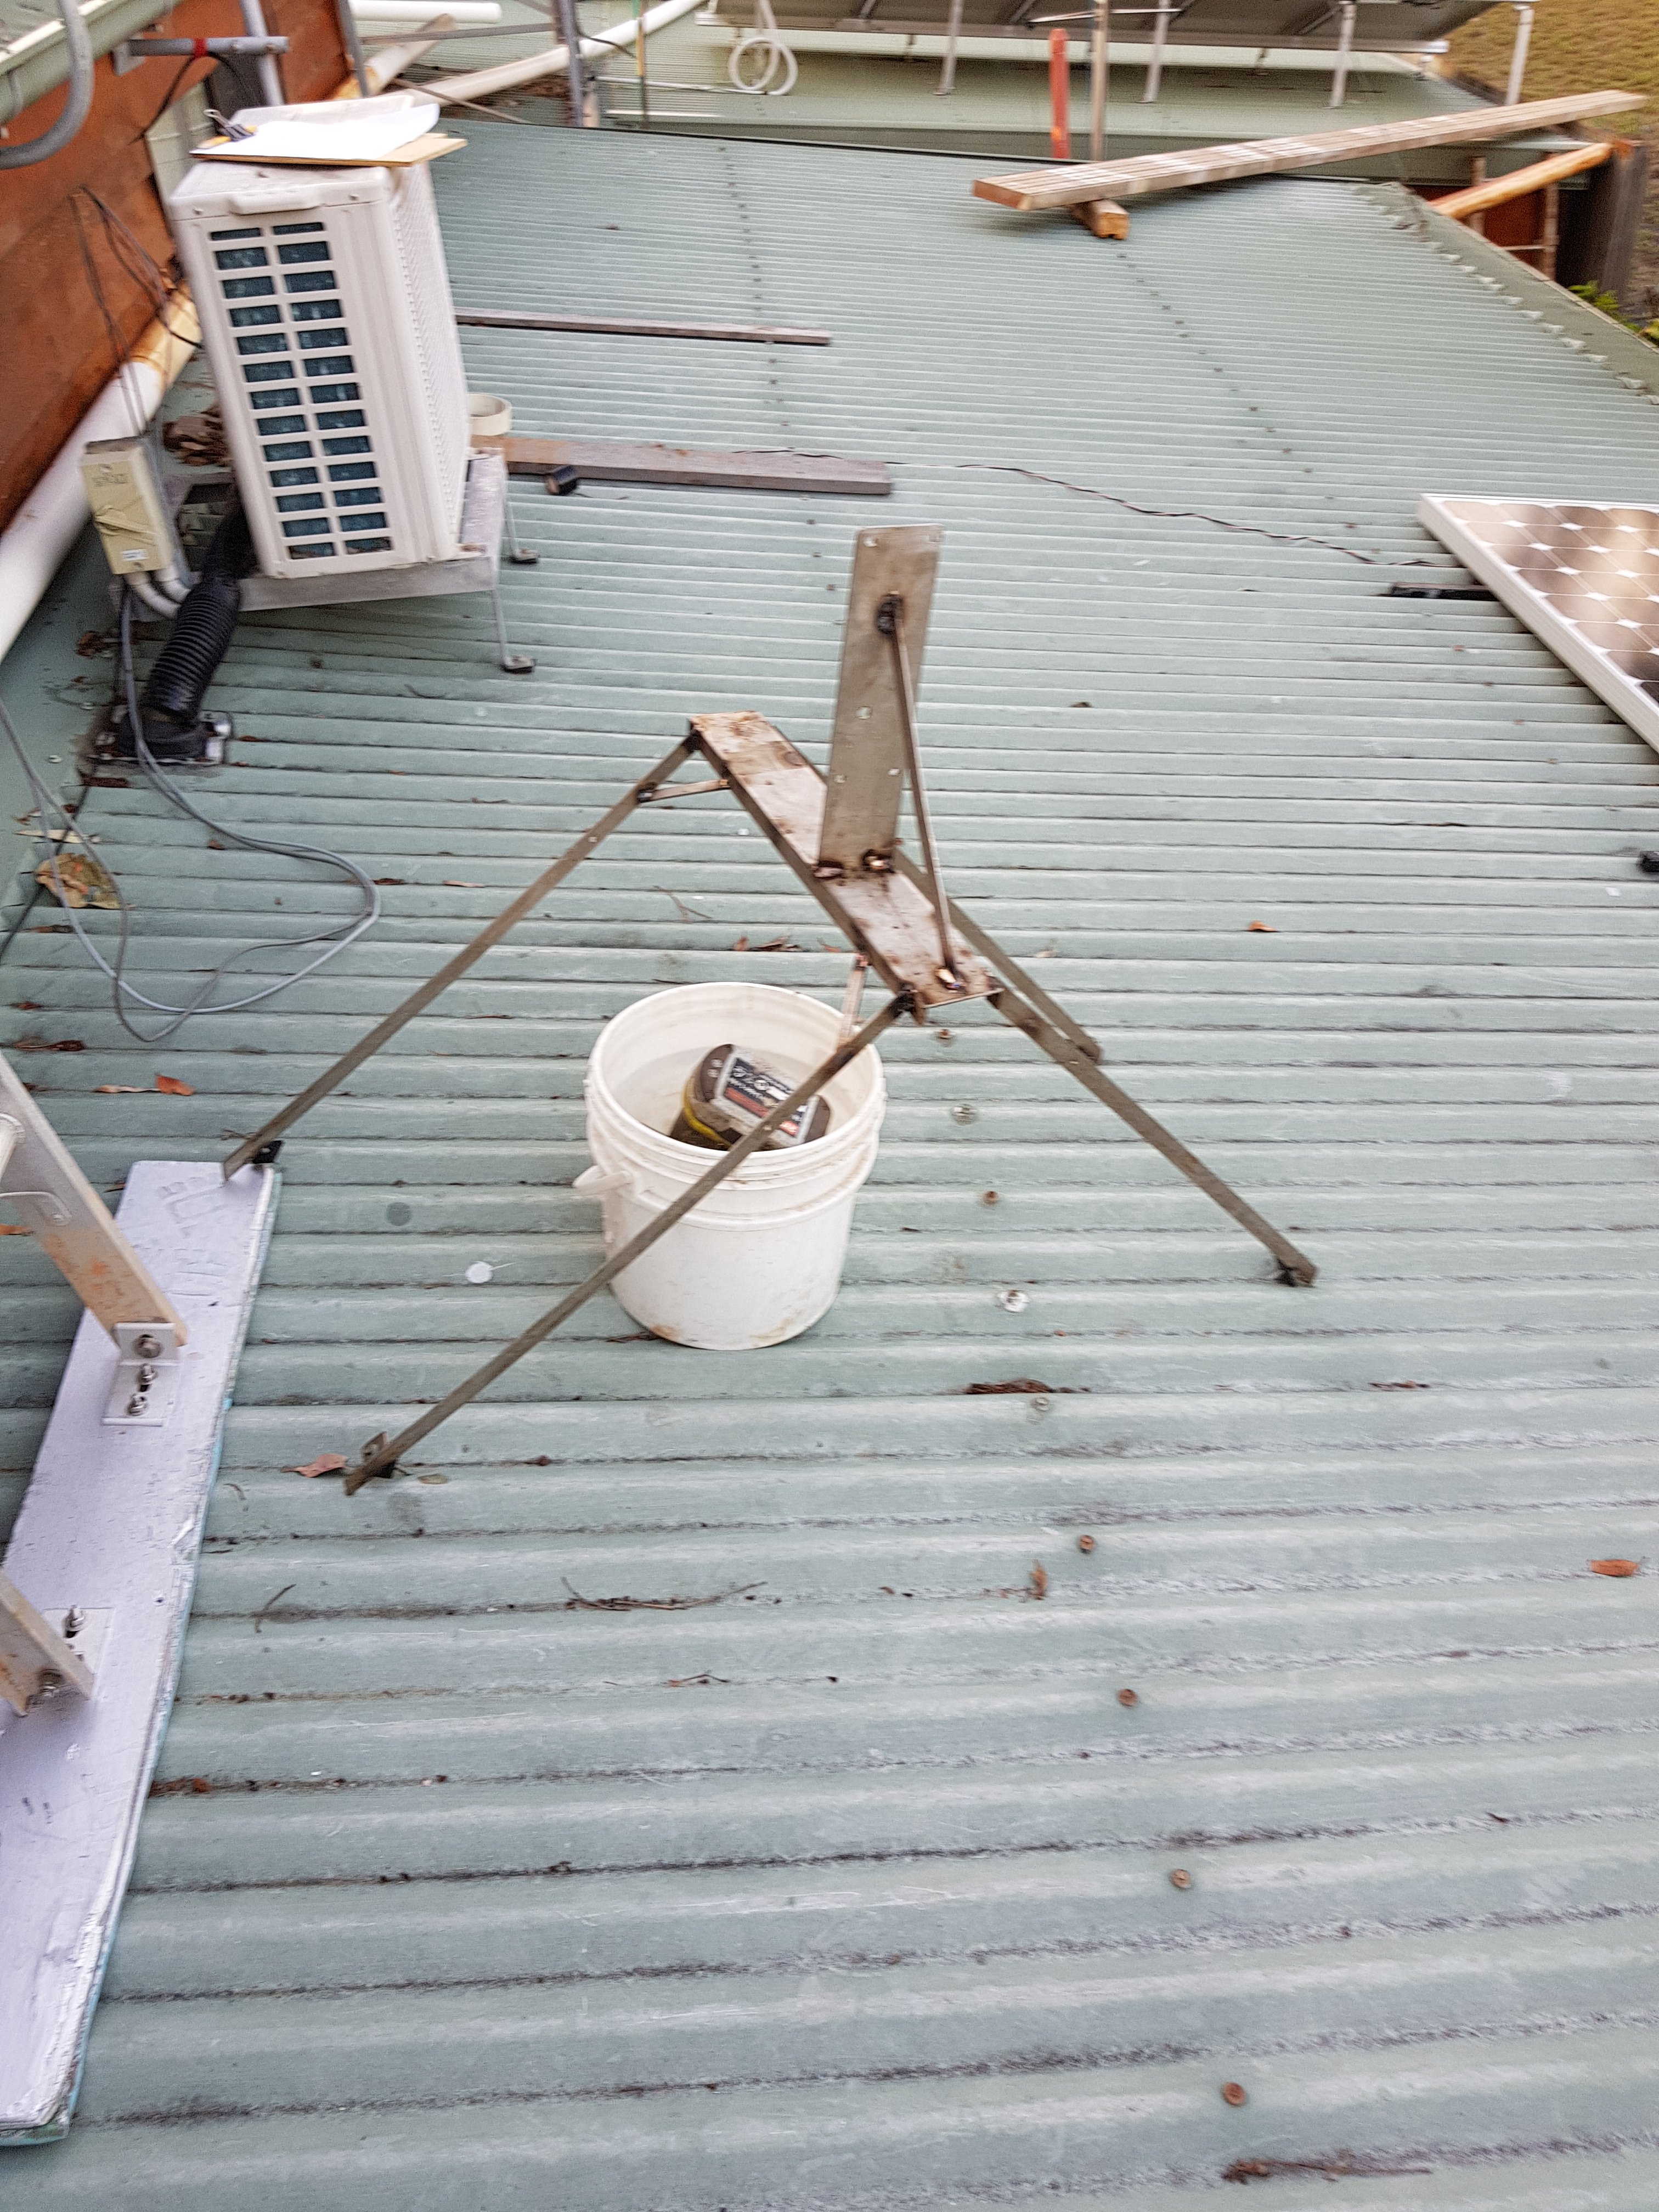
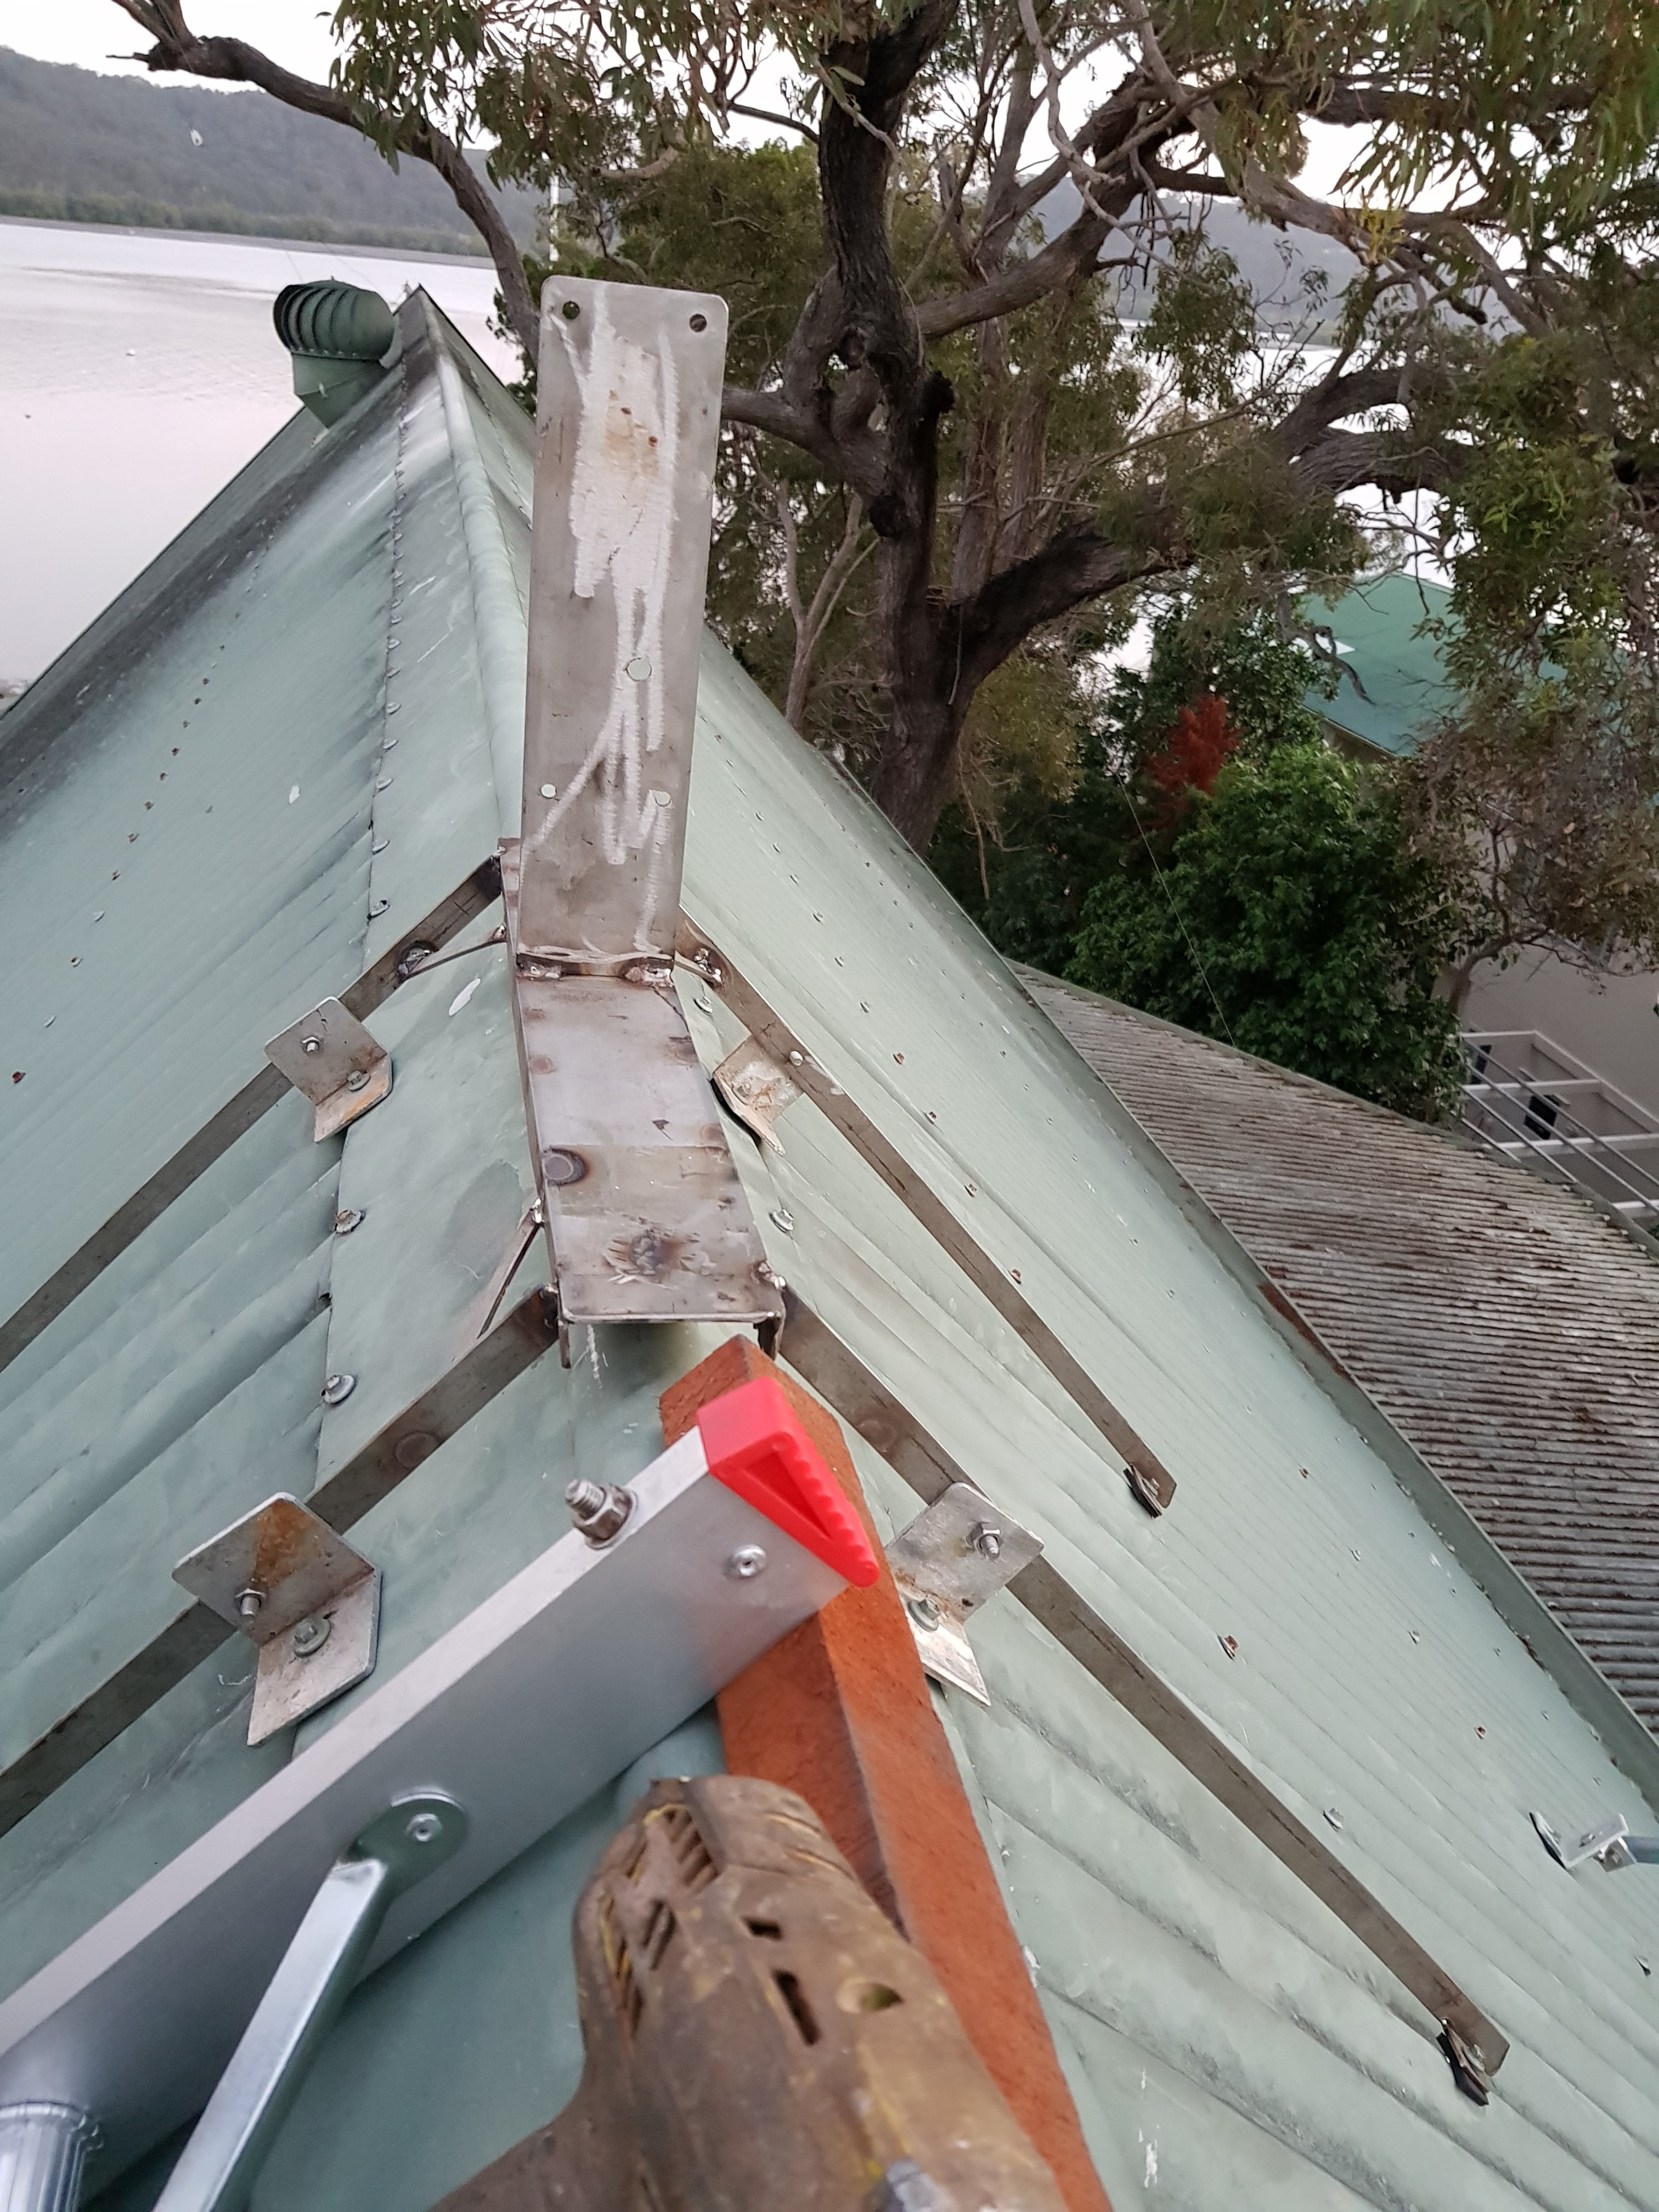
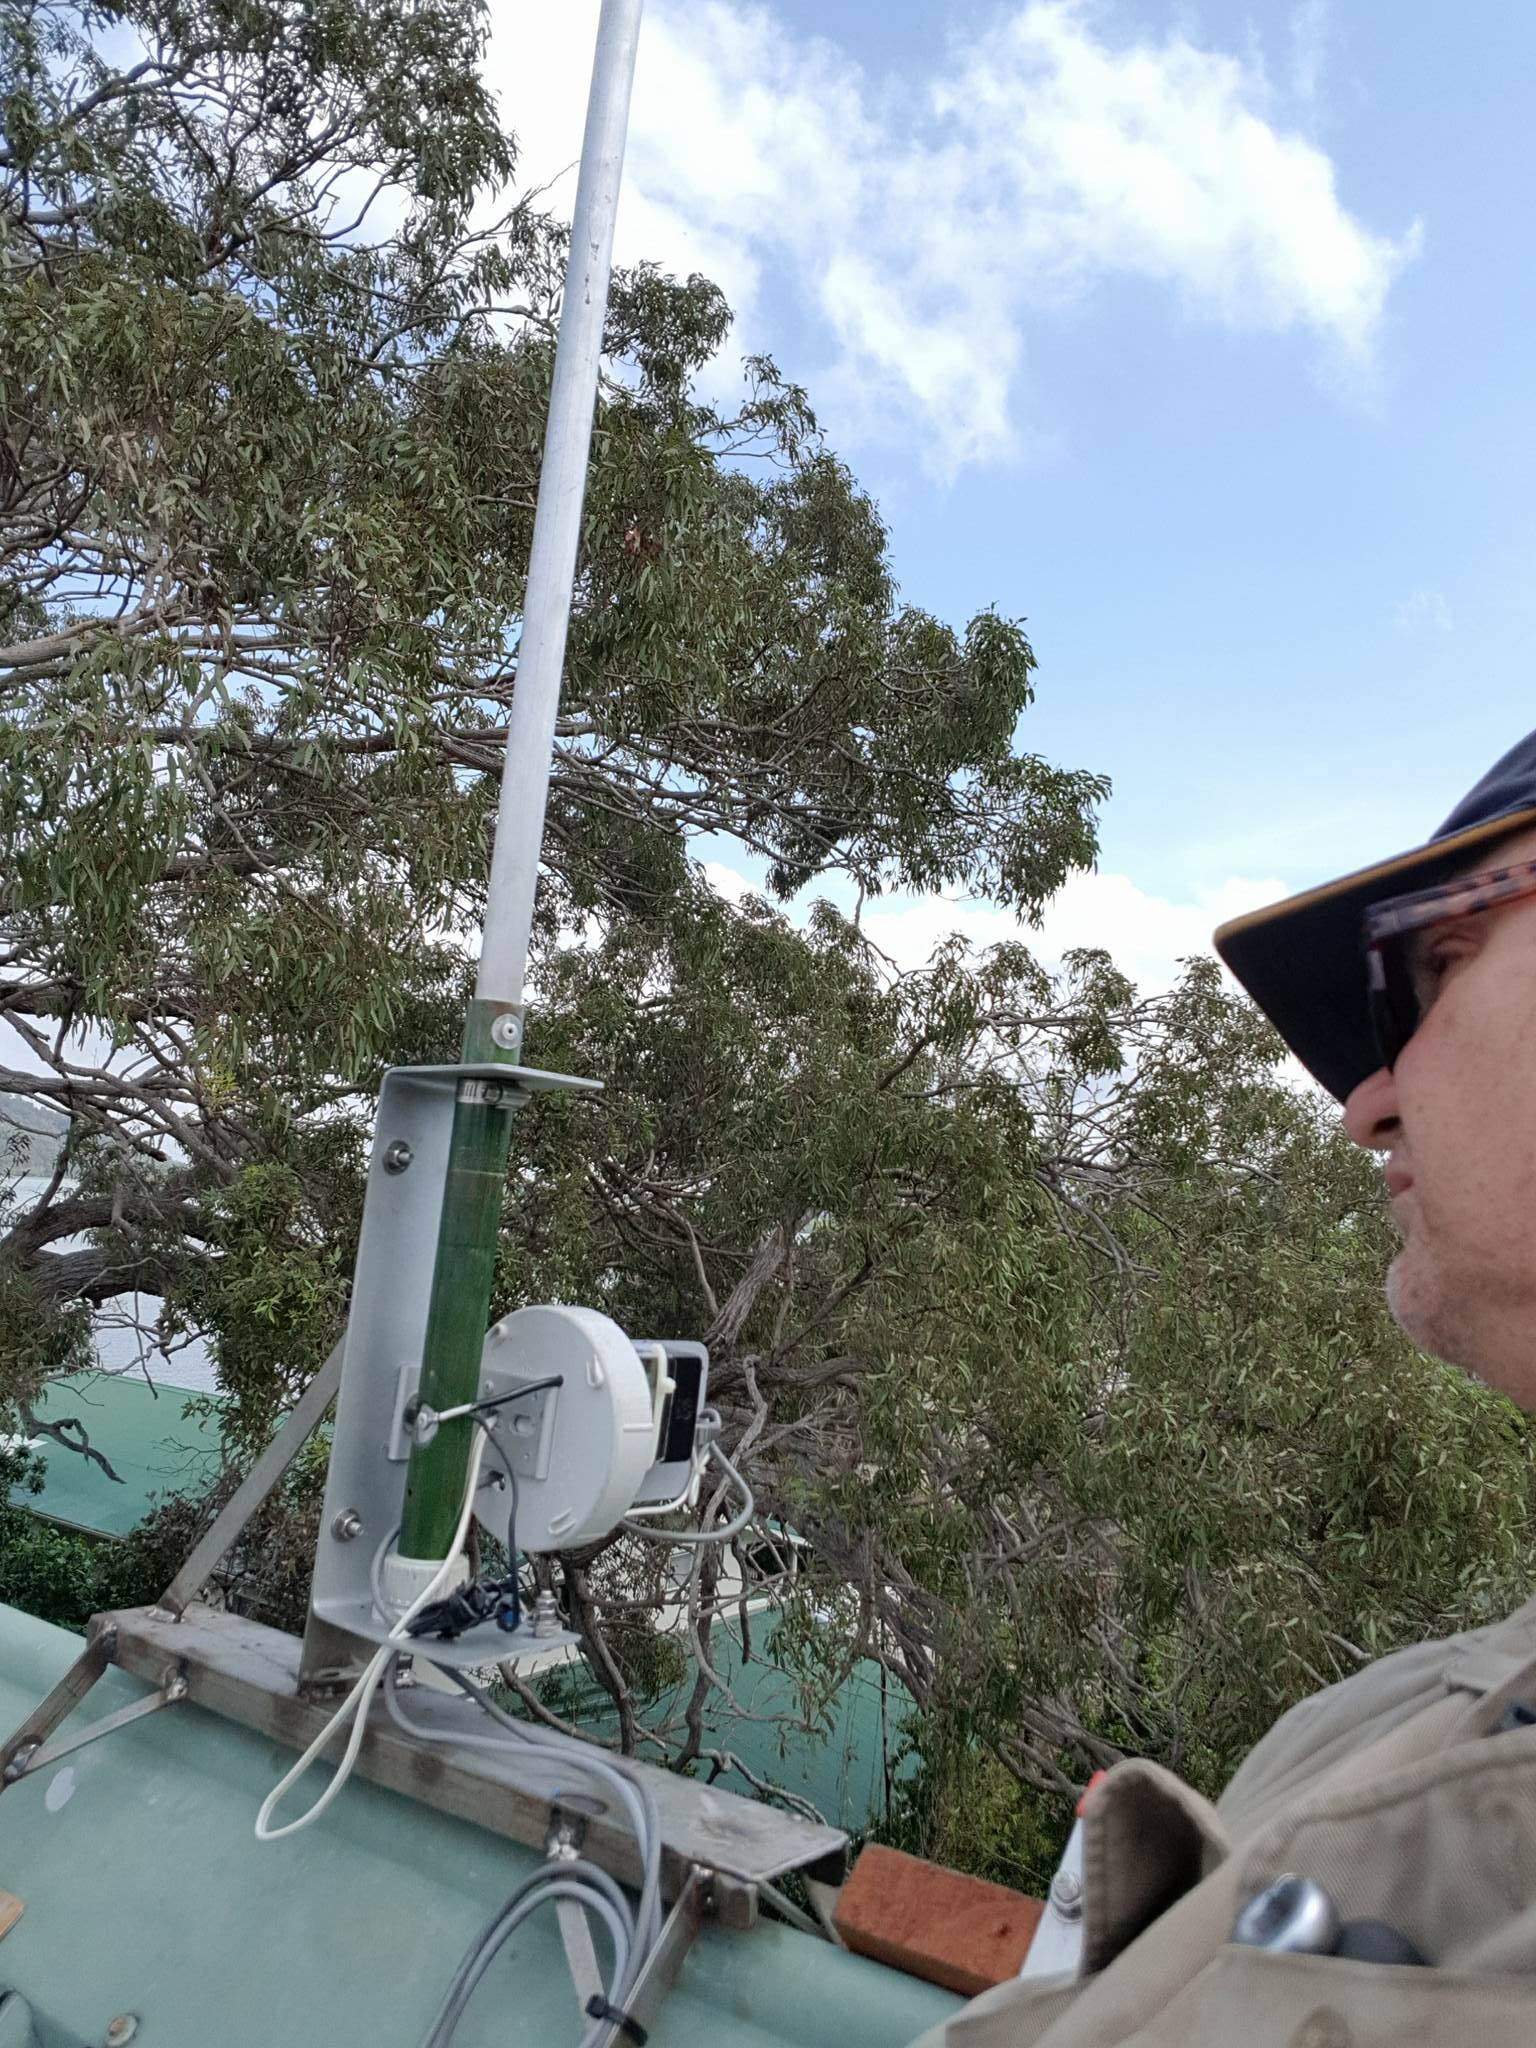
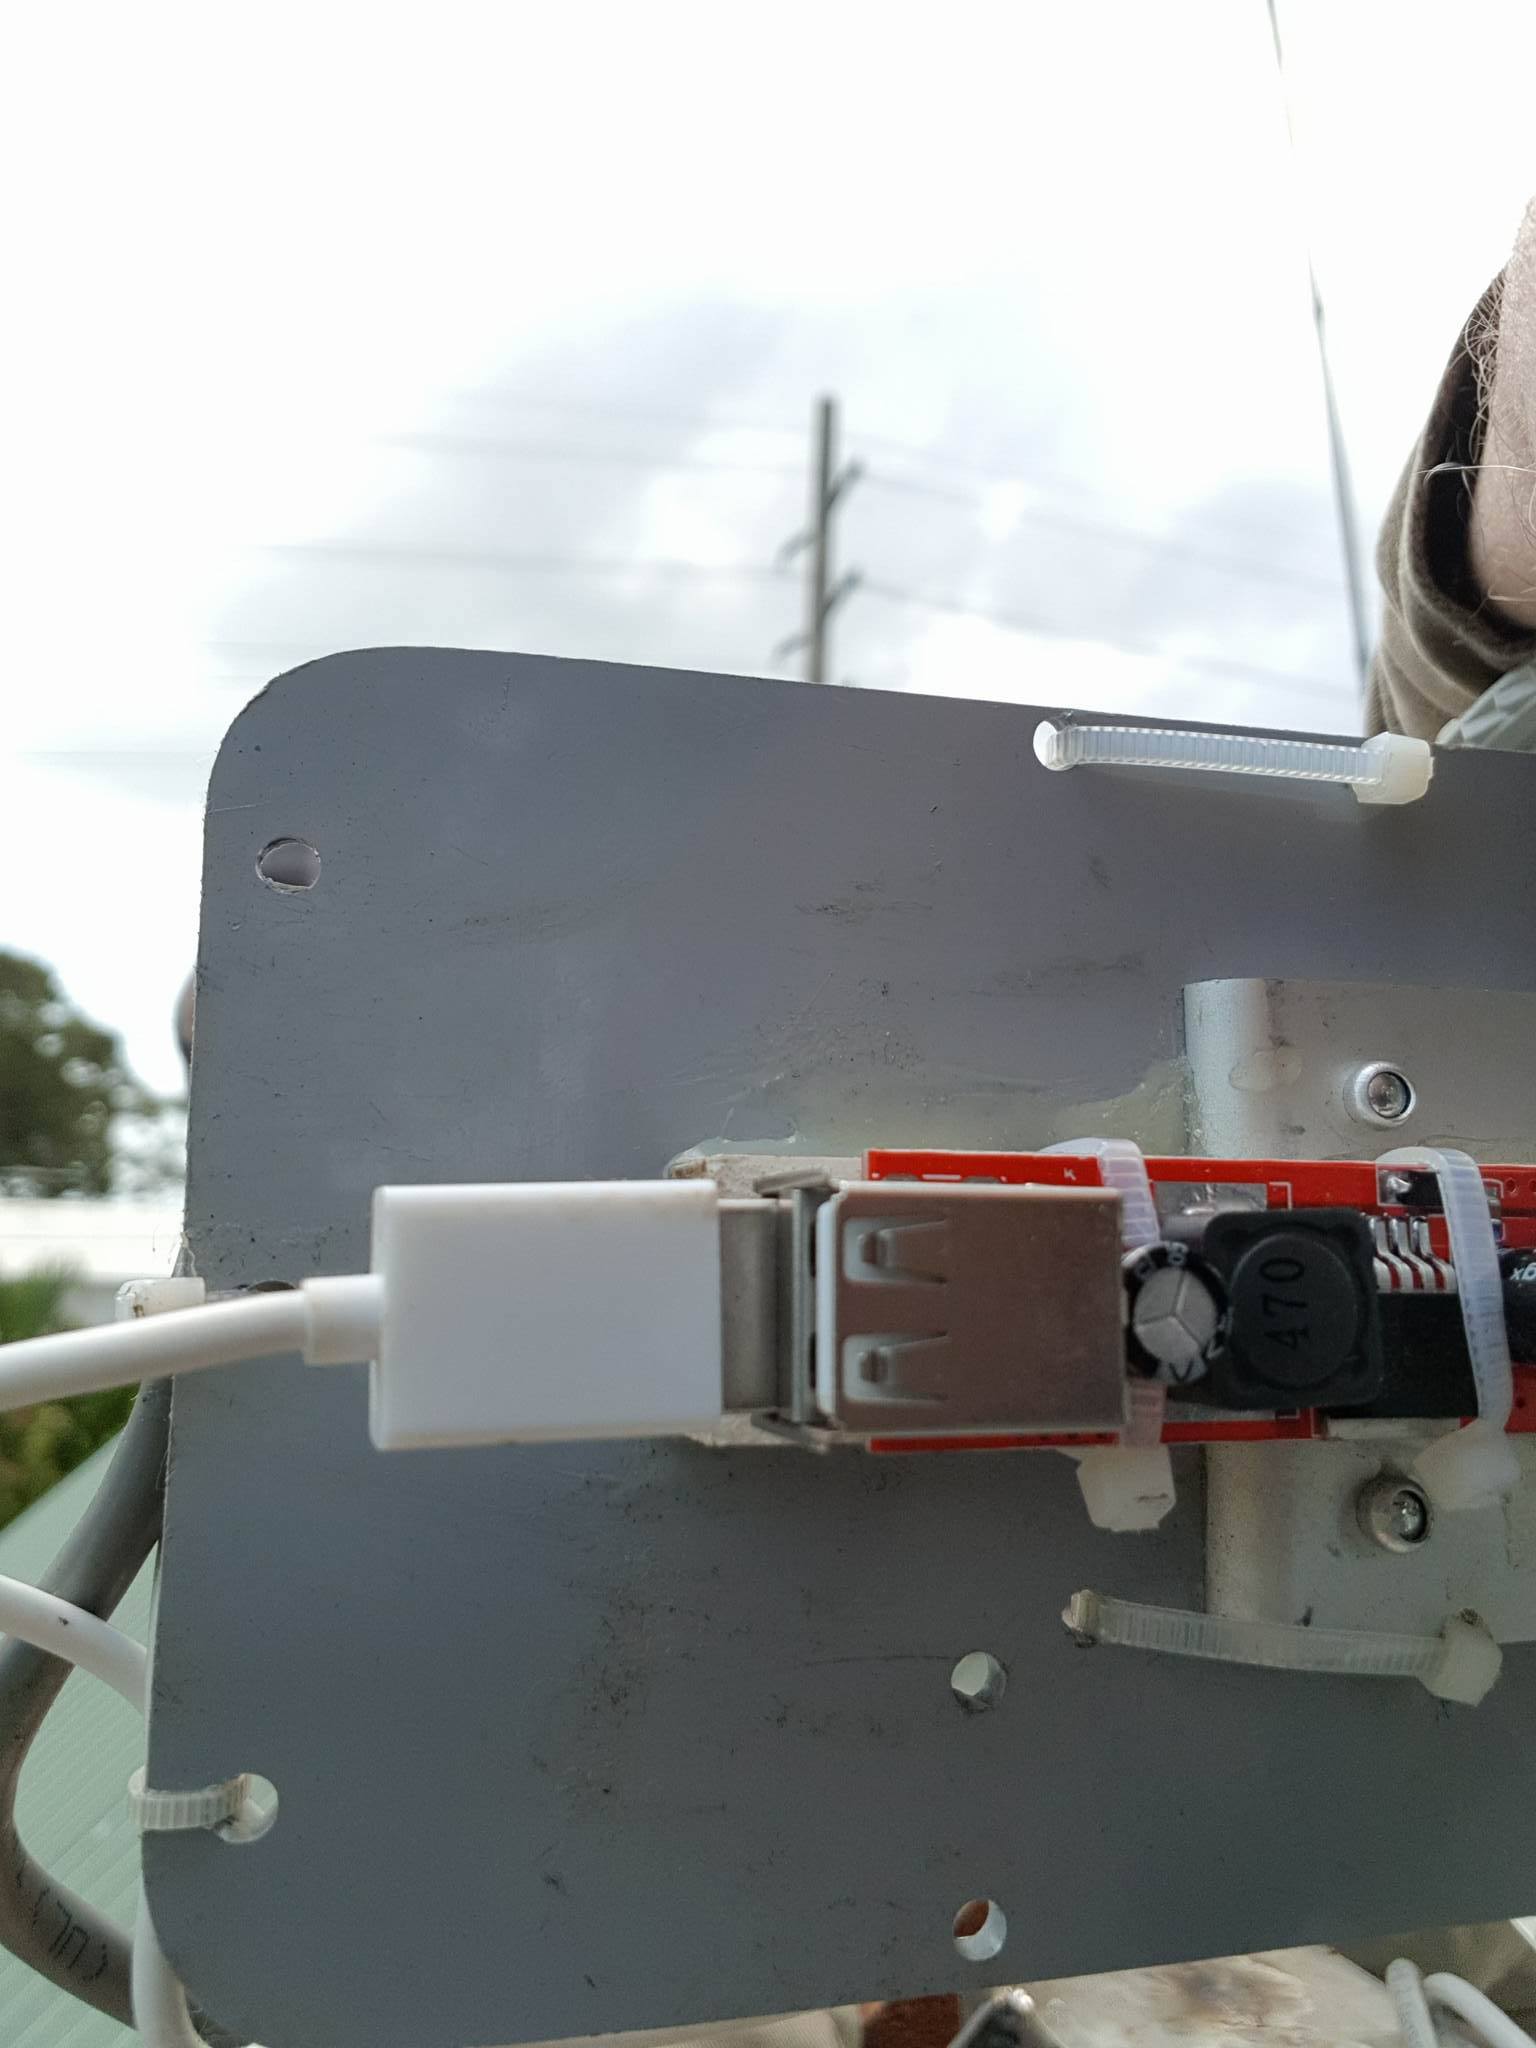
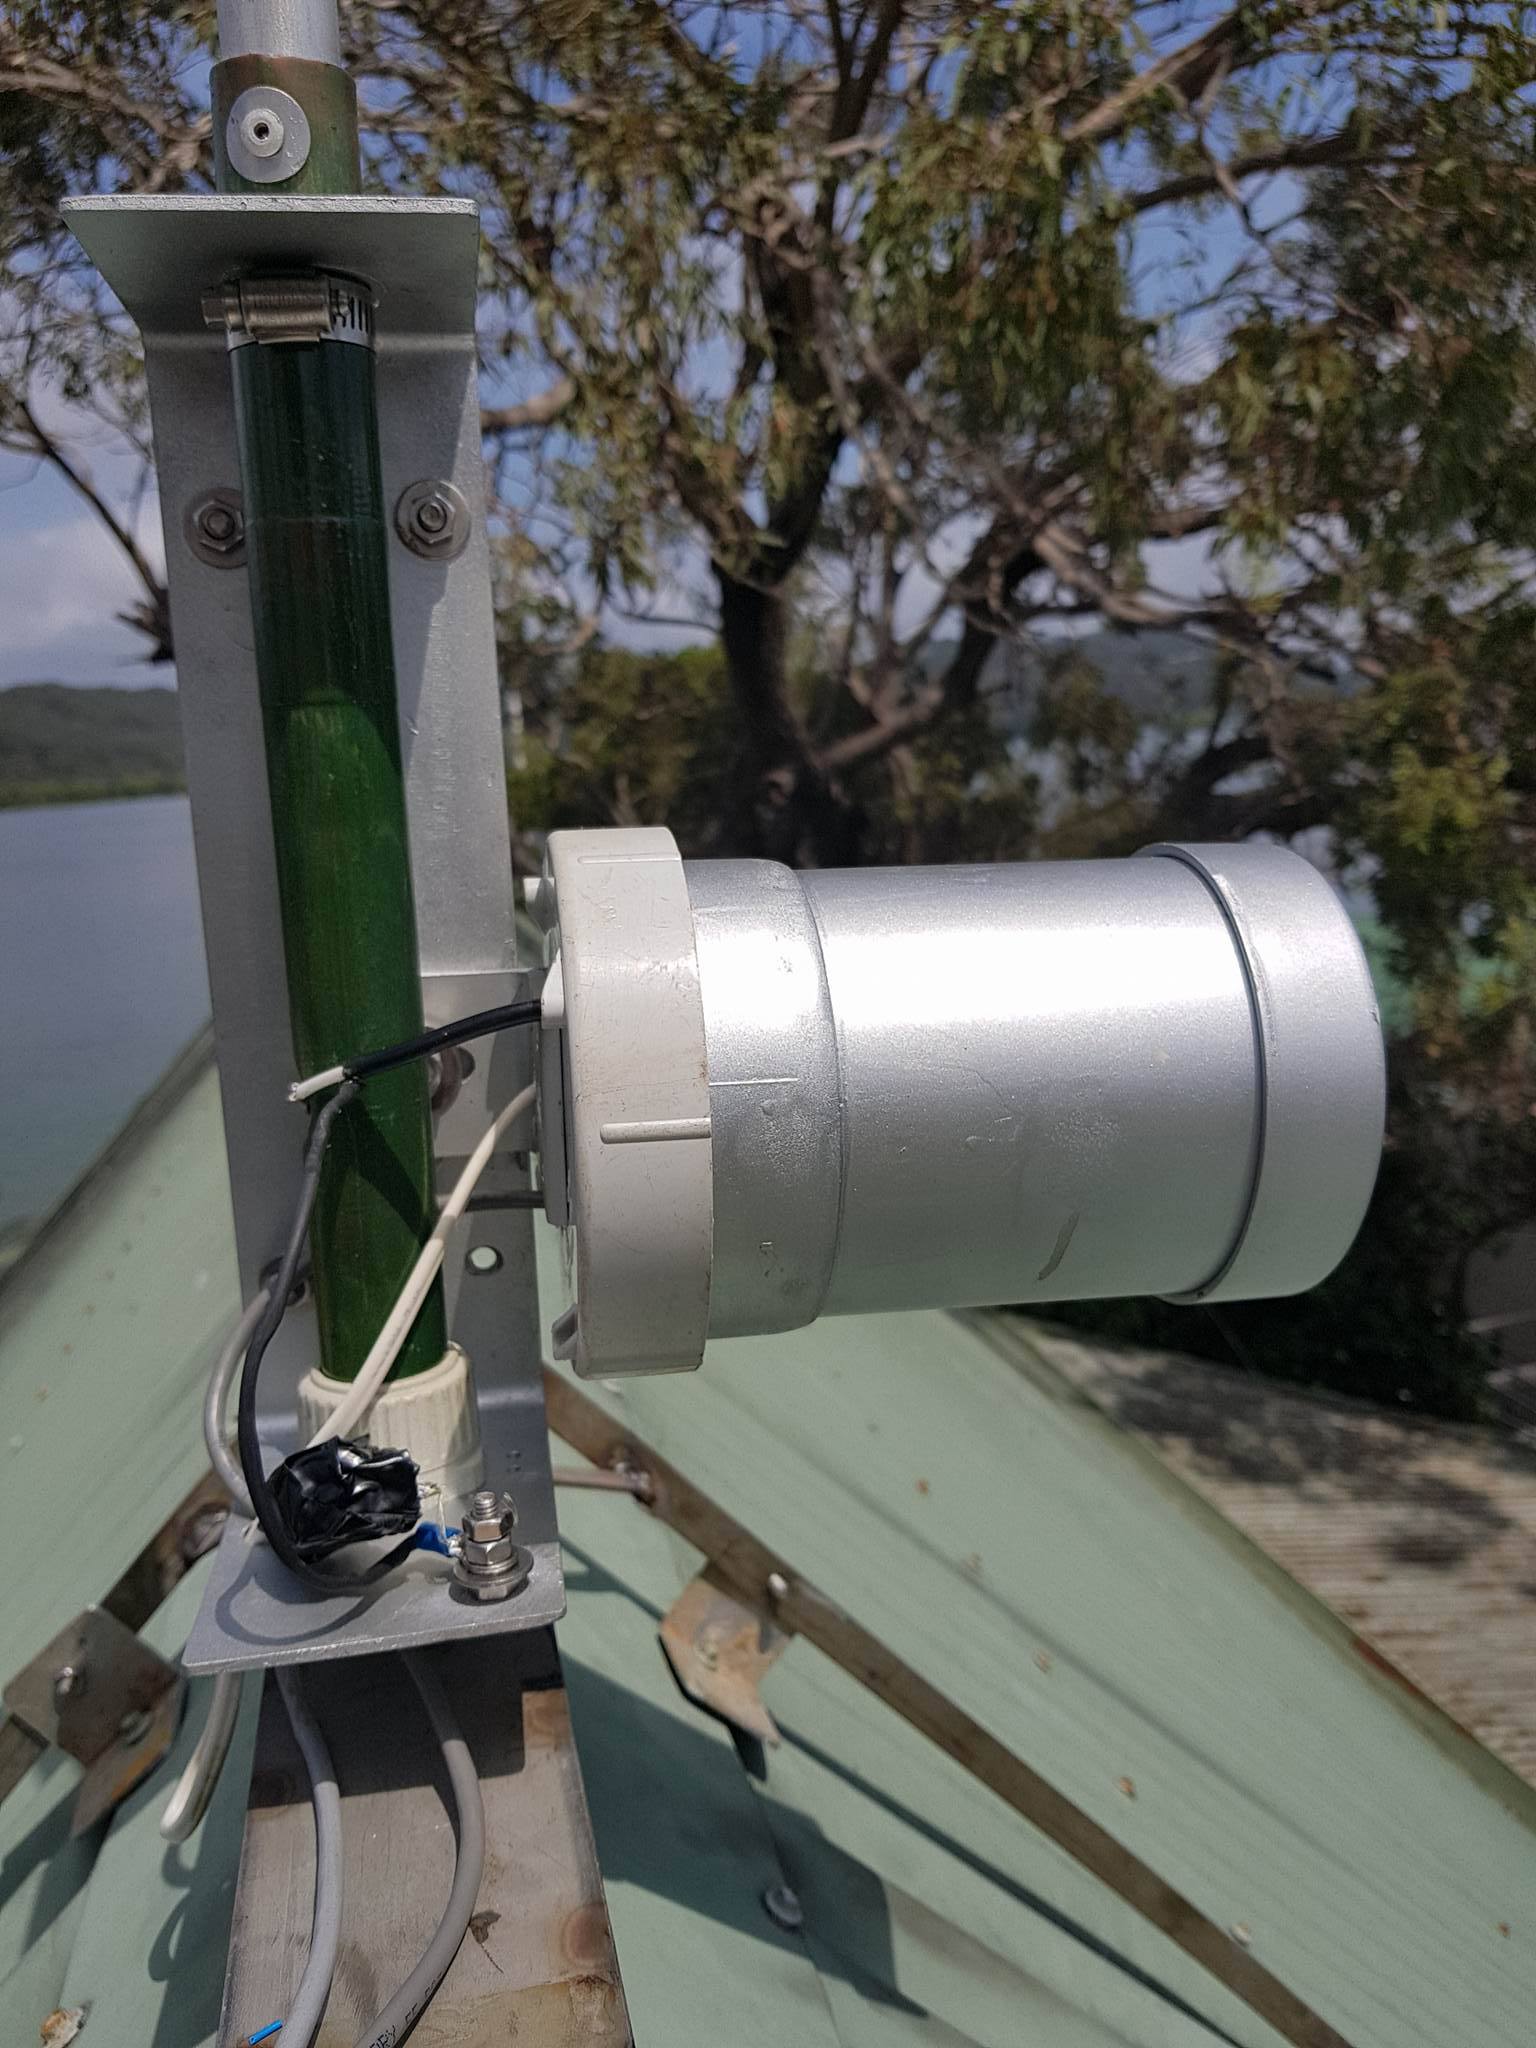
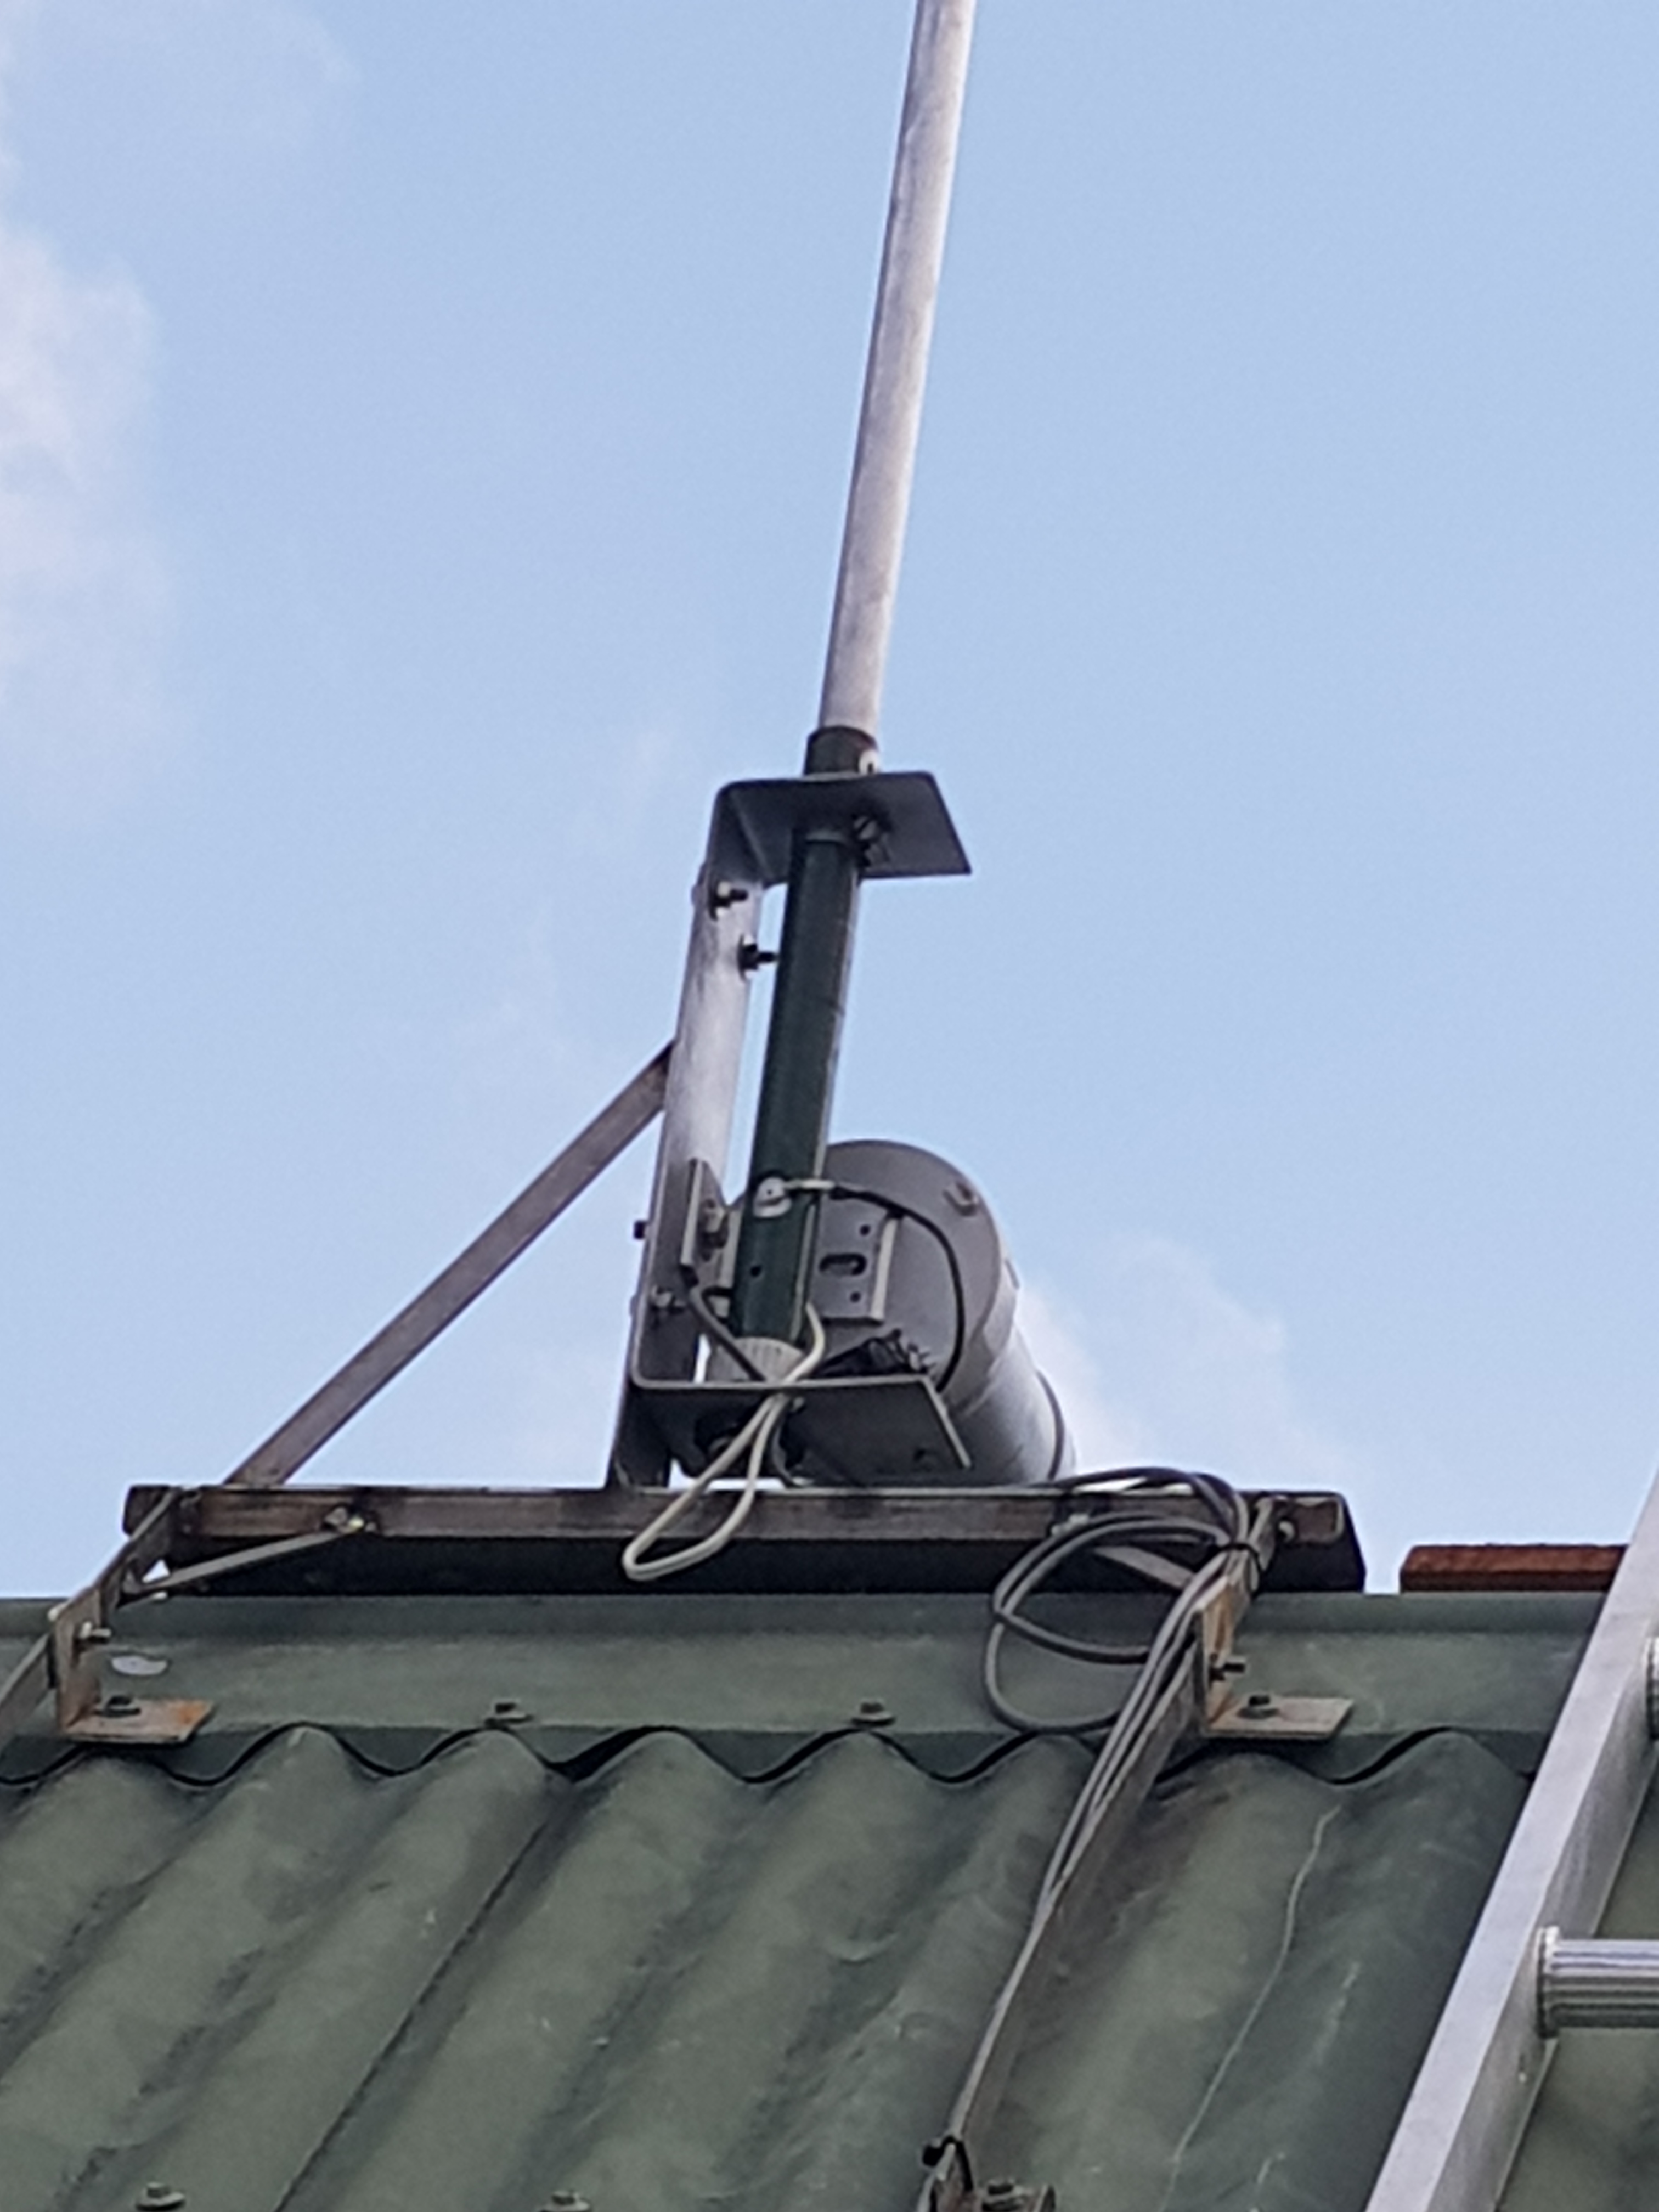
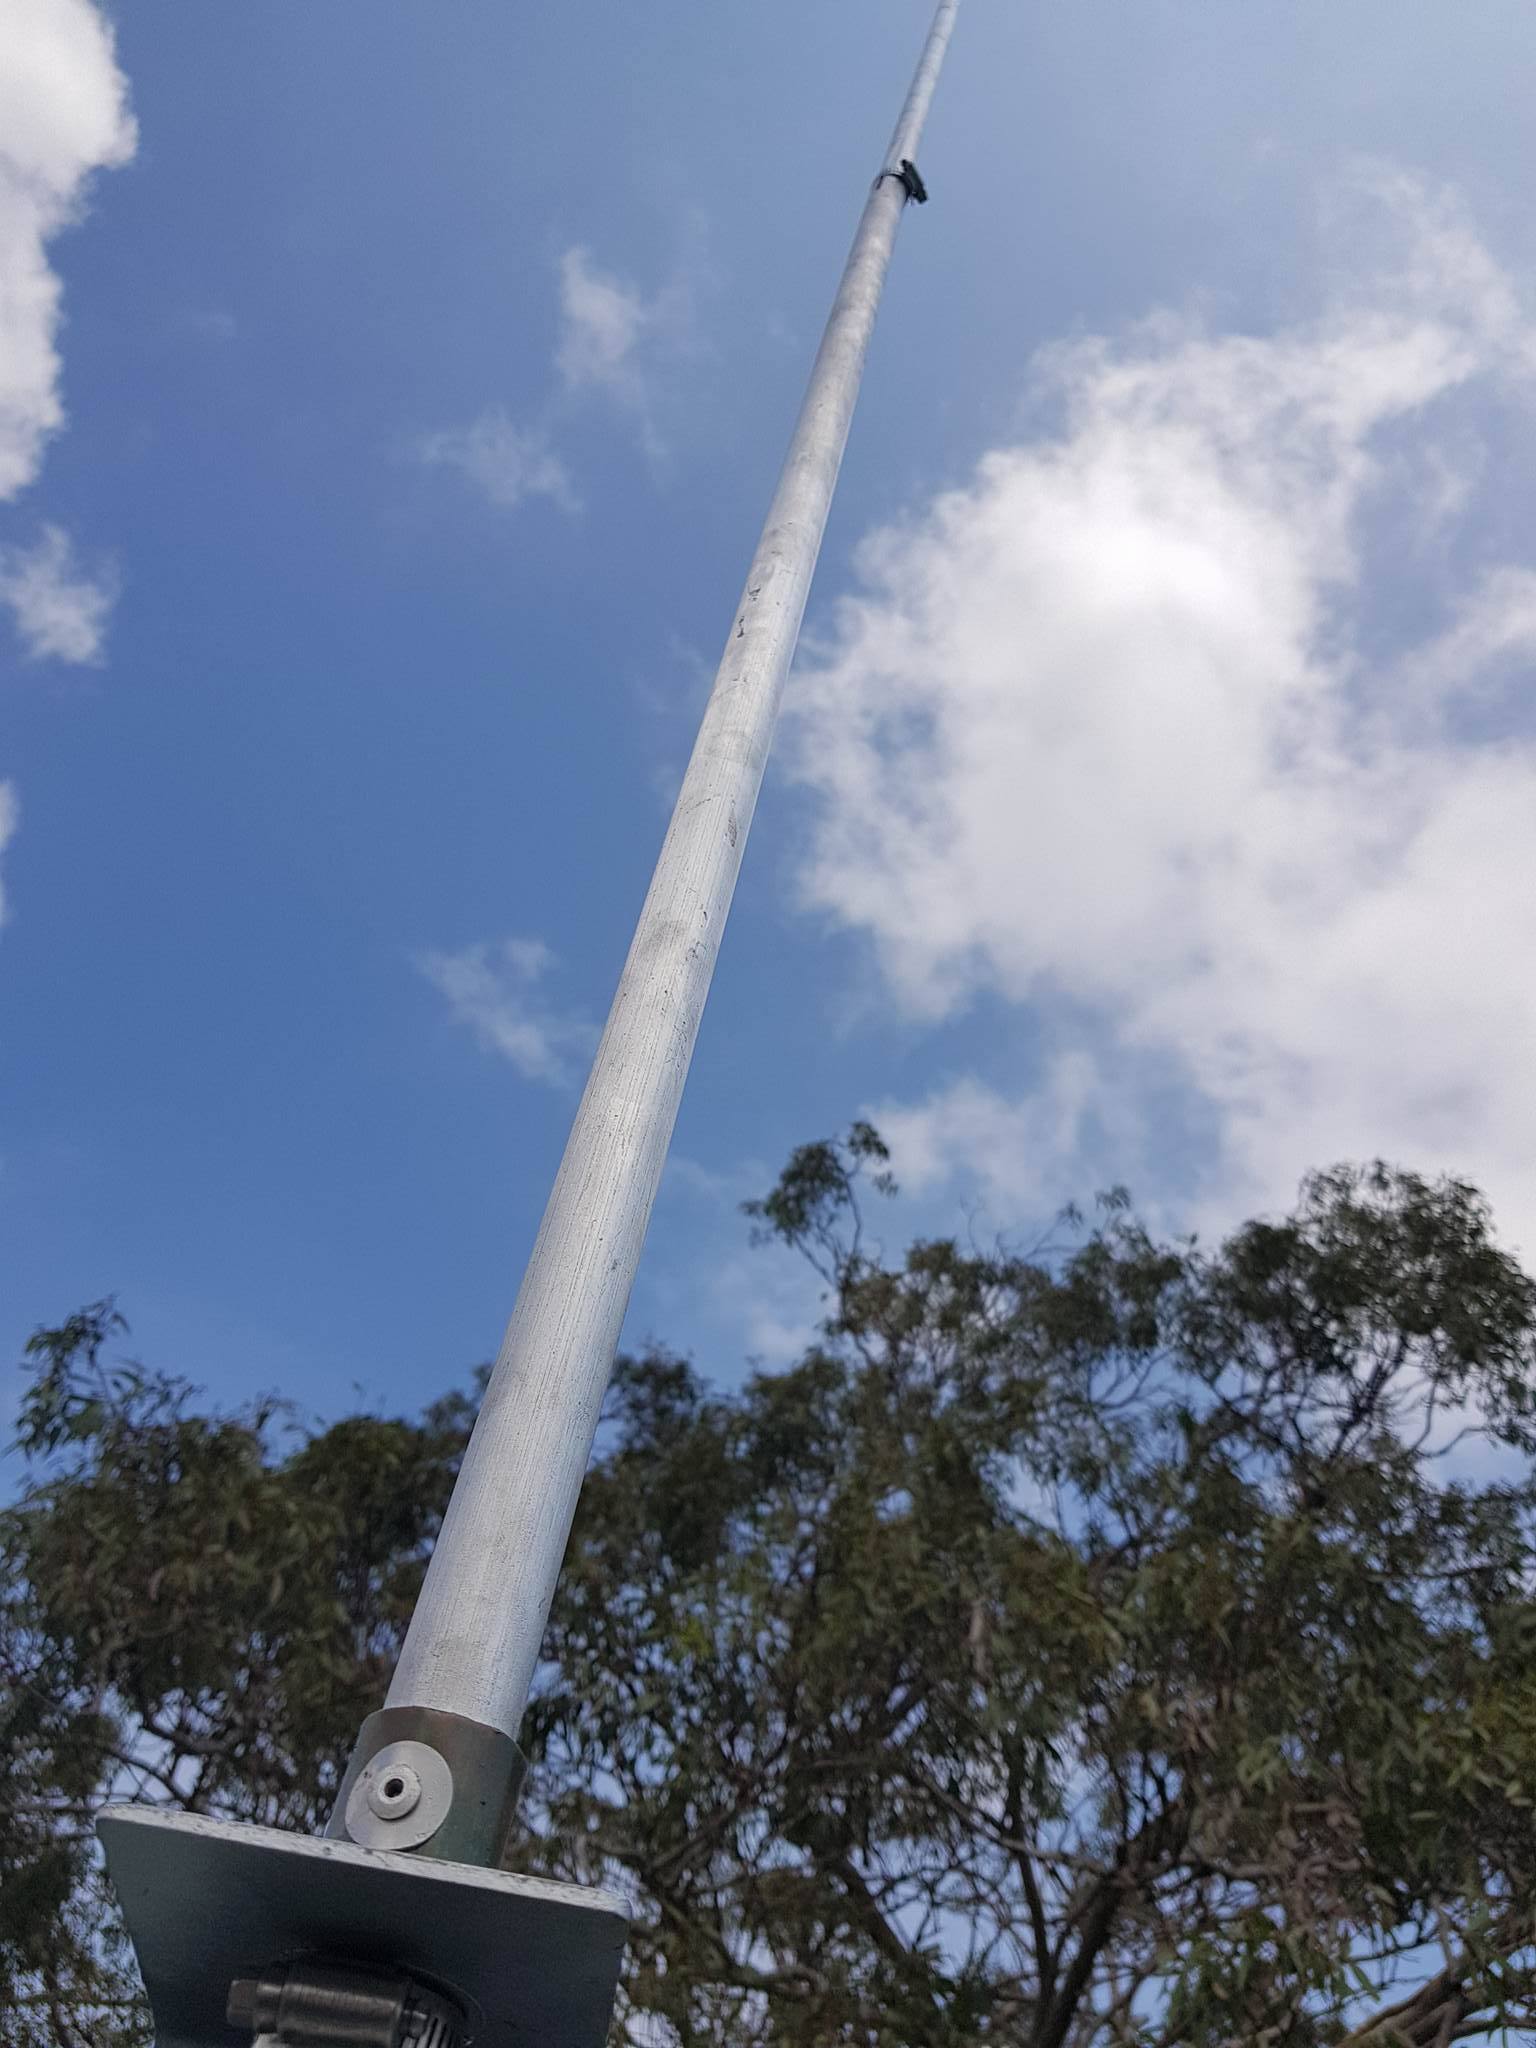
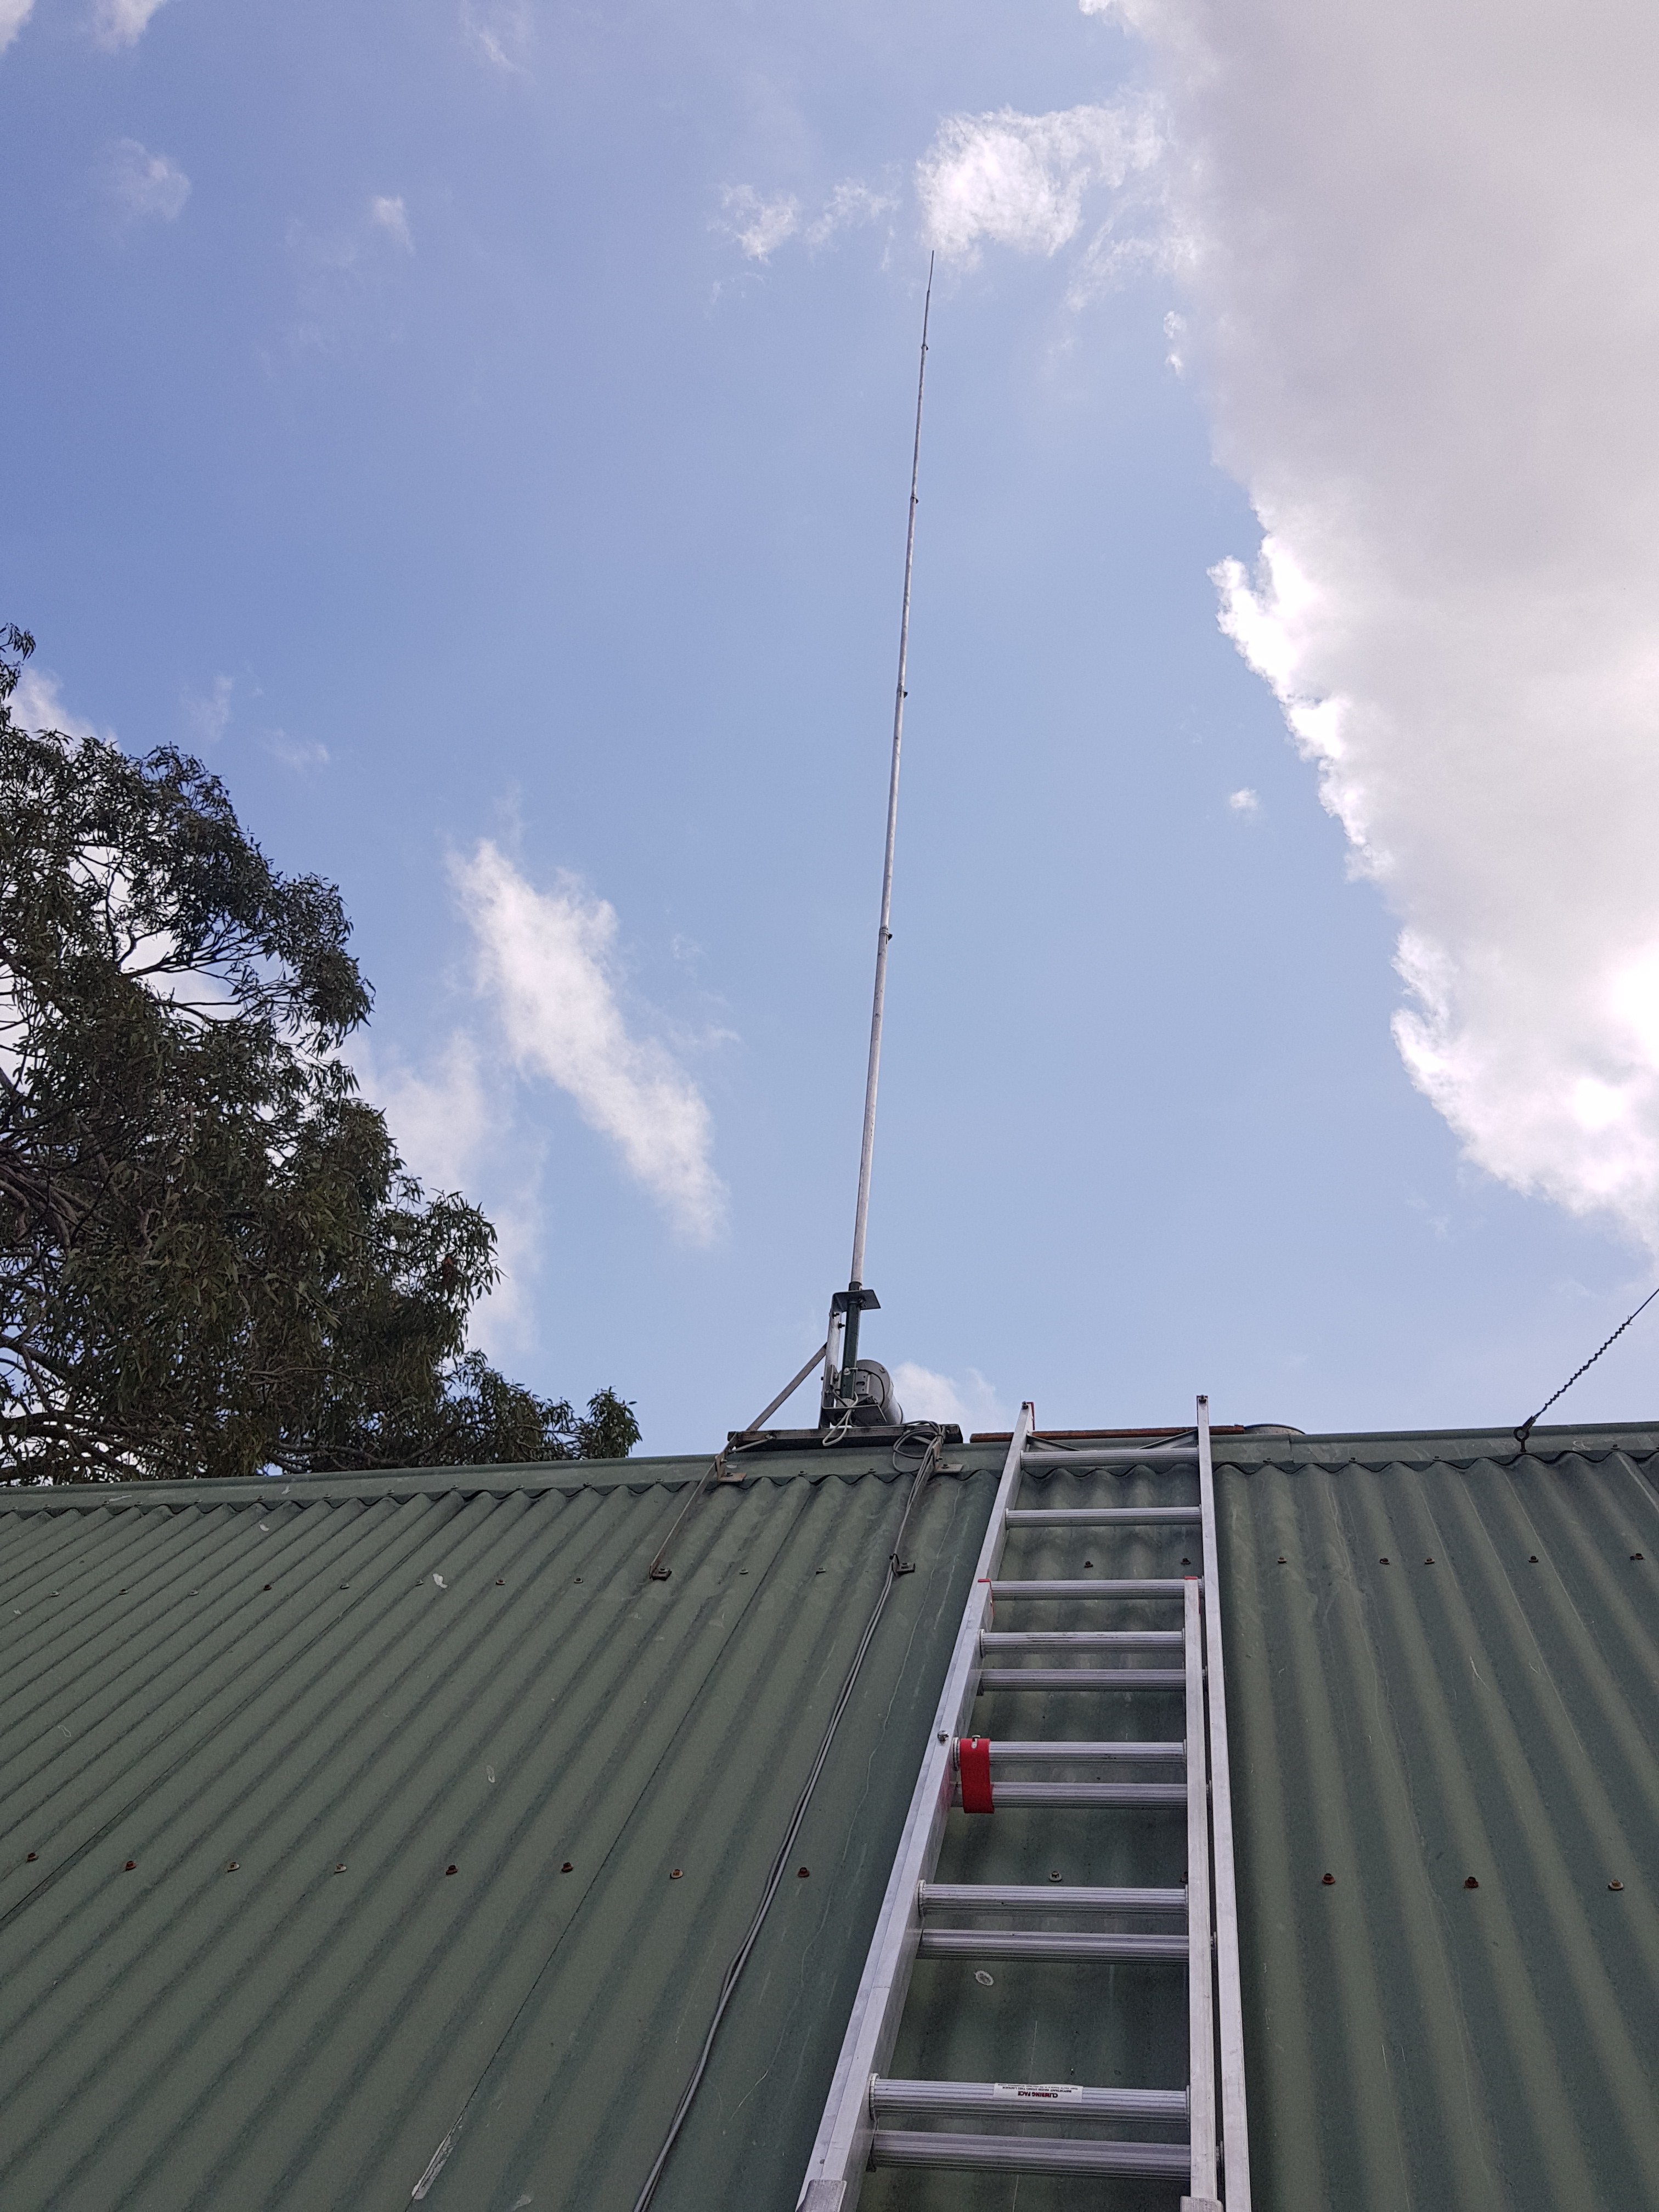
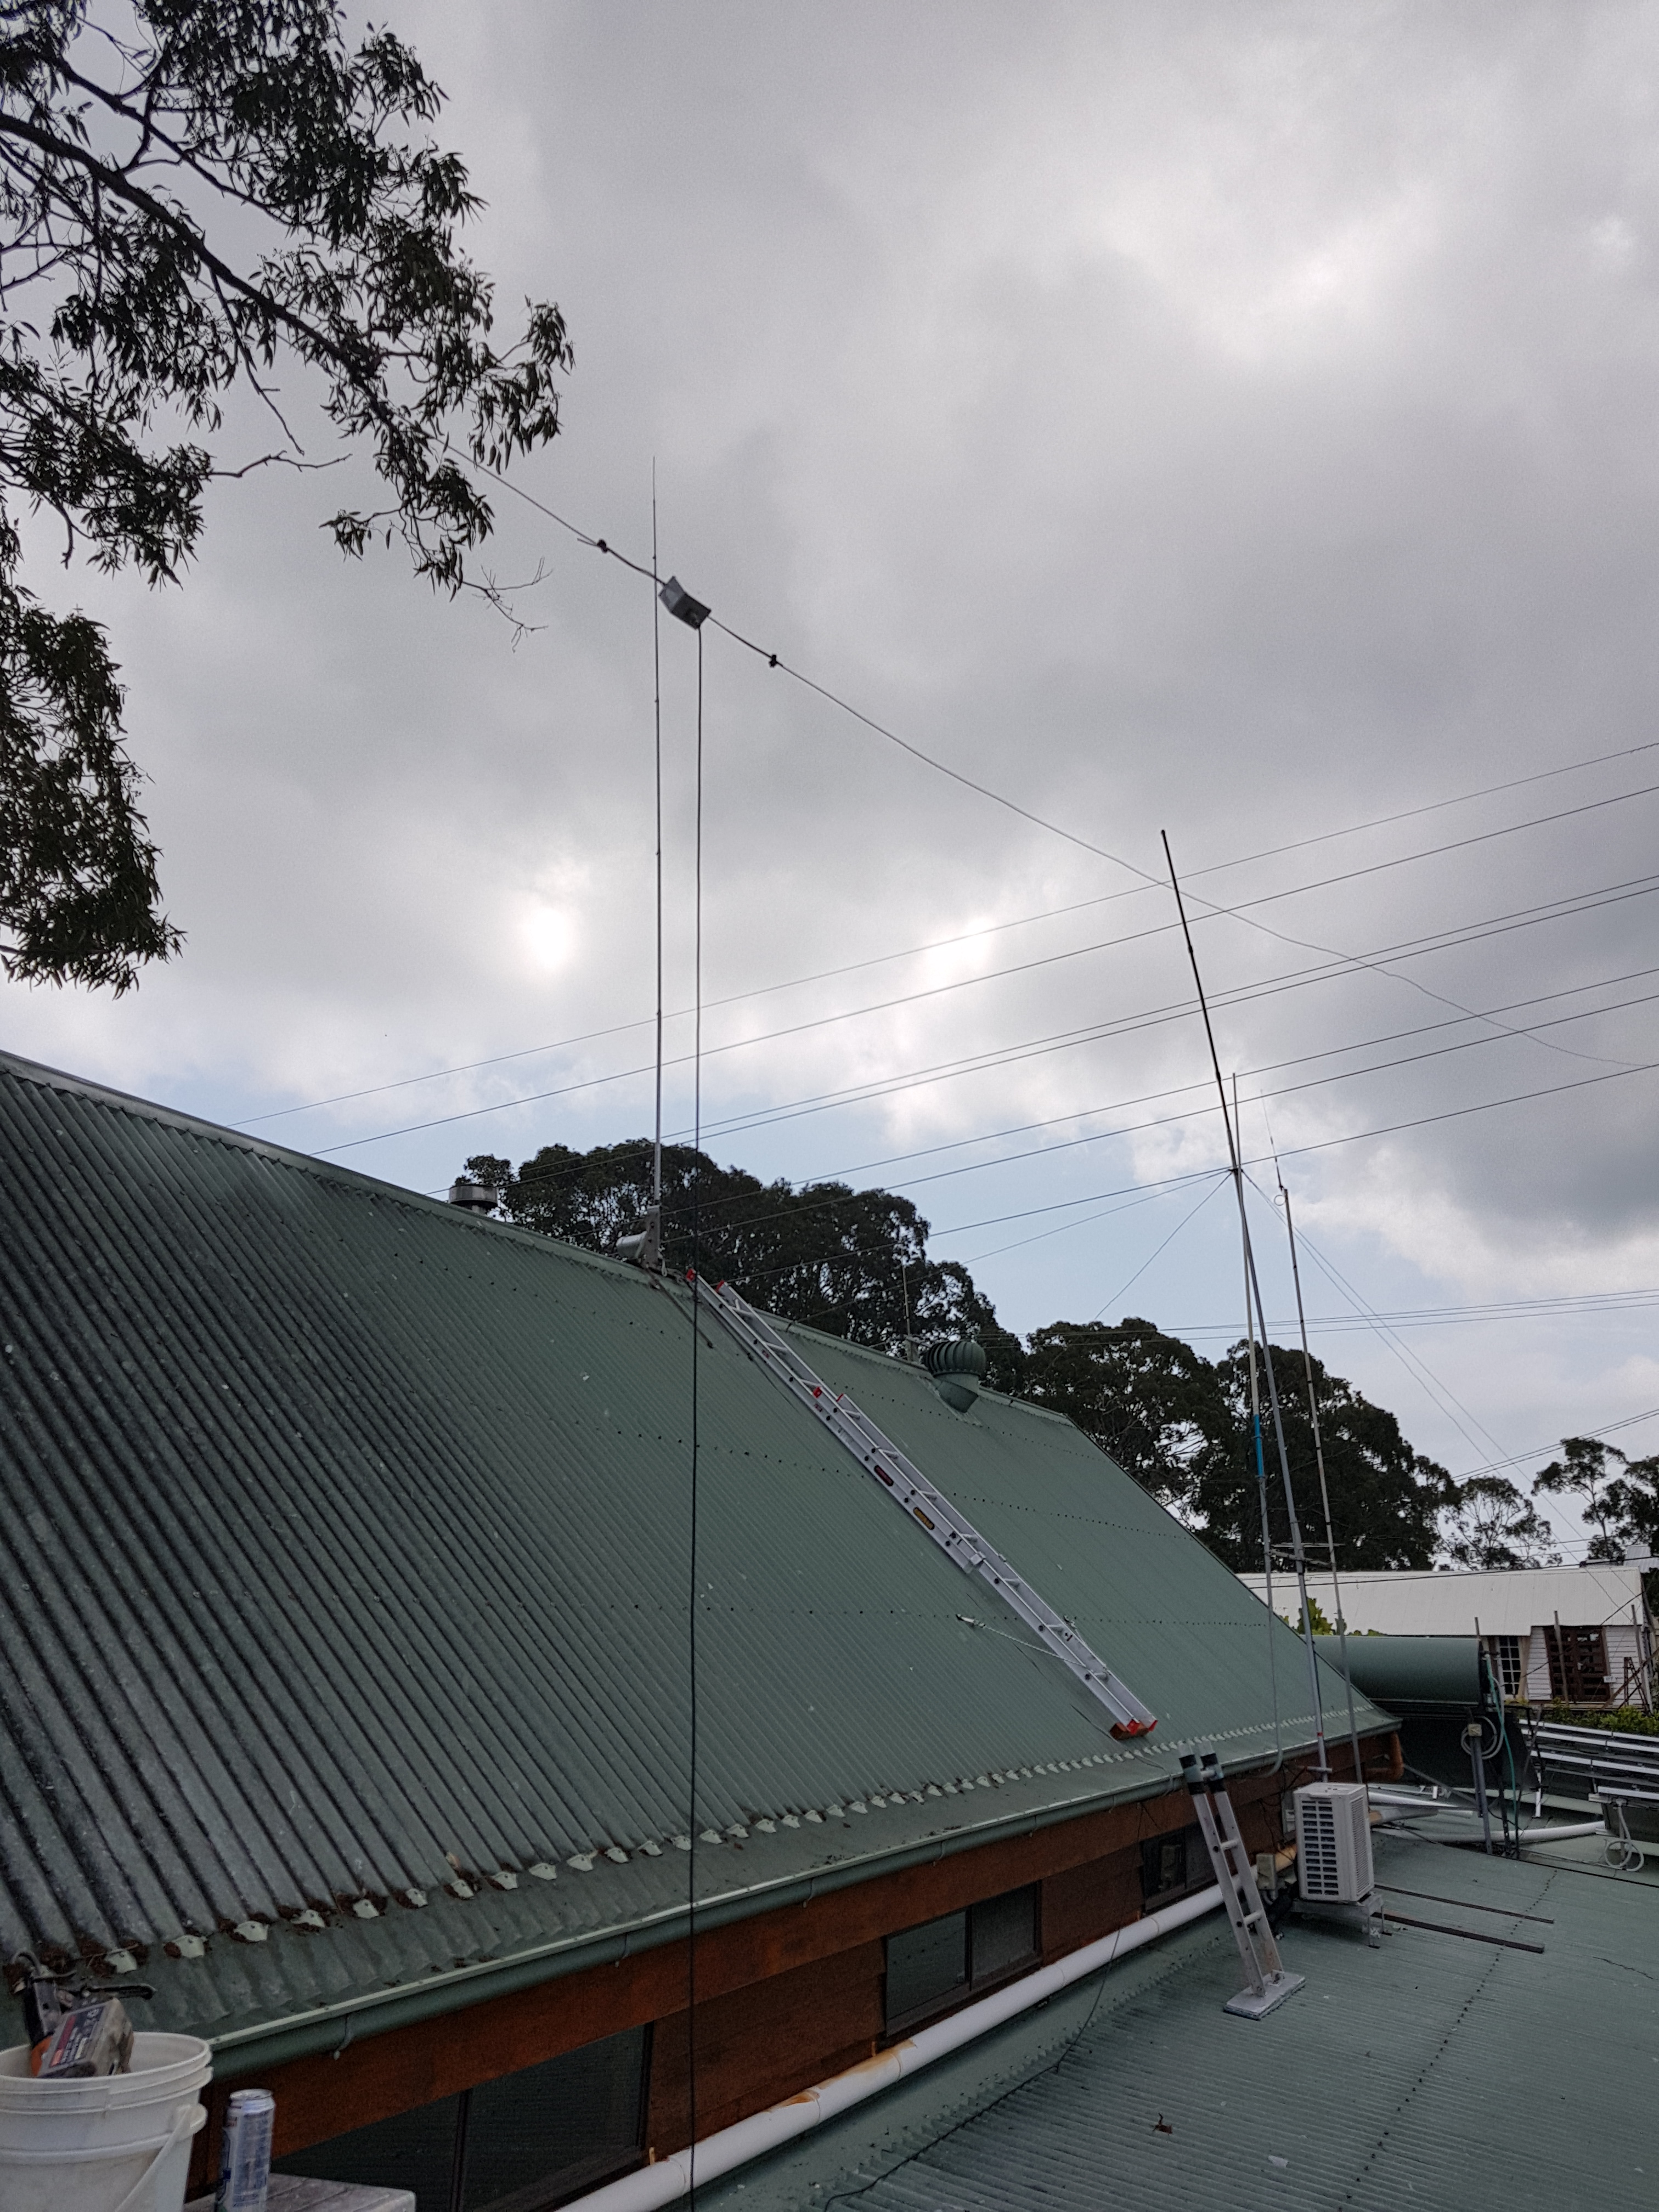
The Finished Installation
QRPi software installation guide for different HAM TX modes by Zoltan Doczi, HA7DCD zoltan@rfsparkling.com
This also includes a description of the other modes the HD7DCD add on board
Why do this project? Firstly it is inexpensive. About $100.00 of kit and some parts from your spares and you are under way.
Moreover, it works fine on older models of Raspberry Pi. I had older models not being used because I upgraded to the faster
RPi3 models so I could improve streaming and general response times. Secondly, it is QRP! I love to concept of transmitting
around the globe with a few hundred milliwatts. Thirdly, it is digital. In my view, that is the future of Amateur Radio.
Also, there is lots of technology in the project, which means there is a lot to learn and understand.
Lastly, but far from least, there are those lovely maps on WSPRnet.org to show off to your friends.
The "QRPi" is a play on abbreviations. It is the combination of the mnemonic "QRP", the Q-code for low power and the mnemonic
"RPi", for Raspberry Pi. Put them together and you have "QRPi". WSPR stands for Weak Signal Propagation Reporter
and is pronounced "whisper". Call it the "Whispering Pi" or "QRPi". The choice is up to you.
3.03 Downloading and Installing The WsprryPi Software Application [Top]
The WsprryPi application application is compatible with the original Raspberry Pi, the Raspberry Pi 2/3, and the Pi Zero.
To download and compile the WsprryPi application, login to the Raspberry Pi and open a terminal.
The commands are as follows:
If the make process completes without error then it can be installed to /usr/local/bin:
If you change your mind or want to install another version, it can also be uninstalled from the Raspberry Pi like this:
Once wspr is successfully installed it can be run manually from the command line prompt as follows:
The full explanation of the WSPR application:
Frequencies can be specified either as an absolute TX carrier frequency, or
  using one of the following strings. If a string is used, the transmission
  will happen in the middle of the WSPR region of the selected band.
    LF LF-15 MF MF-15 160m 160m-15 80m 60m 40m 30m 20m 17m 15m 12m 10m 6m 4m 2m
      -15 indicates the WSPR-15 region of band.

  Transmission gaps can be created by specifying a TX frequency of 0

  Note that 'callsign', 'locator', and 'tx_power_dBm' are simply used to fill
  in the appropriate fields of the WSPR message. Normally, tx_power_dBm should
  be 10, representing the signal power coming out of the Pi. Set this value
  appropriately if you are using an external amplifier.
Determining that actual transmitting frequency takes a bit of working out. The bandwidth of a transmission is about
200Hz. WSPR makes use of the upper side band (USB) and the single side band (SSB) bandwidth allowed is 3000Hz.
Say the transmissions falls in the range 1400–1600 Hz above the
dial frequency. Quite a small slot of bandwidth,
especially when you consider a dozen or more station can simultaneous transmit and be received simultaneously.
So, taking the 20 meter band used on the QRPi 14.095600 + 1400 = 14.097000 and, 14.095600 + 1600 = 14.097200,
so you are transmitting between 14.097000 and 14.097200. Each successive transmission is moved by software,
by a random frequency offset of 80 Hz.
Message space is short so only information essential to propagation reporting is included. I guess
a four character Maidenhead is considered sufficient for this purpose. The wspr command will
accept a six character without error but required two transmission to communicate the last two characters of the location code
. More confusing is that the WSPRnet.org site allows and display six character
Maidenhead for receiving stations. However, since the intended purpose of WSPR is to
report on propagation characteristic, a position within 100k is more than adequate in most cases.
The Maidenhead Locator System (named after the town outside London where it was
first conceived by a meeting of European VHF managers in 1980), is a grid square that measures 1° latitude
by 2° longitude and measures approximately 70 × 100 miles. A grid square is indicated by two letters
(the field) and two numbers (the square), as in QG62, and further refined by two more letters to
produce "QG62qi". These more precise locators measure 2.5 minutes latitude by 5 minutes longitude,
roughly corresponding to 3 × 4 miles in Australian latitudes.
Ethan Zonca has suggested a hack to increase the information that can be transmitted by WSPR in an
article at
http://protofusion.org/wordpress/2017/09/tracking-balloons-with-wspr.
He states, "We can work around two of these issues with a slight hack on the WSPR network.
WSPR packets that have callsigns with ‘0’ or ‘Q’ are considered invalid packets (since no allocated
callsign starts with these characters). However, WSPR receivers still process and upload these
packets to WSPRnet, and they can be used for balloon telemetry".
On the raspberry Pi with monitor and keyboard and mouse attached login with the following
credentials:
Username: pi
Password: raspberry
Select the terminal application from the menu by selecting the Raspberry Pi logo menu --> Applications --> Terminal
In the terminal type the following command:
then navigate to ssh, hit Enter and select Enable or Disable ssh server.
After Pi is restarted check ip-address with this command and
Warning - It is a good idea to change password.
This can be done by simply typing "passwd" at the
command line and following the prompts. Alternatively, any account's passwords can be
changed with these commands:
Now return to your linux workstation, or windows workstation with putty installed and remotely
login to the Raspberry Pi.
After this step you'll not need to use monitor and keyboard to run commands on your Raspberry.
All can be performed remotely over a network connection.
Remotely accessing the WSPR QRPi from a Linux Workstation
Use the secure shell program (ssh) to remotely access the Raspberry Pi from a workstation.
running the wspr application
vi qrpi-daemon.sh
3.8 Installing System Daemon Service (systemd) [Top]
One of several methods to run a program on your Raspberry Pi at startup is to use the systemd files.
"systemd" provides a standard process for controlling which programs run when a Linux system boots
up. Note that systemd is available only from the Jessie versions of Raspbian OS.
There four steps to setup systemd:
Create A Unit File
Setting Up Files and Permissions
Re-Initialise Systemd
Test to make sure it is working
Step 1 – Create A Unit File
Open a new unit file using the command as shown below (Feel free to use your favourite editor):
Add the following text with your callsign and location:
Save and exit the editor.
You have now configure systemd to run a program called "wspr" on your Raspberry Pi at startup time.
This defines a new service called “QRPi WSPR Transmitter” and we are requesting that it is launched once the
multi-user environment is available. The “ExecStart” parameter is used to define the absolute path of the
startup script daemon.sh in the WsprryPi folder.
Step 2 - Setting Up Files and Permissions
There a few thing to do to set up the required files with the correct permissions.
Make sure to create the log file folder and logfile.
The permission on the unit file, qrpi.service, needs to be set to 644,
The permission on logfile directory, logs, is set to 774.
Then, use "touch" to create a logfile, wspr-systemd.log, and set it permission to 664, and
finally make the "wspr" application is executable by adding "x" to its permission.
The commands are as follows:
Step 3 - Re-Initialise systemd
Now the unit and log files has been created and permissions correctly set, we can tell systemd to start:
You should get the message:
"Created symlink /etc/systemd/system/multi-user.target.wants/qrpi.service → /lib/systemd/system/qrpi.service."
And finally to fully test the service is working correctly reboot the Raspberry Pi.
The "QRPi" service should be running when the system come up again. The QRPi service runs up the "wspr" application,
so search for that process in memory:
Step 4 - Is It Working?
If you have problems and don't see the "wspr" process above, here are some commands to help find the cause:
After all that work a Backup is advisable, so shutdown the Raspberry Pi and take the microSD out and mount it on your linux workstation.
On linux use the dd utility to make a copy of your work.
dd is a disk to disk copy utility. It is real quite dump and copies block for block.
"if" is the input file which, in this case, is the raw microSD device.
gzip is the GNU open systems version of the popular Zip archive utility.
The "-c" tell gzip write to the standard output which is then redricted by ">" to a file.
There are several useful command to control the running transmitter, "wspr" via the qrpi service tag.
On some occasions you may want to turn the wspr off or run the process manually from the terminal
login.
They are as follows:
"systemd" commands
FUNCTION
COMMAND
Reload all the systemd configurations
sudo systemctl daemon-reload
Stops the service immediately
sudo systemctl stop qrpi.service
Restarts a service
sudo systemctl restart qrpi.service
Shows the status the service (including whether it is running or not)
WSPR modulation is 4-FSK (Layland-Lushbaugh polynomials for a K=32, r=1/2 convolutional code)
The type of radio emission is classified "F1D", frequency-shift keying.
A message contains a station's callsign, Maidenhead grid locator,
and transmitter power in dBm. The WSPR protocol compresses the information in the message into 50 binary digits. These are
encoded using a convolutional code with constraint length K=32 and a rate of r=1/2. The long constraint length makes
undetected decoding errors less probable at the cost, that the highly efficient Viterbi algorithm must be replaced by a simple
sequential algorithm for the decoding process.
Source: WSPRing-Around-the-World-QS11-2010-Taylor.pdf (QST magazine December 2001 page 37)
In telecommunication, a convolutional code is a type of error-correcting code that generates parity symbols via the sliding application of a boolean polynomial function to a data stream. A detailed explanation of convolutional code can be found on Wikipedia,
https://en.wikipedia.org/wiki/Convolutional_code
The Viterbi Algorithm is a dynamic programming algorithm for finding the most likely sequence of hidden states – called the Viterbi path – that results in a sequence of observed events, especially in the context of Markov information sources and hidden Markov models.
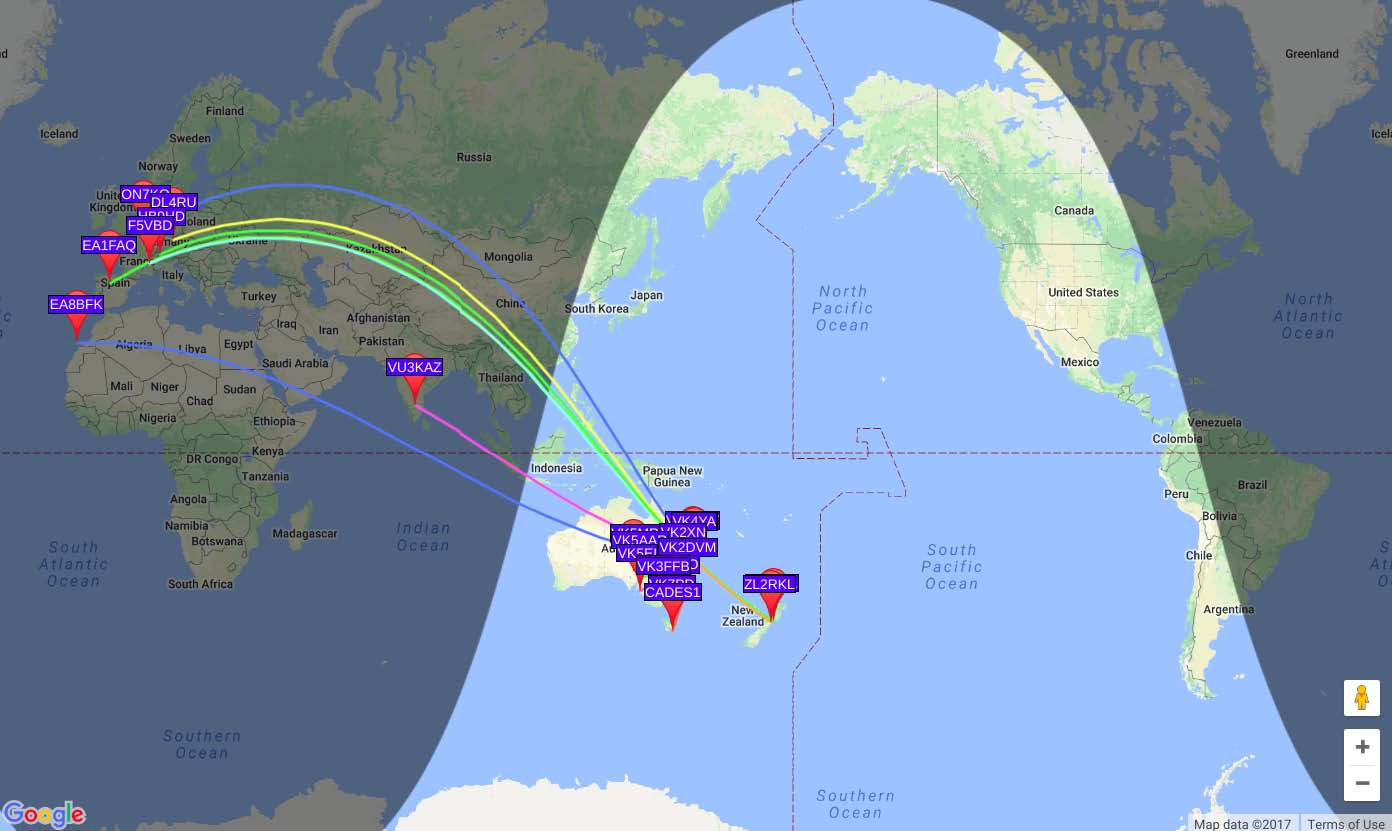
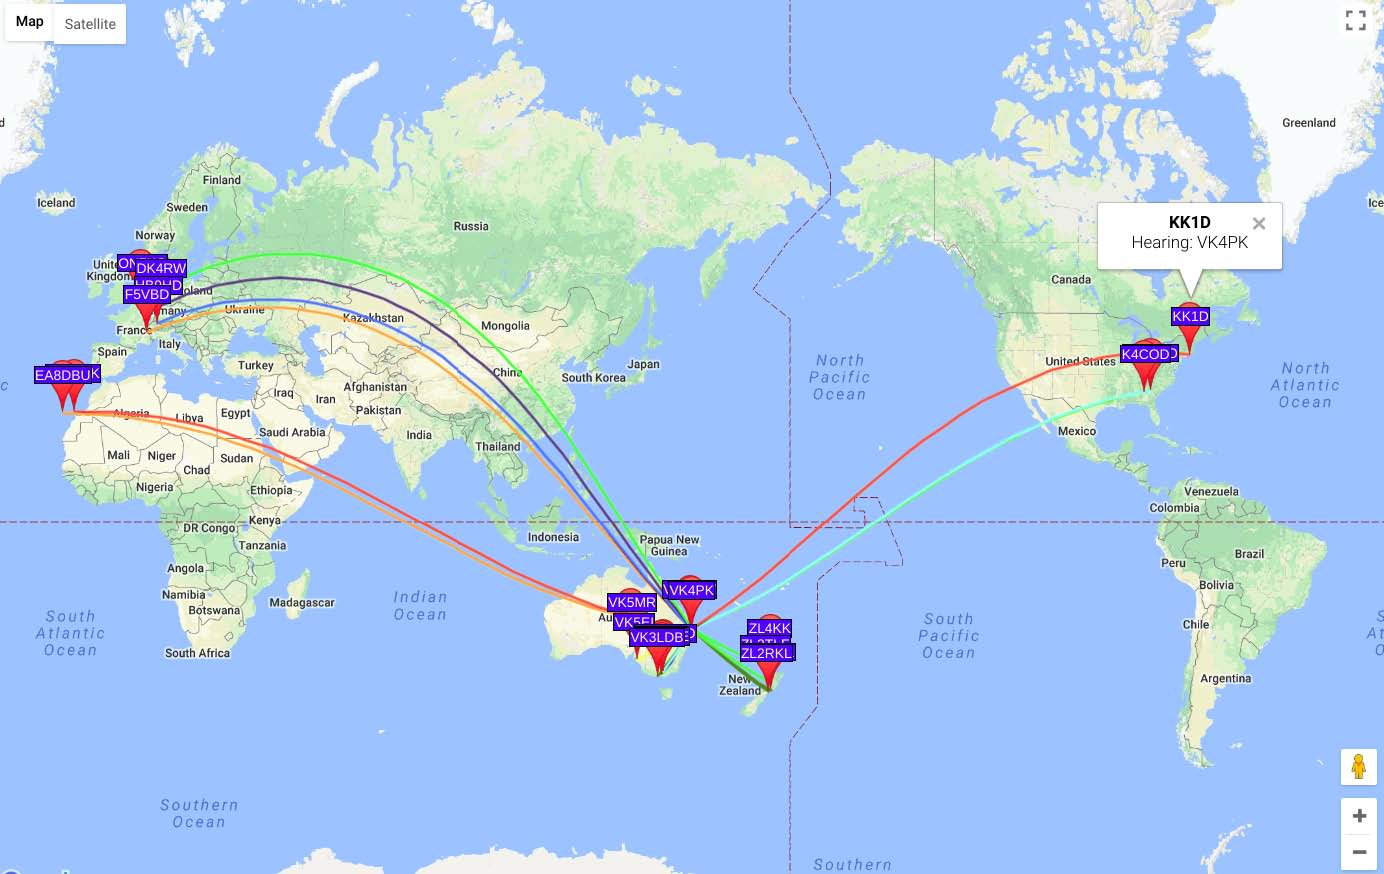
Using your Internet browser head to http://WSPRnet.org/drupal/WSPRnet/map.
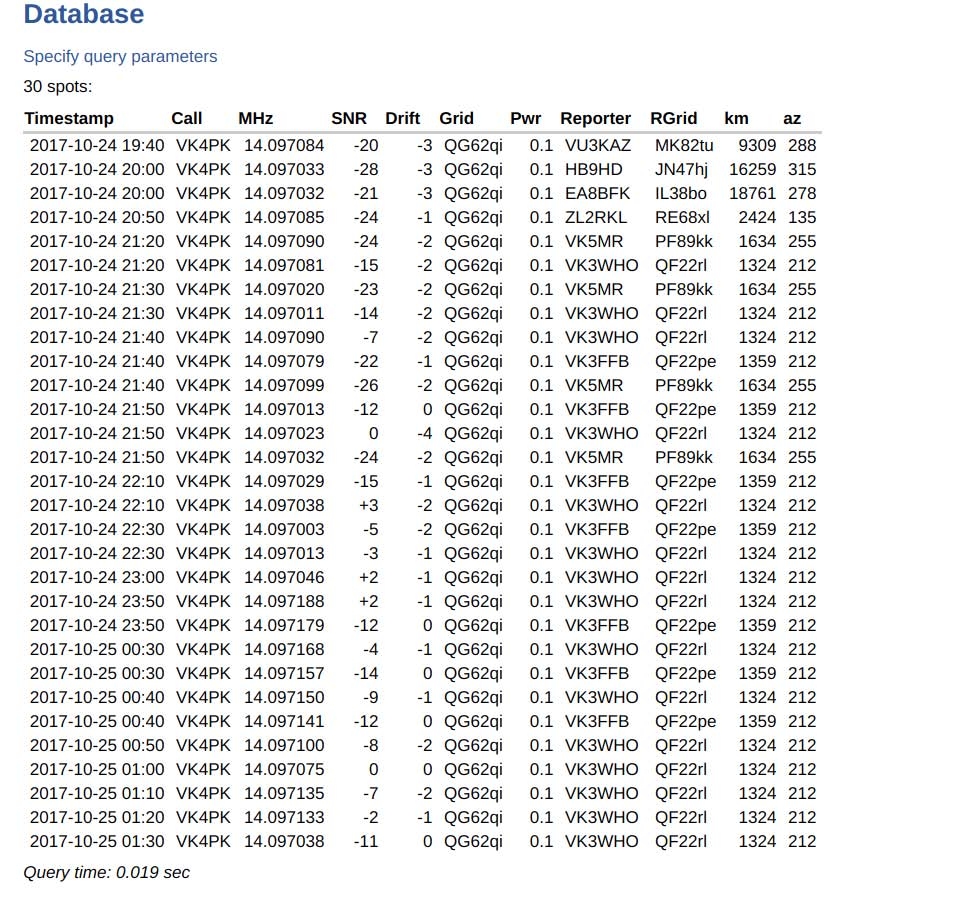
You do not have to login, but scroll down the page and enter the search criteria, and click "Update". You should be presented with a map of the contacts achieved in the time period selected. If you want more details the "Database" tab provide a tabular history for analysis.
Map display can also be had by searching on the http://wspr.aprsinfo.com site.
WSPRnet also provides a database download facility. The day night shading can be switched on or off.
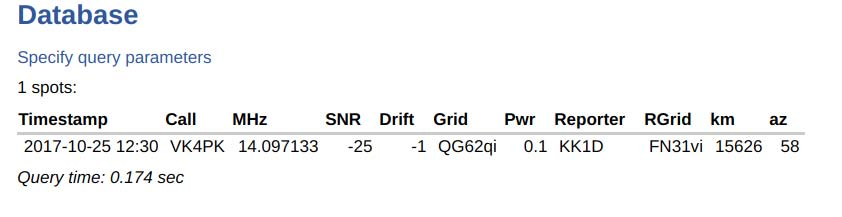
The "timestamp" is UTC so the 12:30 hours on the KK1D example is 2:30 hours local.
This is when you would expect the ionospheric propagation would enable this hop.
"az" is the azimuth in degrees between spotter and spotee.
It is always gratifing to know a little about who is reporting your signals. P. Joshua Rovero, KK1D has an interesting website,
http://www.roveroresearch.info More important his location is "FN31vi" and that is somewhere very close to East Lyme, Connecticut USA.
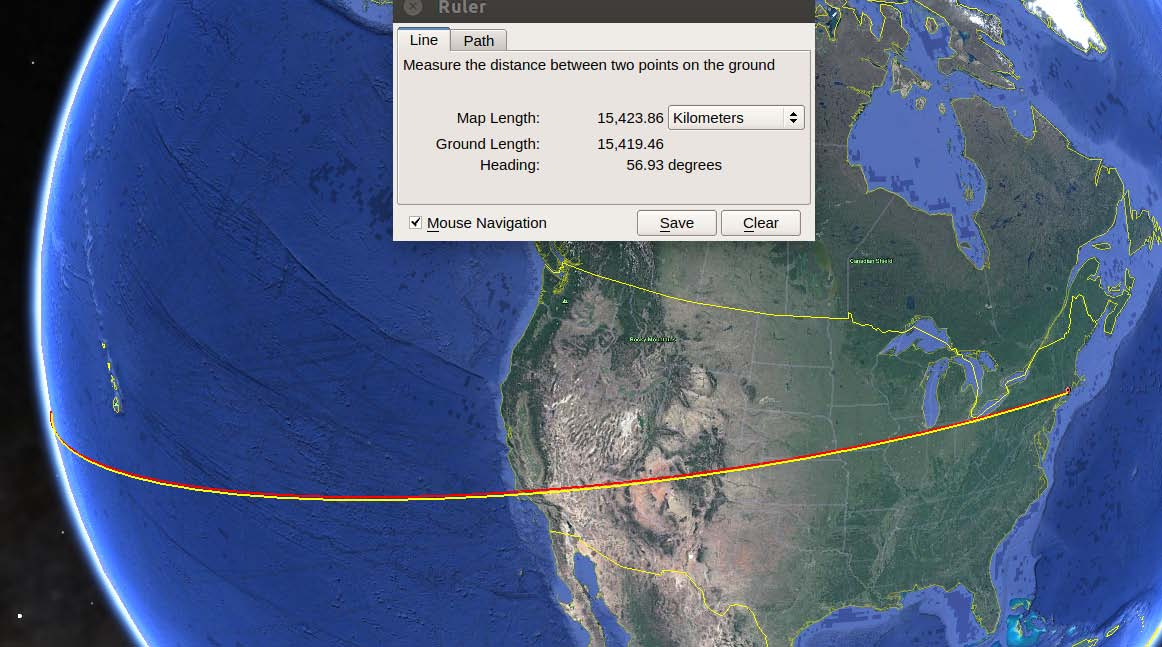
I did the plot on Google Earth and the results were close.
I am surprised how far a 100 milliwats can get and how well a simple addon board and Rasperry Pi can work.
I am very please that such an inexpensive project can achieve such significant results.
There is unresolved understanding of how exactly LOC code works
I have discovered a inconvenience. The WsprryPi “wspr” program needs a switch to introduce a times gap between
successive transmissions so signal from other station can be received on other equipment, like my IC-7300 in the
quiet periods. The QRPi cannot receive so has no apparent need to pause and listen. Therefore , I cannot monitor
the 20 meter band as my own signal is almost continuously drowning out all others. This was later solved by Paul Beet
who pointed out there is a facility to transmit as 0 frequency.
It is interesting to watch the propagation differences between day and night and I am looking forward to seeing how
they pan out over a longer time frame.
How much time a "quick little project" can take! "Knock it up in a few hours" turned into days then weeks.
On the other hand I have learned a lot and been spurred on to greater heights to do more projects.
Horology is the art or science of measuring time and maybe the greatest horologist was John Harrison (1693 – 1776) was
a self-educated English carpenter. The building complex instruments to keep increasingly accutate time can argueable
be said to begin with Harrison and his timepeices. A breif account of Harrison can be found at Wikipedia https://en.wikipedia.org/wiki/John_Harrison.
The book by Dava Sobel, "Longitude: The True Story of a Lone Genius Who Solved the Greatest Scientific Problem of His Time" is a must read.
Source:https://outreach.wikimedia.org/wiki/Wikipedian_in_Residence/Ladd_Observatory
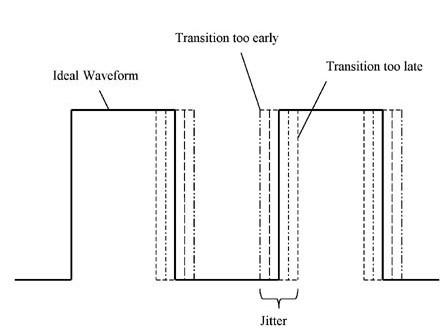
Now we build tempreature compensate crystal locked oscillators and reference GPS satalities and cesium clocks via the Network Time protocal to keep those time pieces very accurate. Timing is very important to the tramsmitter mode used by WSPR as the the encoding is taken for the transition and not the state of the modulated signal.
The Jitterbug is a kind of swing dance popularized in the United States in the early 1900's, but it is not the type of
jitter bug that concerns us.
We are talking about the jitter that is the deviation from true periodic signal, in relation to a reference
clock signal. Clock period recovery is called timing jitter and is considered an undersirable bug.
Some time we transission to early, some times to late. In electronics and telecommunications, jitter is the deviation from true
periodicity of a presumably periodic signal, often in relation to a referenceclock signal. In clock recovery
applications it is called timing jitter.
Somehow we need to constantly correct the drift introducted by tiny inaccuracies in the Pi's local crystal oscillator, so we turn to
the internet or the skies above for a more accurate time reference to correct our local time. It not a simple as reading those time references as
there are correction and averages to be made. A detailed resource on NTP and the RPI can be found here:
http://www.satsignal.eu/ntp/Raspberry-Pi-NTP.html and is well worth a read.
This, of course requires an internet connection or an add-on GPS board to the RPi.
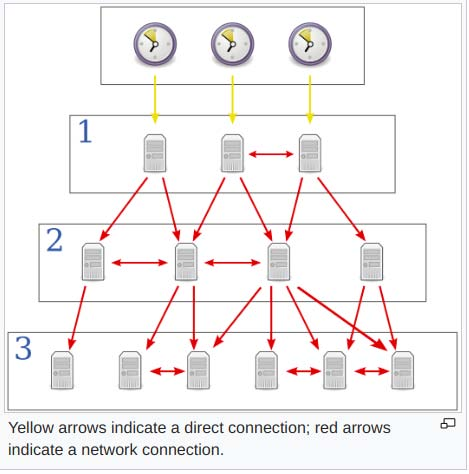
Stratum 0
These are high-precision timekeeping devices such as atomic (cesium, rubidium) clocks, GPS clocks or other radio clocks. They generate a very accurate pulse per second signal that triggers an interrupt and timestamp on a connected computer. Stratum 0 devices are also known as reference clocks.
Stratum 1
These are computers whose system clocks are synchronized to within a few microseconds of their attached stratum 0 devices. Stratum 1 servers may peer with other stratum 1 servers for sanity checking and backup.[12] They are also referred to as primary time servers.[2][3]
Stratum 2
These are computers that are synchronized over a network to stratum 1 servers. Often a stratum 2 computer will query several stratum 1 servers. Stratum 2 computers may also peer with other stratum 2 computers to provide more stable and robust time for all devices in the peer group.
Stratum 3
These are computers that are synchronized to stratum 2 servers. They employ the same algorithms for peering and data sampling as stratum 2, and can themselves act as servers for stratum 4 computers, and so on.
Stratum 4-15
The upper limit for stratum is 15; stratum 16 is used to indicate that a device is unsynchronized. The NTP algorithms on each computer interact to construct a Bellman-Ford shortest-path spanning tree, to minimize the accumulated round-trip delay to the stratum 1 servers for all the clients.[1]:20
The essential things required for a good decode are:
1. Your computer clock must be set correctly, errors greater than + or - three seconds
will prevent both RX and TX decoding). (Quick check are the received signals on the waterfall,
starting exactly on the two minute markers)?
2. You are using Upper Sideband, the correct sideband for WSPR (LSB won't decode)
3. The grey box showing Rx Noise should be showing 0 dB but, it is not critical +- 10 dB
will work ok.
4. Frequency is critical, only to the extent that the WSPR prog will not decode anything
outside Plus or Minus one hundred hertz of the 1,5kHz audio tone frequency so selecting
USB setting the tranceiver dial to 10,138,700 should receive the WSPR band
10,140100 to 10,140,300, a signal on 10,140,200 should produce an audio tone of 1,500 Hz.
(No RIT or XIT offset)
So assuming Correct Timing, USB Sideband selected, RX Noise Level (0dB) adjusted, and Dial Frequency correct,
the next step is to look at the software and the computer. What Version of WSPR's, what operating system
and brief details of CPU and memory? A problem that the trouble lies in slow processing of the received data.
The WSPR transmission has 50 user data bits, 112 error correcting code bits, combined with another 162 bits
of synchronizing symbols fed into the decoder and error correction process. When the signal is nice and clean
a single pass through the decoder may produce a good decode.
When the received signal is noisy, distorted, or suffers interference the data is looped through the decoder many times,
the more times the longer the decoding time. When the signal is badly distorted it may do up to 20,000 loops
through the decoder, which depending on the computer speed and other processing being done can take minutes.
You can see in this printout extract, the 2nd last figure in each line is the number of decode loops
each decode required. (1 to 19860)
So a slow decode ties the computer up for a long time, reducing the chance of decoding other signals.
If you are hitting 100% for long during a decode you have a problem.
A summary from a post by Paul VK4ZBV.
Source http://www.wsprnet.org/drupal/node/2403
Glenn Lyons VK4PK
glenn@LyonsComputer.com.au
Ver:gnl20171024 - pre published v1.3
Ver:gnl20171024 - pre published v1.3 - Added KK1D Google Earth Image
Ver:gnl20171027 - Published on Dropbox v1.4 - correct case of qrpi service file, Added chaper 4 on Jitter
Ver:gnl20171107 - Published to BDARS v1.5 - Added Appendix A
Ver:gnl20171208 - Post publish edits ans corrections
Ver:gnl20200319 - Diagnosis of faults
Distributed as docx using pandoc utility "pandoc The-VK4PK-Whispering-Pi.html -o The-VK4PK-Whispering-Pi-v1.4.docx"