The sensor at position U10 on the Splat Board is labled M2PR EWC and is
installed as Detector No 3. It is a a low precision detector MPL115A1. This is
the Datasheet.
MPL115A1 Miniature SPI digital barometer, 50 to 115 kPa Rev. 8 — 10 October 2017 :
https://www.nxp.com/docs/en/data-sheet/MPL115A1.pdf
The upgrade to a MPL3115A2 is recommended and the datasheet is here.
MPL3115A2 I2C precision pressure sensor with altimetry Rev. 8 — 12 April 2018:
https://www.nxp.com/docs/en/data-sheet/MPL3115A2.pdf
See
MPL3115A2 Pressure Sensor
for more details on the replacement module.
This is detector 3 with the replacement eBay module wired in. It can be taped to
board using double sided cushion tape and stuck where the zigbee module can go.
 [Top][Home]
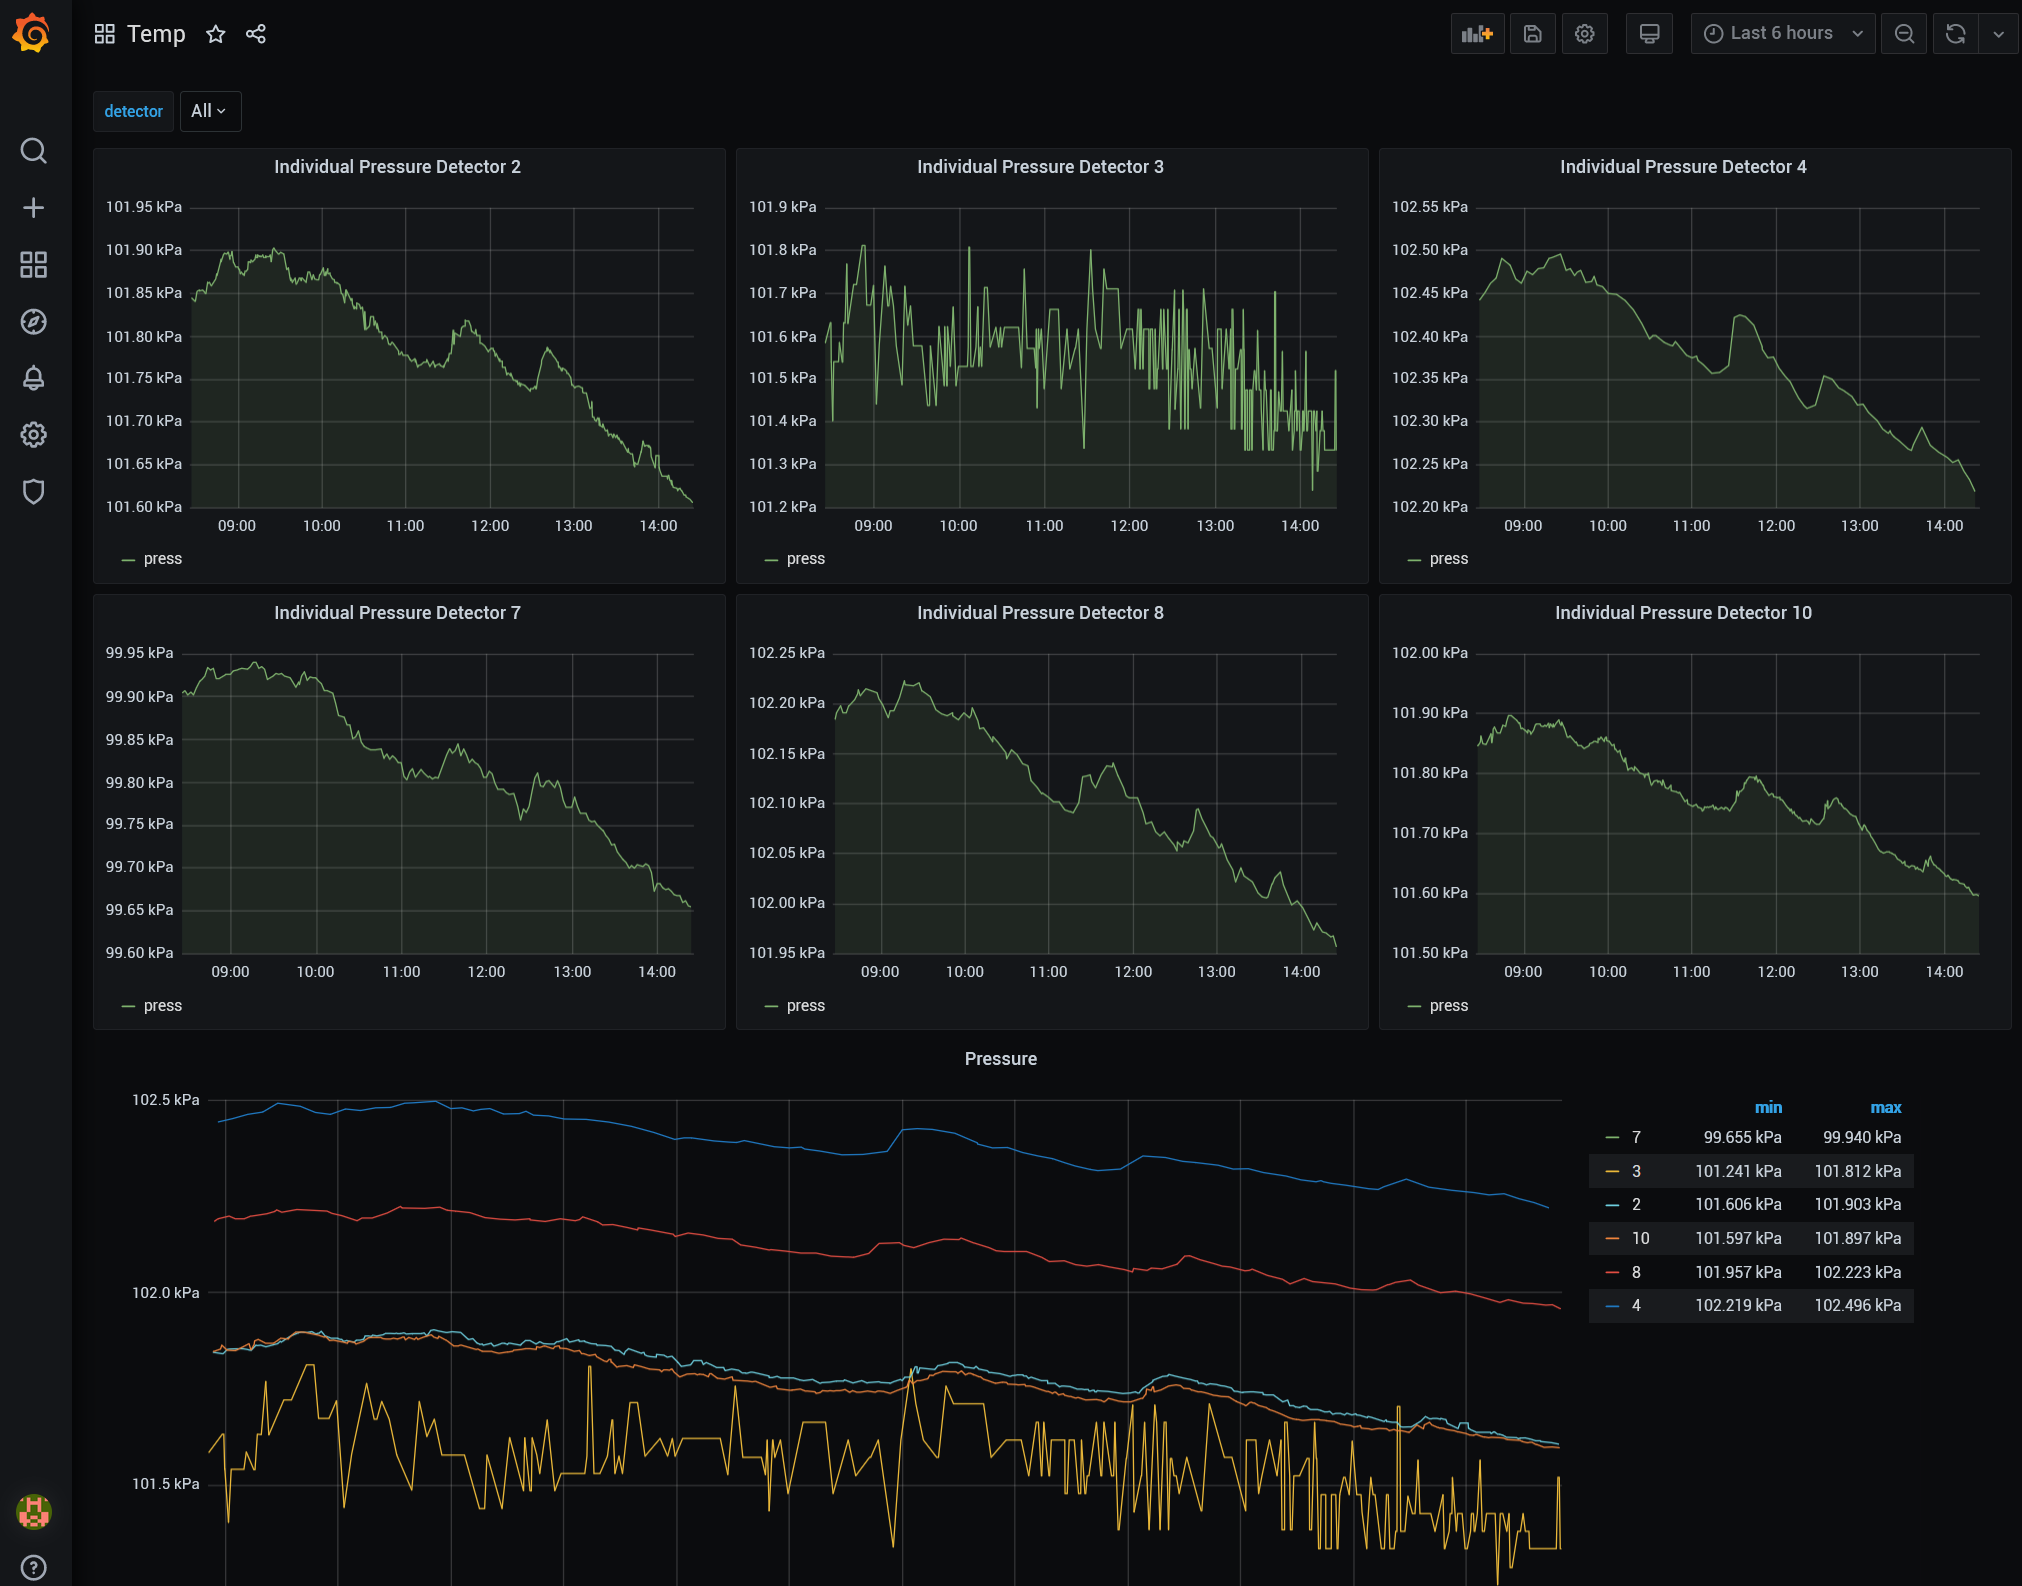
The surface mounted MPL3115A2 is not giving the same accuracy of results as the MPL3115A2 Arduino module which contain the MPL3115A2. The surface mounted low precision detector (MPL115A2) appears to be inferior to the MPL3115A2 module.
In the following image you can see the difference in quality of the barometric pressure sensors, dislayed as Detector 3. That is, graph in the top centre is of a low quality onboard sensor.
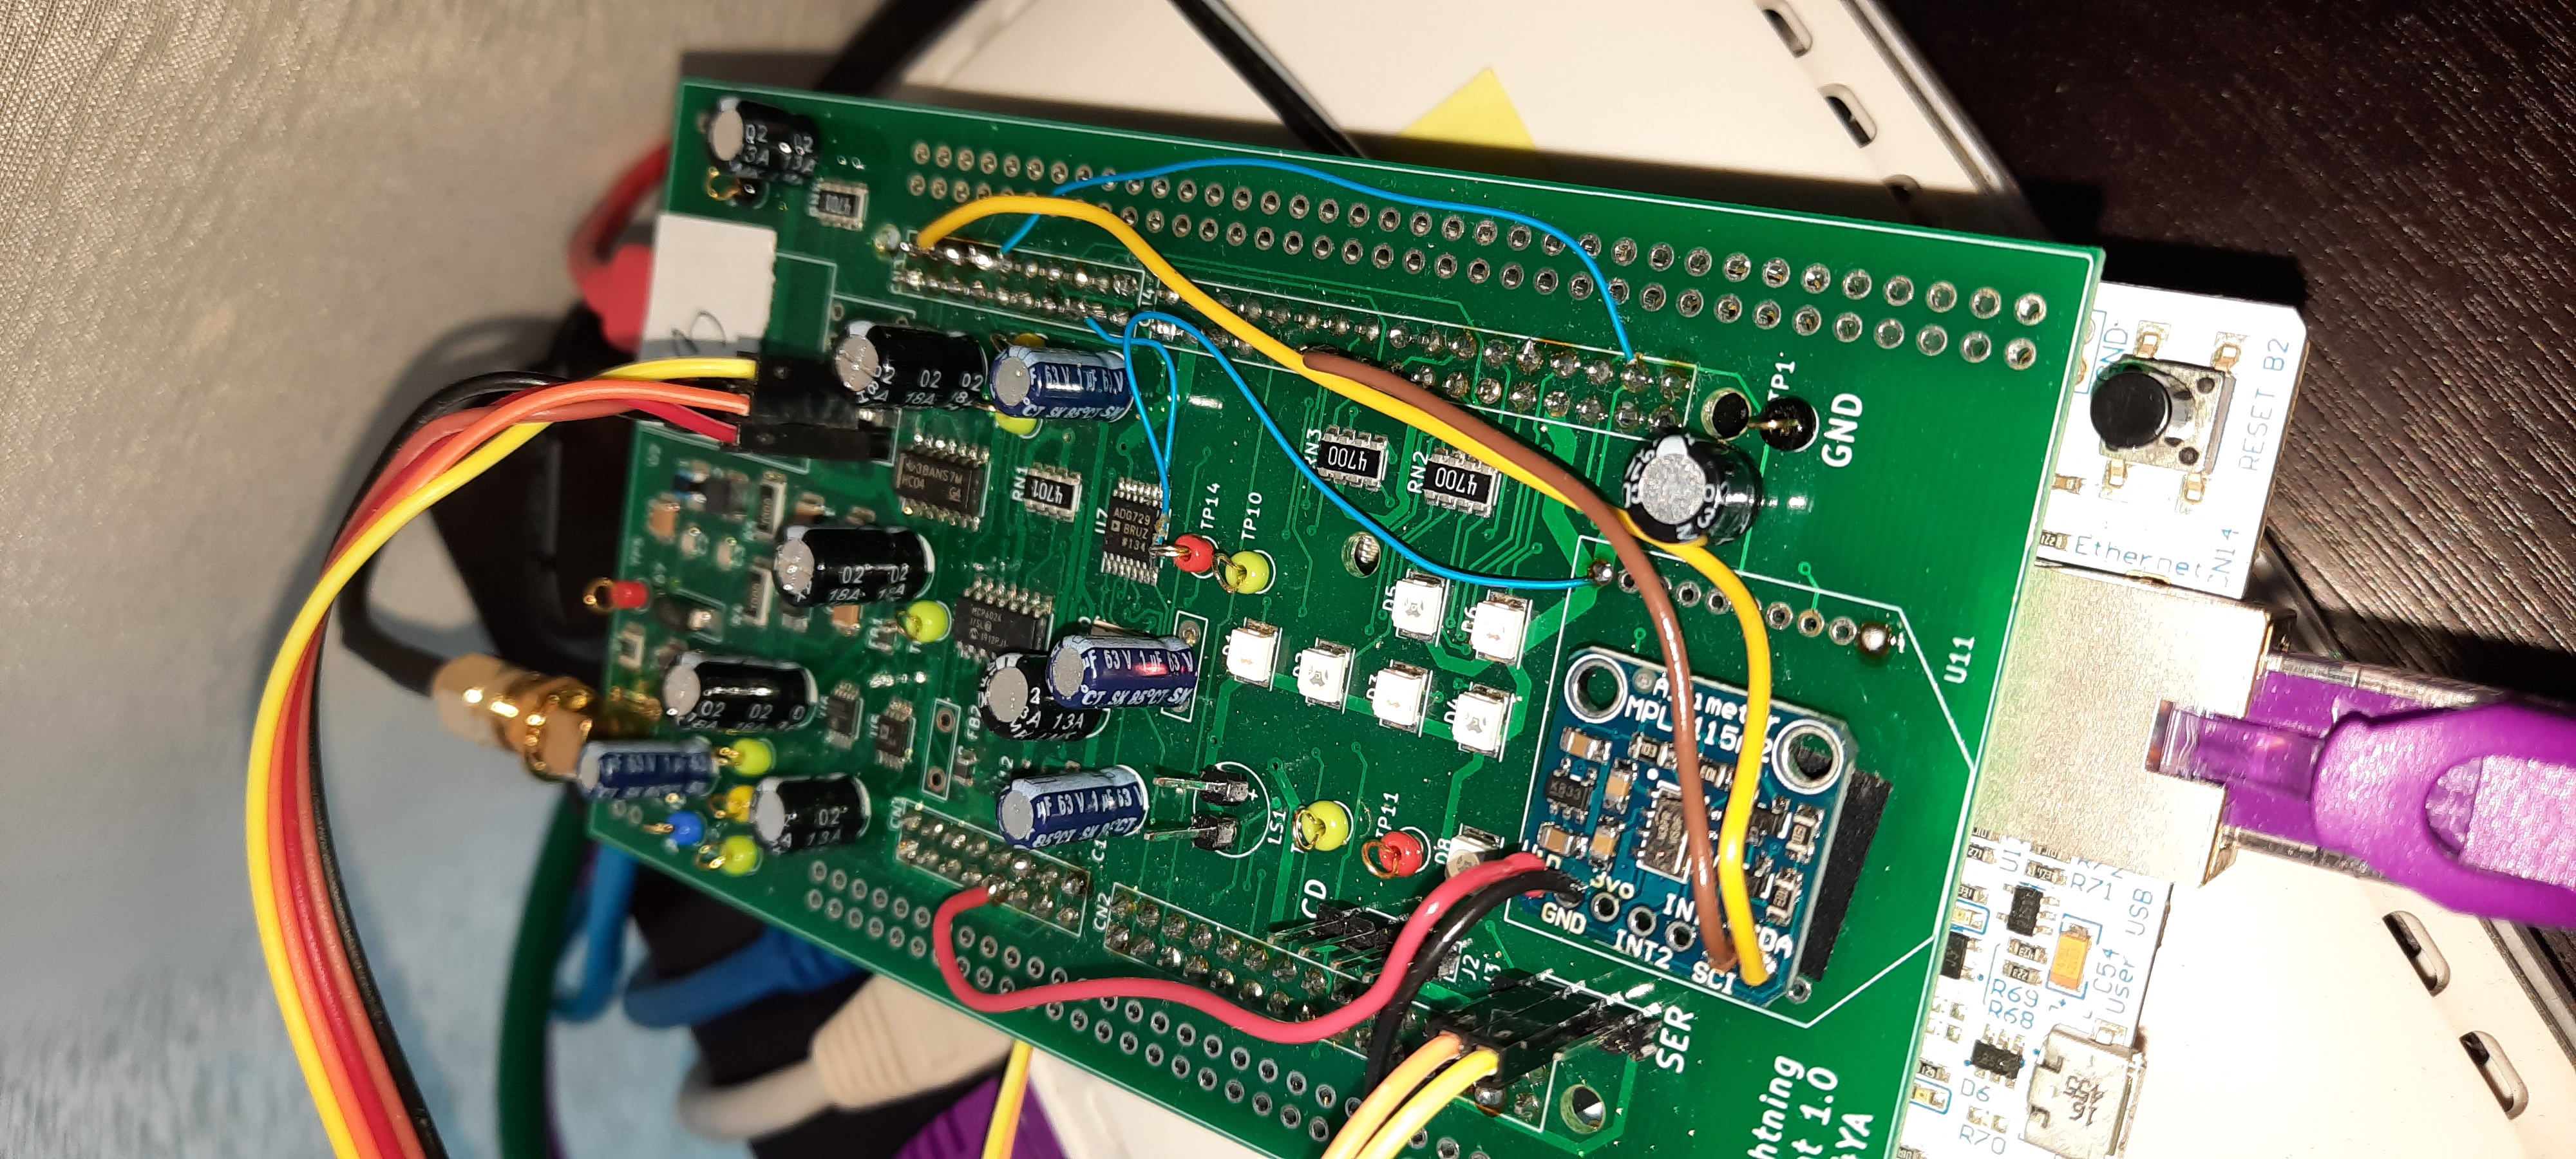
This is the Splat board with the MPL3115A2 Pressure Sensor module wired in and
the MPL115A2 disabled.
The MPL3115A2 can be secured to the Splat board using double sided cushion tape in
the location allocated to the zigbee module.
To add the module:
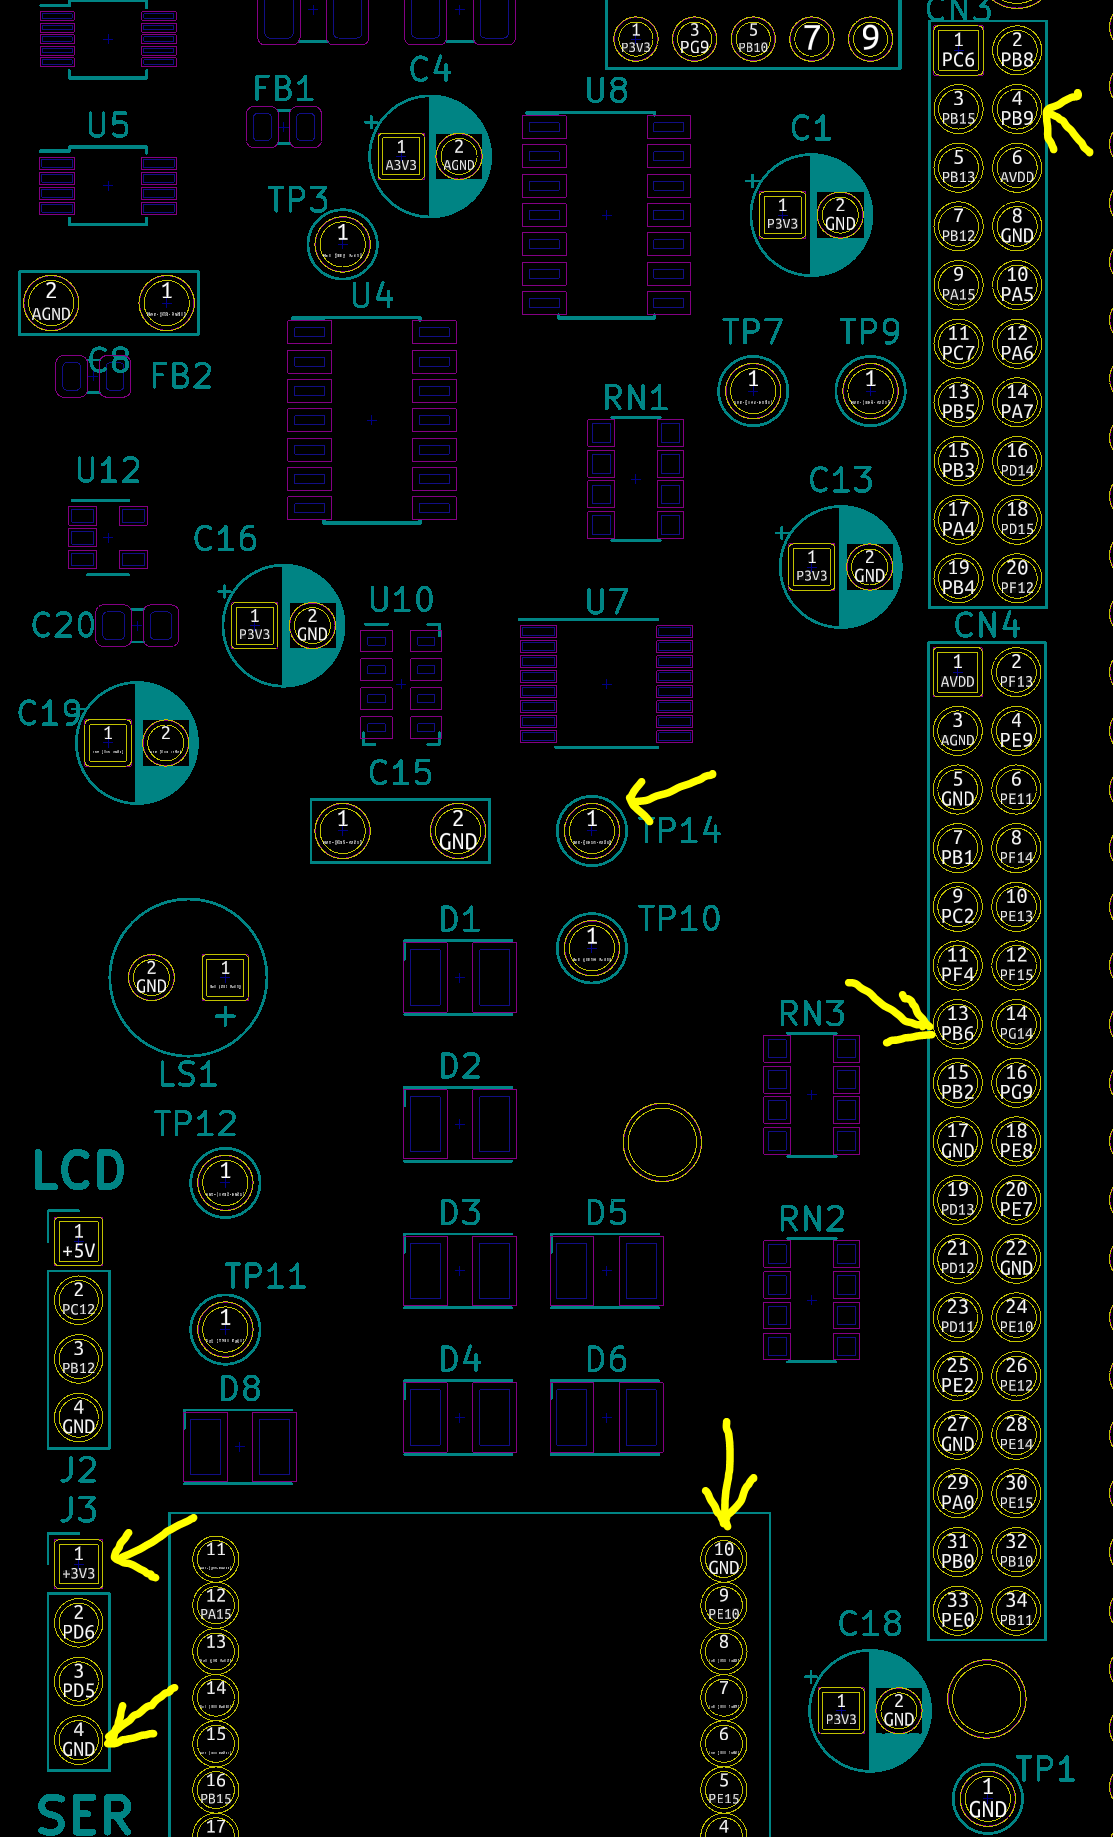
Unsolder other end of the handwire connected to TP14 and resolder it to the other end
of the U11. That is, to the GND pin (socket). This will disable the onboard MPL115.
Determine if the module to be installed is powere at 5V or 3V3. The VCC connects to
Pin 1 on the SER connector (J3) of the STM32 board and GND is on Pin4 of that same
connector (nearest to the edge of the STM32).
The SDA signal goes to Pin 4 on CN3 - YELLOW
The SCL signal goes to Pin 13 on CN4 - BROWN
The pressure data is being reported correctly so the upgrade was successful/
Live Grafana page showing pressure and tempeature data:
http://lightning.vk4ya.com:3000/d/MmBxx05Gz/pressure?orgId=1&refresh=5m&from=now-15m&to=now&var-detector=All